Golden Chicken Rice Recipe
- Time: Active 10 minutes, Passive 25 minutes, Total 35 minutes
- Flavor/Texture Hook: Silky buttered grains with a bright lemon finish
- Perfect for: Stress free weeknight dinners or cozy meal prepping
- Creating the Most Golden Comforting Rice Recipe
- Why This Golden Pot Works
- Ingredient Deep Dive Analysis
- Grains and Spices You Need
- Essential Gear for Fluffy Grains
- Mastering the Sizzle and Simmer
- Fixing Common Kitchen Mishaps
- Flavor Twists and Fun Swaps
- Storing Your Leftover Treasures
- Styling Your Final Creation
- Rice Recipe FAQs
- 📝 Recipe Card
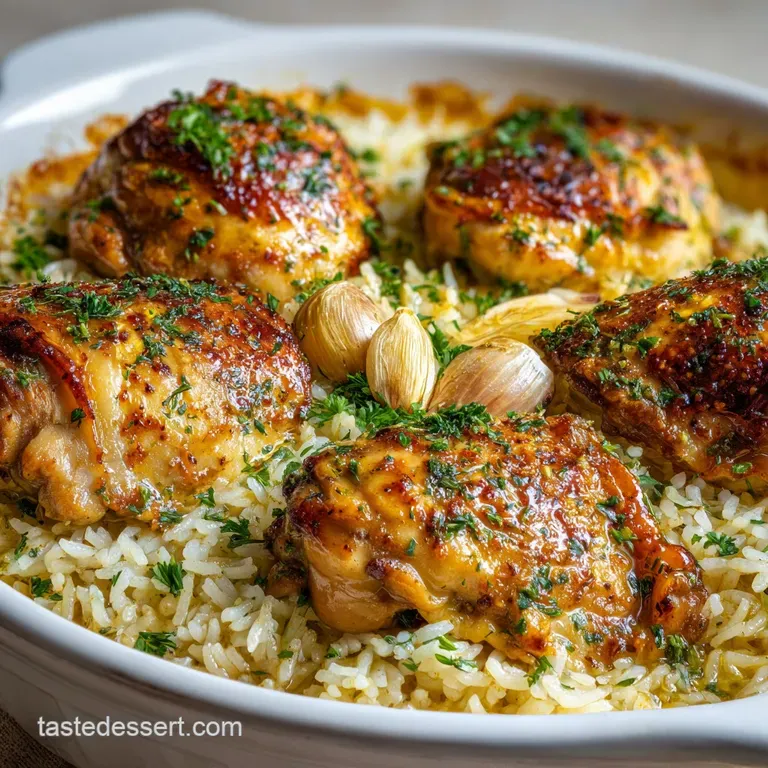
Creating the Most Golden Comforting Rice Recipe
The moment that chicken hits the hot oil, you hear that specific, aggressive sizzle that promises a deep, golden crust. Then the garlic goes in, and suddenly the whole kitchen smells like a warm hug.
Honestly, there is something so rhythmic about making a one pot meal where the rice drinks up all that concentrated chicken flavor. I used to struggle with mushy grains or, worse, a burnt bottom, but once I figured out the butter to broth ratio, everything changed.
This isn't just a side dish, it is the main event. We are aiming for a texture that is light and airy, where the rice isn't clumped together but feels velvety on the tongue. If you've ever felt intimidated by stovetop cooking, stick with me.
We are going to treat these grains with the same precision I use for my favorite dessert bakes, ensuring every bite is balanced between the richness of the butter and the zing of fresh lemon.
Right then, let's get into the details of why this works so well. You don't need a fancy rice cooker to get restaurant quality results. All you need is a heavy bottomed pot and a little bit of patience.
We are going to build layers of flavor that make this the kind of meal you'll want to eat straight out of the pan with a wooden spoon. Trust me on this, once you nail the timing, you'll never go back to plain boiled rice again.
Why This Golden Pot Works
- Maillard Reaction: Searing the chicken thighs first creates a deep brown crust that leaves behind "fond," which the rice then absorbs for a richer flavor profile.
- Starch Gelatinization: Rinsing the rice removes excess surface starch, while the precise broth to grain ratio ensures the starch granules swell without bursting into a mushy mess.
- Emulsification: The unsalted butter melts into the chicken bone broth, creating a silky coating for each grain that prevents them from sticking together.
Before we move on to the science of our ingredients, let's look at how to tell when your protein is actually ready. One mistake I once made was moving the chicken too early, which ruins that beautiful crust we want.
| Thickness | Internal Temp | Rest Time | Visual Cue |
|---|---|---|---|
| 1 inch pieces | 165°F | 3 minutes | No pink, juice runs clear |
| 0.5 inch pieces | 165°F | 2 minutes | Edges look golden and crisp |
| 1.5 inch pieces | 165°F | 5 minutes | Firm to the touch |
Giving the chicken those few minutes to rest after cooking is vital. It allows the fibers to relax so the juices stay inside the meat rather than flooding your plate. It's the same principle we use when letting a cake cool so the structure sets properly.
Ingredient Deep Dive Analysis
Success in this kitchen starts with understanding what each component brings to the party. We aren't just tossing things in a pot; we are selecting elements that work together to create a specific texture.
| Ingredient | Science Role | Pro Secret |
|---|---|---|
| Long grain white rice | Structural base | Rinse until the water is clear to prevent gummy grains. |
| Chicken bone broth | Liquid gold | Use bone broth over standard stock for a higher collagen content and silkier mouthfeel. |
| Unsalted butter | Fat barrier | Coating the grains in fat before adding liquid slows down water absorption for a firmer bite. |
| Turmeric | Natural pigment | A little goes a long way for that vibrant yellow color without overpowering the taste. |
Each of these items plays a part in the final outcome. For instance, the long grain rice has a higher amylose content than short grain varieties, which is why it stays fluffy rather than sticky. If you want to expand your skills with different grain textures, you might enjoy learning How to Season recipe techniques for sushi, which uses a completely different rice variety.
Grains and Spices You Need
- 1.1 lbs boneless skinless chicken thighs: Why this? Thighs stay juicy and tender during the simmering process unlike leaner breast meat. (Substitute: Chicken breasts, but reduce cook time by 5 minutes)
- 1.5 cups long grain white rice: Why this? Provides the classic separate, fluffy texture we need for this dish. (Substitute: Jasmine rice for a floral aroma)
- 2.25 cups low sodium chicken bone broth: Why this? Adds deep protein rich flavor while letting you control the salt levels. (Substitute: Vegetable broth)
- 3 tbsp unsalted butter: Why this? Creates a velvety finish and prevents the rice from clumping. (Substitute: Ghee or olive oil)
- 4 cloves garlic, minced: Why this? Provides a fragrant backbone to the entire meal. (Substitute: 1 tsp garlic powder)
- 1 tsp smoked paprika: Why this? Adds a subtle earthiness and warmth to the chicken. (Substitute: Sweet paprika)
- 1 tsp turmeric: Why this? This is purely for that stunning golden sunshine color. (Substitute: Saffron threads)
- 1 cup frozen peas: Why this? Offers a bright pop of sweetness and color at the very end. (Substitute: Chopped spinach)
- 0.5 tsp kosher salt & 0.5 tsp black pepper: For seasoning the protein.
- 1 tbsp extra virgin olive oil: For the initial sear.
- Fresh parsley & Lemon wedges: For a bright, acidic finish.
| Original Ingredient | Substitute | Why It Works |
|---|---|---|
| Long grain white rice | Quinoa | Similar cook time but adds a nutty, protein dense crunch. |
| Chicken bone broth | Coconut milk (full fat) | Adds a creamy, tropical vibe. Note: Will be much richer and heavier. |
| Unsalted butter | Avocado oil | High smoke point and neutral flavor, keeps it dairy-free. |
I always recommend using low sodium broth because it gives you the freedom to season the chicken and rice yourself. If you use full sodium broth, you might find the final dish a bit too aggressive on the palate.
Essential Gear for Fluffy Grains
You don't need a kitchen full of gadgets, but a heavy bottomed pot is a must. I prefer using a Dutch oven or a deep stainless steel skillet with a tight fitting lid. The weight of the lid is what traps the steam, which is what actually cooks the rice grains to the core.
If your lid is loose, the steam escapes, and you'll end up with hard, undercooked centers.
A fine mesh strainer is also non negotiable here. You need to be able to rinse that rice under cold running water until the cloudiness disappears. That cloudiness is surface starch, and if you leave it on, your golden rice will turn into a sticky clump.
Think of it like sifting flour for a delicate sponge cake it is all about the preparation of the dry ingredients.
Finally,, grab a silicone spatula or a wooden spoon. You want something that can scrape up the browned bits of chicken from the bottom of the pan. Those bits are packed with flavor, and we want them incorporated into the broth.
Mastering the Sizzle and Simmer
- Season the chicken. Toss the 1.1 lbs chicken pieces with the smoked paprika, salt, and pepper until well coated. Note: This creates a dry rub that browns beautifully.
- Sear the protein. Heat olive oil in your pot over medium high heat and add the chicken. Cook for 5 minutes until a deep golden crust forms.
- Remove and set aside. Take the chicken out of the pan, leaving the oils and browned bits behind.
- Melt the butter. Add the 3 tbsp unsalted butter and 4 cloves minced garlic to the pot. Sauté for 1 minute until fragrant but not browned.
- Toast the rice. Stir in the 1.5 cups rinsed rice and 1 tsp turmeric. Cook for 2 minutes until the grains look translucent at the edges.
- Add the liquid. Pour in the 2.25 cups chicken bone broth and scrape the bottom of the pan to release the flavor.
- Return the chicken. Place the seared chicken pieces back into the pot, nestling them into the rice.
- Simmer low and slow. Bring to a boil, then immediately turn the heat to the lowest setting and cover with a lid.
- The steam phase. Cook for 15 minutes without lifting the lid. Note: Lifting the lid lets the essential steam escape.
- Final fluff. Remove from heat, stir in the 1 cup frozen peas, and let it sit covered for 5 minutes. Fluff with a fork and serve with lemon.
Toasting Grains for Nutty Depth
By sautéing the rice in butter and turmeric before adding the broth, you are actually "toasting" the grain. This creates a protective layer of fat that prevents the grains from becoming mushy and adds a subtle, nutty aroma that reminds me of toasted pecans in a dessert recipe.
The Perfect Absorption Ratio
We are using a 1:1.5 ratio (1.5 cups rice to 2.25 cups broth). This is the "sweet spot" for long grain rice. If you were using a different style, like the one in my Foolproof Japanese Curry recipe, the ratio would change to account for the stickier nature of short grain rice.
Fluffing for Airy Texture
Always use a fork, never a spoon, to fluff your rice. A spoon tends to smash the grains together, while the tines of a fork separate them, allowing the steam to escape and leaving you with a pile of light, airy gold.
Fixing Common Kitchen Mishaps
We have all been there lifting the lid to find a swamp or a desert. Rice can be temperamental, but it is almost always fixable if you catch it early.
Salvaging Crunchy Grains
If your timer goes off and the rice is still hard, it usually means your heat was a tiny bit too high and the liquid evaporated too fast. Don't panic. Add 2 tablespoons of hot broth or water, put the lid back on tight, and let it sit on the lowest heat for another 5 minutes.
The extra steam will finish the job.
Preventing the Burnt Bottom
A burnt bottom usually happens because the pot isn't heavy enough or the heat isn't low enough. If you smell burning, take the pot off the heat immediately. Do not stir it! Scraping the bottom will mix the burnt flavor into the rest of the dish.
Instead, scoop out the good rice from the top and leave the scorched bits behind.
| Problem | Root Cause | Solution |
|---|---|---|
| Mushy texture | Too much liquid or over stirring | Spread on a baking sheet and pop in a warm oven for 5 mins to dry out. |
| Crunchy center | Heat too high, liquid evaporated | Add 2 tbsp hot liquid and steam for 5 more minutes. |
| Bland flavor | Not enough salt or low quality broth | Stir in a squeeze of lemon and a pinch of salt at the end. |
Common Mistakes Checklist
- ✓ Rinsing the rice until the water is clear (removes excess starch).
- ✓ Using a heavy, tight fitting lid to trap the steam.
- ✓ Resisting the urge to peek don't lift that lid!
- ✓ Searing the chicken long enough to get a proper crust.
- ✓ Letting the dish rest for 5 minutes after cooking to redistribute moisture.
Flavor Twists and Fun Swaps
If you find yourself making this every week (and you might), it is fun to change things up. While I love the chicken version, you can easily adapt this method for other proteins or even make it a purely plant based feast.
Swapping for Rich Salmon
You can replace the chicken with salmon fillets. Instead of simmering the salmon the whole time, sear the salmon first, remove it, then place it back on top of the rice for only the last 8 minutes of the rice's cook time. This ensures the fish stays flaky and moist without drying out.
Creating Quick Stir Fries
If you have leftovers, this golden rice makes the best fried rice the next day. Because the grains are already coated in butter and turmeric, they won't stick together when they hit a hot wok. Just add a splash of soy sauce and some extra veggies for a whole new meal.
Scaling Your Golden Pot
- Cutting the recipe in half: Use a smaller pot (2 quart). Keep the cook time the same, as the absorption rate depends on the grain, not just the volume.
- Doubling for a crowd: Use a large Dutch oven. You may need to increase the simmer time by 2-3 minutes. Only increase the spices (paprika/turmeric) by 1.5x to avoid an overpowering flavor.
- Baking version: If you prefer the oven, you can bake the whole covered pot at 375°F for 25 minutes.
| Method | Time | Texture | Best For |
|---|---|---|---|
| Stovetop | 25 minutes | Fluffy & Light | Classic texture, easy to monitor. |
| Oven | 30 minutes | More uniform, slightly drier | Large batches or hands off cooking. |
| Slow Cooker | 3 hours | Very soft, almost like porridge | Set and forget, but less grain definition. |
Storing Your Leftover Treasures
This rice recipe keeps beautifully in the fridge for up to 4 days. In fact, some people say the flavors meld and become even better on day two. Just make sure to store it in an airtight container so it doesn't dry out.
When reheating, add a tiny splash of water or a small knob of butter before microwaving to help re steam the grains.
For the zero waste enthusiasts, don't throw away those lemon rinds! I like to toss them into a jar of white vinegar to create a natural kitchen cleaner, or even zest them into a batch of sugar cookies for a bright flavor boost.
If you have leftover chicken bones, save them in the freezer to make your own bone broth for the next time you make this dish.
Freezing Guidelines: You can freeze this dish for up to 2 months. Let it cool completely first, then press it into a freezer safe bag, removing as much air as possible.
To reheat, let it thaw in the fridge overnight and then warm it through in a skillet with a tablespoon of water to bring back that velvety texture.
Styling Your Final Creation
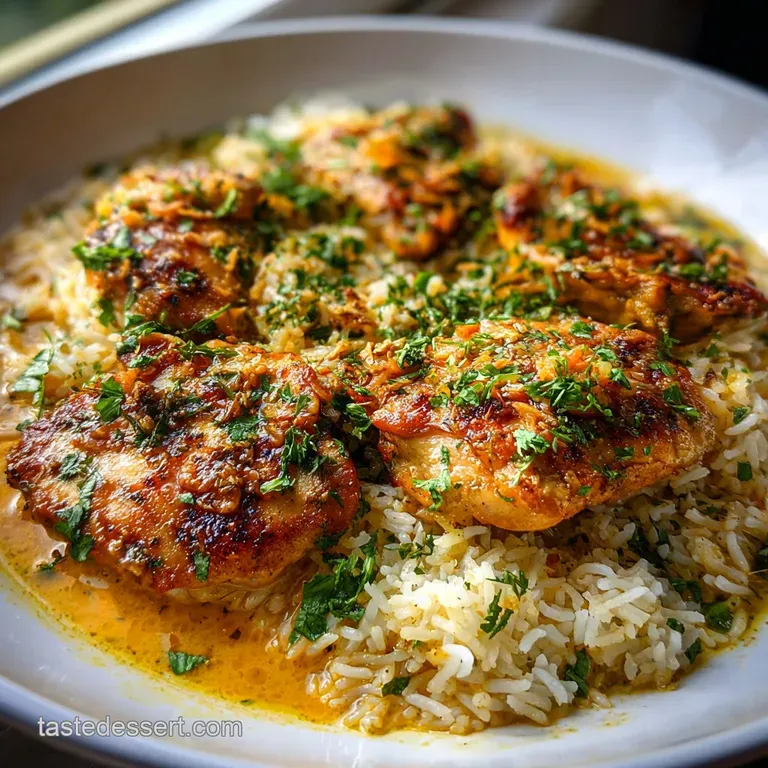
We eat with our eyes first, especially when a dish is this vibrant. The golden hue from the turmeric provides a stunning backdrop for the bright green peas and the dark, crispy edges of the chicken. I like to serve this in wide, shallow bowls rather than deep ones so you can see all the different textures.
Scatter a handful of fresh, chopped parsley over the top right before serving. The green against the yellow is a classic color contrast that looks incredible. Don't forget the lemon wedges! A final squeeze of fresh lemon juice cuts through the richness of the butter and bone broth, "waking up" all the other flavors.
Chef Tip: For an extra touch of luxury, sprinkle some toasted almond slivers or pomegranate seeds over the top. The crunch and the burst of sweetness take this from a simple weeknight meal to something that feels like a celebratory treat. Enjoy every bite!

Rice Recipe FAQs
What can I add to rice for flavor?
Many ingredients can enhance rice flavor. Consider herbs like cilantro or parsley, spices such as turmeric or cumin, or aromatics like garlic and onion. For a richer taste, try cooking it in broth instead of water, or stir in butter or a dash of soy sauce. If you enjoyed learning about flavor layering here, see how we build complex flavors in our Panda Express Honey Sesame Chicken Homemade Takeout.
What is the 123 rice rule?
The 123 rice rule is a simple ratio for cooking rice. It typically refers to 1 cup of rice, 2 cups of liquid (water or broth), and cooking for 3 minutes on high heat, then simmering on low until absorbed. This method is basic, but results can vary based on rice type.
What is the ratio of water to rice?
The most common ratio is 2 parts liquid to 1 part rice. For most white, long grain rice, use 2 cups of water or broth for every 1 cup of rice. For other types like basmati or jasmine, you might use slightly less liquid, around 1.5 cups per cup of rice, for a fluffier result.
What is the 5 5 5 rule for cooking rice?
The 5 5 5 rule is a specific cooking method for fluffy rice. It involves rinsing rice 5 times, letting it soak for 5 minutes, and then cooking it for 5 minutes on high heat before simmering. This technique helps remove excess starch and ensures grains remain separate and tender.
Can I use flavored broth instead of water for rice?
Yes, using flavored broth is a great way to add depth. Chicken, vegetable, or beef broth can significantly enhance the taste of your rice. Just be mindful of the salt content in your broth and adjust seasoning accordingly. For inspiration on how broth contributes to flavor, check out our Umami Bomb: Easy Homemade Yakitori Tare Sauce which focuses on building rich savory notes.
How do I get my rice to be less sticky?
Rinse your rice thoroughly before cooking. Rinsing removes excess surface starch, which is the primary culprit for sticky rice. Let the water run until it's clear. If you enjoyed mastering texture control here, see how the same principle applies to controlling crispiness in our Aloha Chicken My Familys Hawaiian Chicken Sauce by ensuring proper caramelization.
What type of rice cooks the fastest?
Instant or parboiled rice typically cooks the fastest. These types have been pre-cooked and dehydrated, so they require much less time on the stove. Regular long grain white rice usually takes about 15-20 minutes to cook after bringing the liquid to a boil.
Golden Chicken Rice Recipe

Ingredients:
Instructions:
Nutrition Facts:
| Calories | 567 kcal |
|---|---|
| Protein | 34.1 g |
| Fat | 16.8 g |
| Carbs | 65.3 g |
| Fiber | 3.1 g |
| Sugar | 1.8 g |
| Sodium | 435 mg |
