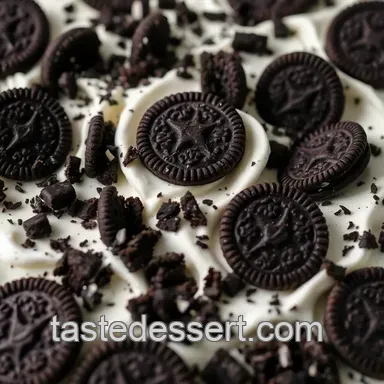
Heavenly Oreo Icebox Cake
Oh my gosh, let me take you back to one of those lazy summer afternoons when my sister and i were kids.
We spent hours rhelping my mom’s pantry, piecing together whatever sweets we could find. one day, we stumbled upon a pack of oreos, some cream cheese, and as luck would have it, a tub of whipped cream.
We whipped up a makeshift dessert, layered it together, and honestly? it was like a heavenly oreo dessert explosion in our mouths! fast forward to today, and that spontaneous creation inspired me to dive into a more refined (but still super easy) recipe: the heavenly oreo icebox cake .
Trust me, this no-bake dessert is just as delightful and takes you straight back to those carefree days.
Recipe Overview
The oreo dessert has been a hit since it burst onto the scene. originally made using a simple blend of oreos and cream, it has evolved to include layers, flavors, and tons of fun variations.
This recipe, while simple, highlights the charm of the classic layered icebox cake . plus, there’s no baking involved a huge win for those of us who’d rather keep the oven off in the summer heat!
Let's get real: we're talking easy dessert recipes here! it takes about 20 minutes to prep, and then you let it chill in the fridge for around 4 hours.
The hardest part is waiting! with a cost effective setup, you’re looking at about $10 to whip up something that serves at least eight people.
Perfect for gatherings, right?
Key Benefits
First off, let’s chat health benefits. while this might not be the go-to for health food, the homemade oreo dessert is a fantastic way to indulge without overthinking every bite.
It has a satisfying sweetness that pairs well with fresh fruit. you can even make it a bit lighter by tweaking the ingredients who knew vegan dessert alternatives could be just a swap away?
This decadent no-bake recipe shines during special occasions. birthday parties, summer picnics, or even a chill night with friends, it’s a crowd pleaser for sure! plus, its chilled nature makes it one of those cold desserts for summer that people keep coming back for.
Seriously, every time i make this, folks at the party start asking for more. you can’t go wrong with a cookies and cream dessert that’s this iconic.
Another awesome perk? this dessert is super versatile! want a nutty twist? throw in some crushed up pecans or add layers of banana for a whole new level of goodness.
And if you want to level-up with an oreo cheesecake vibe go for it! customize it as you like, and everyone will want your oreo recipes !
So, are you ready to get to the good stuff? let’s dive into the ingredients you'll need to create this amazing creamy dessert .
It’s pretty much a love letter to oreos, and you’re gonna want to dig in!
Your Go-To Guide for Essential Ingredients
Alright, folks! let’s dive into the world of cooking with an essential ingredients guide . we all know that quality ingredients can make or break a dish, right? so, whether you're gearing up to whip up something fancy or just looking for a quick and tasty oreo dessert , knowing your staple items is key.
Plus, it's just plain fun! let’s get into it.
Premium Core Components
You know when you're about to make something and you suddenly realize you're out of an essential ingredient? Ugh, the worst! Here's how to avoid that.
Detailed measurements : for your recipes, always use exact amounts. in the u.s., we’re often with cups and teaspoons.
But let's throw in some metric measurements , too, in case you’ve got a fancy scale. you might need 4 oz (113 g) of cream cheese for that icebox cake!
Quality Indicators : Not all ingredients are made the same. Look for brands that you trust. For instance, when buying heavy cream , you want it to have a fat content of at least 36% for that rich flavor!
Storage guidelines : your pantry is your best friend. ensure your spices are kept in a cool, dark place , and your baking goods can stay fresh in airtight containers.
Check the shelf life when you buy nobody needs expired vanilla extract in their life!
Freshness Tips : Always pick the freshest ingredients. For example, when selecting herbs, look for bright and vibrant leaves wilted ones? Nah. Just say no.
Signature Seasoning Blend
Now that you’ve got your ingredients straight, let’s talk about the magical world of spices!
Essential Spice Combinations : Ever tried sneaking in a little cinnamon in chocolate dessert recipes? It enhances the flavors in such a delightful way, trust me on this!
Herb Selections : Basil and oregano are the dynamic duo in Italian cooking, while cilantro can jazz up anything Mexican. Find what works for your palate!
Flavor Enhancers : Don’t underestimate ingredients like garlic powder or onion salt. They can turn a simple dish into something heavenly!
Regional Variations : Got a Mexican dish? Go for a dash of smoked paprika instead! Understanding different spices from around the world can expand your flavor pinboard.
Smart Substitutions
So, what happens if your tan-sorta-be-popular ingredient isn’t available? Fear not!
Common Alternatives : No buttermilk? Just add a splash of vinegar to regular milk, and voila!
Dietary Modifications : Got a friend who’s vegan? You can swap cream cheese with cashew cream. It still lends that creamy goodness without dairy!
Emergency Replacements : Out of eggs? You can use ¼ cup of applesauce per egg in many baking recipes. Who knew that would turn my cake into a moist masterpiece?
Seasonal Options : Take advantage of what’s fresh! If strawberries are in season, pop them in your dessert instead of frozen ones for a refreshing treat.
Kitchen Equipment Essentials
Let’s wrap things up with some must have equipment.
Must Have Tools : A good mixing bowl, a sturdy spatula, and a trusty whisk! These are your kitchen staples. The right tools make cooking a breeze.
Alternative Equipment Options : Don’t have a mixer ? No worries! Your good old arm and trusty whisk can still do the job.
Preparation Tips : Pre-measuring your ingredients? Oh, so helpful! It saves time and makes the whole process way smoother.
Storage solutions : a well organized kitchen is a happy kitchen. invest in clear bins for your frequently used items. this way, you never have to do the “where’s the baking powder?” dance again.
By now, you're all set to dive into your recipes with confidence, whether you’re creating a cozy, family friendly heavenly oreo dessert or another of your favorites.
So, grab those ingredients and get ready to craft something delicious!
Next up, let’s jump into the step-by-step instructions for our show stopping dessert! You won’t want to miss it!
Mastering Professional Cooking: Let’s look into In!
So, you wanna level up your cooking game? awesome! whether you're whipping up a heavenly oreo dessert or tackling other easy dessert recipes , using professional methods can totally transform your skills.
Trust me, it's all about getting your act together before you even start cooking. let's break down the essential steps to get you rolling like a pro.
Essential Preparation Steps
Mise en place: first things first, get everything prepped and organized. have all your ingredients measured out and tools at the ready.
It's like laying down the groundwork for an epic cookies and cream dessert . you’d be surprised how being prepared can save your neck when you’re in full-on cooking mode.
Time management tips: we all know how tricky it can be to juggle tasks. try setting a timer for each step.
For example, when you're whisking that creamy filling for your cake, set a quick 5-minute timer. it'll keep you focused, and add some urgency to the mix pun totally intended!
Organization Strategies: Use bowls for each ingredient. It feels a bit fancy but trust me, it helps. You won't be scrambling to find that vanilla extract mid-recipe.
Safety considerations: don’t forget, safety in the kitchen is key! keep that cutting board steady, wash your hands, and for heaven’s sake, watch out for hot surfaces especially if you’re trying to make those decadent no-bake recipes that require you to mix and chill without any actual cooking.
step-by-step Process
Alright, let's say you've got your Heavenly Oreo Icebox Cake ingredients ready. Here’s how you whip it up!
Prepare Filling: Mix 8 oz of softened cream cheese with ½ cup of powdered sugar and 1 tsp of vanilla. Beat until smooth it's like creating a smooth road for your dessert journey.
Whip it good: in another bowl, whip 1 cup of heavy cream until stiff peaks form. think of it like making magic.
Fold it into the cream cheese mixture and rejoice that's the creamy goodness that will make your dessert unforgettable.
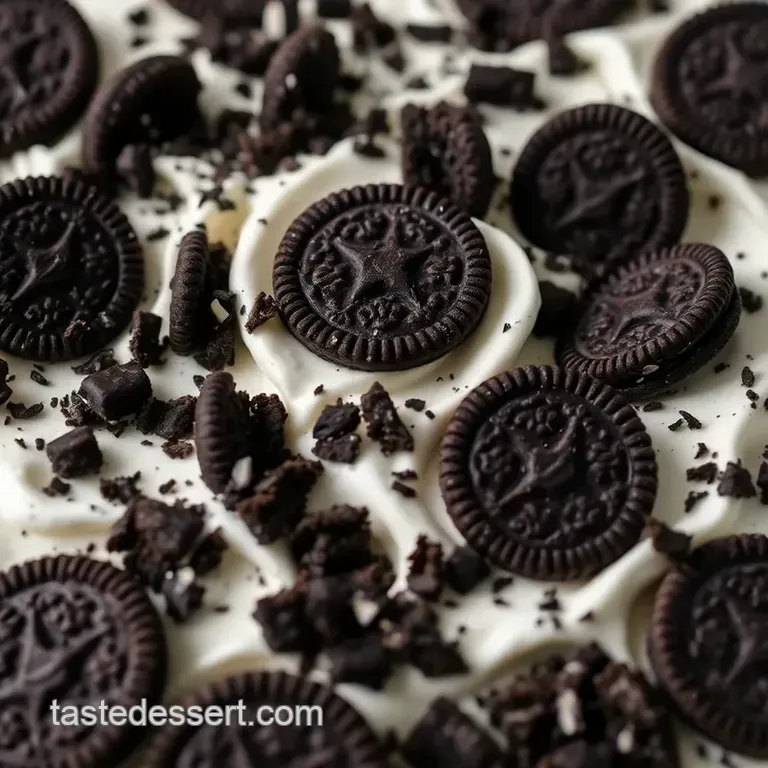
Layer up: dip 36 oreo cookies in 1 cup of milk quickly (you don't want mush). lay those beauties down in your baking dish, spread half that luscious cream mixture on top, and repeat.
Seriously, just like that!
Chill time: cover it all up and toss it in the fridge. let it chill for at least 4 hours overnight if you can manage.
The longer it chills, the better the flavor.
Slice and Serve: Cut it into squares and serve. Each bite will have that creamy Oreo goodness that feels so indulgent a true rich dessert recipe .
Expert Techniques
To really shine in the kitchen, embrace some expert tips. A quality checkpoint? Always taste! Seriously, if it tastes divine before assembly, it's going to be a rockstar dessert.
When making these creamy desserts, resist the urge to over stir that whipped cream. We want fluffy here, people! If things start looking thin, you might end up with a watery mess (yikes!).
Success Strategies
We all make mistakes, and that’s okay! common mishaps include soggy layers or over mixing. quick tip? dip those oreos swiftly in milk so they’re soft yet firm.
Think of it like a spa day for cookies.
For a surefire make-ahead option , remember: the longer this dessert sits, the better it gets. Make it the day before your gathering, and you’ll be the hero trust me!
Conclusion: Your Recipe for Success!
So there you have it! with these steps, you’re well on your way to slaying in the kitchen and whipping up your own homemade oreo dessert masterpieces.
Just remember, cooking is all about practice and a little love. don’t stress the small stuff, and have fun with it.
Next up, we’ll explore some additional information on how to personalize this Heavenly Oreo Dessert or explore other cool dessert ideas! Get ready to be the life of the party no one can resist a chilled dessert during the summer!
Additional Recipe Information for Your Heavenly Oreo Dessert
Pro Tips & Secrets
You wanna nail that heavenly oreo dessert ? here are some cool insider tips! first off, don’t skip the chilling .
Seriously, it makes a world of difference. when you let it sit overnight, those flavors meld together beautifully.
And for a little time saving magic , skip the full-on mixing bowls for whipping your cream. grab that electric mixer and whoosh your way to whipped perfection! oh, and here’s a trick i learned from a chef friend: fold the whipped cream into the cream cheese gently.
You want that fluffy vibe, not a pancake flat situation.
For flavor enhancement, consider adding a dash of maple syrup or almond extract to the filling. it gives a sweet depth that’ll have people guessing your secret ingredient.
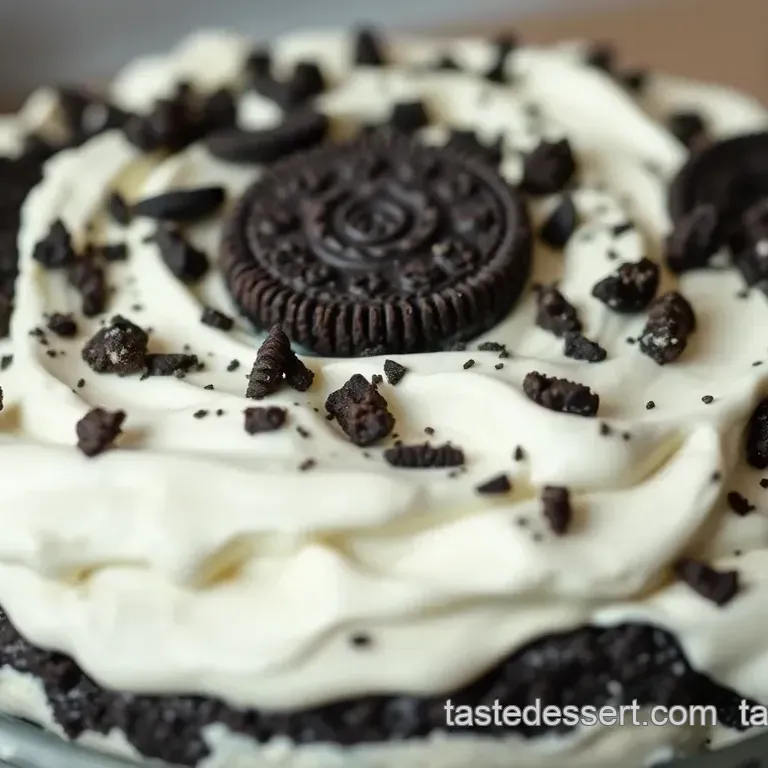
Trust me, it’s fab! and for presentation, how about crumbling extra oreos on top? it’s like a cherry on a sundae but way more chocolatey.
Perfect Presentation
Let’s talk about stunning your folks with how you present this delightful dish! plating can turn your oreo dessert from ordinary to “wow!” to get that instagram worthy look, use a spatula to slice clean squares.
Mix in some fresh toppings a few strawberries or a sprinkle of chocolate shavings on top will bring in that color. These little touches make it family friendly and inviting !
Oh! if you drizzled some chocolate sauce over the top, that would add a gorgeous contrast. visual appeal is key, especially for summer parties or gatherings.
It’ll be hard for anyone to resist diving in.
Storage & make-ahead
So, what if you’ve got leftovers? First of all, congrats! To store, wrap that baby tight with plastic wrap. Chilled desserts can usually stay good in the fridge for about 3-4 days , but let’s be real it probably won’t last that long!
If you want to make it ahead, this recipe’s your best friend. you can prepare everything the night before your gathering and just chill! just follow those chilling instructions, and your creamy layers will be perfect for serving.
When reheating, there’s no need just slice it cold! but if you want that gooey vibe, a quick 10 seconds in the microwave can soften it up.
Just don’t overdo it or you'll have a mushy mess.
Creative Variations
Now’s the fun part: getting creative with your Oreo dessert ! You could switch things up using flavored Oreos imagine mint or peanut butter. Oh boy, isn’t that mouthwatering?
Feeling adventurous? toss in some banana slices between the layers or mix in a nutty layer of peanut butter cream.
In the fall, how awesome would it be to try a pumpkin spice twist? just swap in some pumpkin puree for part of the cream cheese heavenly, right?
And if you’re looking for vegan alternatives, try using coconut cream in place of heavy cream. It’ll give you that rich flavor while staying plant based.
Complete Nutrition Guide
Now, while this recipe is a decadent delight , it’s always wise to be mindful about portions. each serving of this oreo cheesecake like beauty packs about 350 calories, with moderate sugar.
When it comes to treats, balance is key!
Don’t forget about some nutrition nuggets cream cheese offers calcium, and those cookies? Well, they’re a sweet treat. Just consider having a smaller piece alongside some fresh fruit for a well rounded dessert experience.
Expert FAQ Solutions
Oh, the questions! Many folks wonder if they can substitute the cream cheese. Yes, you absolutely can! Ricotta cheese also works great for that creamy texture.
And if you find your whipped cream isn’t fluffy enough, no sweat! continue whipping for a few more minutes until those stiff peaks form.
Need inspiration for flavors? think outside the box you can always add caramel or fudge sauce to the filling for that dreamy chocolate cream dessert vibe!
Conclusion
Making this heavenly oreo dessert is all about having fun in the kitchen! with easy assembly and endless twists, it’s your go-to summer dessert for gatherings or just chilling with family.
So, roll up your sleeves and whip up this tasty treat. you and your taste buds are gonna love it!
Heavenly Oreo Icebox Cake