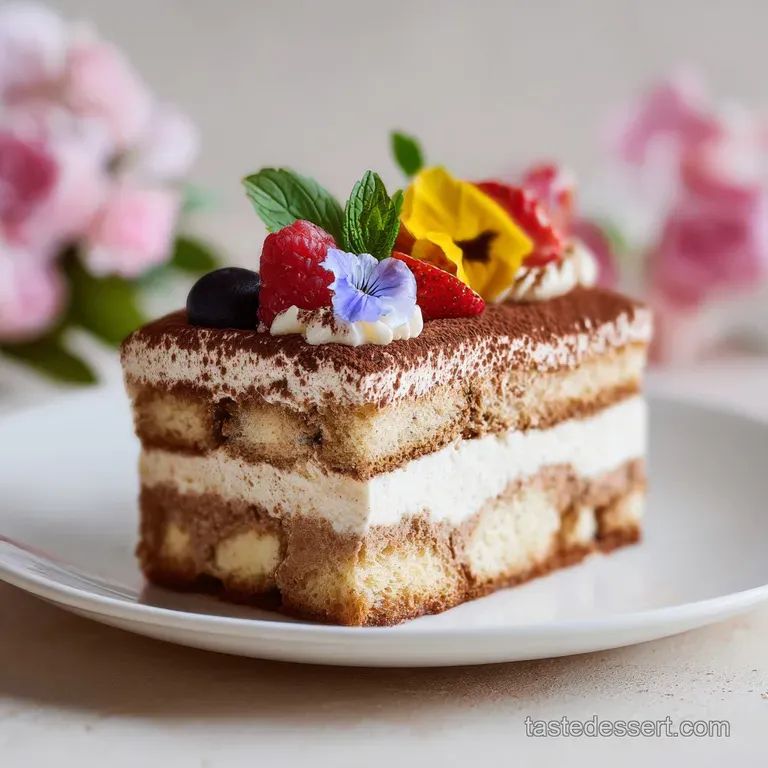
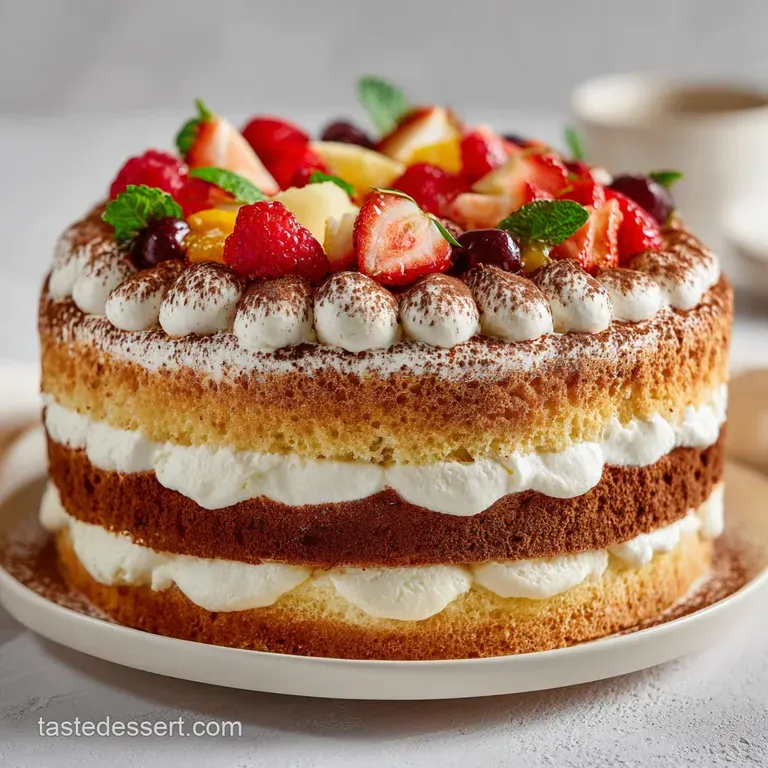
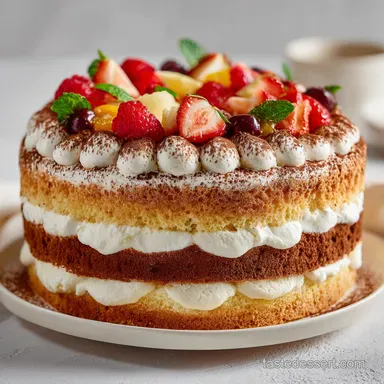
Tiramisu Layer Cake: Silky Mascarpone and Coffee
- Time: Active 40 minutes, Passive 30 minutes, Total 70 minutes
- Flavor/Texture Hook: Silky mascarpone cream meeting coffee soaked, velvety sponge
- Perfect for: Milestone birthdays, elegant dinner parties, or a delightful Sunday treat
- Crafting the Ultimate Tiramisu Layer Cake
- Essential Principles for Cake Success
- Selecting Your Prime Dessert Elements
- Necessary Tools for Your Kitchen
- Detailed Steps for Cake Assembly
- Fixing Your Common Baking Hurdles
- Fun Variations for Every Occasion
- Saving Your Cake for Later
- Delightful Sides for Your Dessert
- Recipe FAQs
- 📝 Recipe Card
Crafting the Ultimate Tiramisu Layer Cake
The house currently smells like a dream, filled with the deep, earthy aroma of freshly brewed espresso and the sweet, nostalgic scent of a golden cake cooling on the counter. There is something truly magical about the moment you peel back the parchment paper to find a perfectly springy crumb, just waiting to soak up that coffee syrup.
I remember the first time I tried to turn a classic tiramisu into a tiered masterpiece; I was so worried the layers would slide right off the plate, but the secret lies in that stabilized mascarpone frosting that holds everything together like a warm hug.
This Tiramisu Layer Cake is the answer for those days when you want the sophistication of a high end bakery without the stress of complicated techniques. We are taking the soul of the traditional dessert the coffee, the mascarpone, the cocoa and giving it a sturdy, homemade foundation that slices like a dream.
It is a wonderful way to bring a bit of Italian flair to your kitchen, and I promise your friends will be asking for the recipe before they even finish their first slice.
We are going to focus on a few key tricks today, like how to get that espresso soak just right so the cake is moist but never soggy, and how to whip your cream so it stays fluffy for days. Whether you are a seasoned pro or this is your first time attempting a layer cake, the process is incredibly rewarding.
Let's get our aprons on and start whisking up something delightful together.
Essential Principles for Cake Success
Building a tall cake that tastes as good as it looks requires a tiny bit of kitchen logic, but nothing we can't handle together. The beauty of this Tiramisu Layer Cake is how each component supports the other, creating a balance of bitter coffee and sweet, velvety cream.
- Fat Hybridization
- Using both butter and oil ensures the cake has a rich, buttery flavor while remaining incredibly moist even when cold.
- Controlled Saturation
- Brushing the espresso syrup onto sliced layers allows the liquid to penetrate the crumb without pooling at the bottom.
- Mascarpone Stability
- Whippig cold mascarpone with heavy cream creates a structure that mimics buttercream but feels much lighter on the tongue.
| Servings | Ingredient Adjustments | Pan Size | Bake Time |
|---|---|---|---|
| 6 People | Halve all ingredients; use 1 egg plus 1 yolk | One 8 inch round | 28 minutes |
| 12 People | Use official recipe quantities | Two 8 inch rounds | 30 minutes |
| 24 People | Double all ingredients; work in batches | Four 8 inch rounds | 35 minutes |
Choosing the right approach for your crowd makes the whole day much smoother, especially if you're prepping for a big celebration. If you find yourself wanting a different texture profile for your next party, you might enjoy the dense richness of a Baked Tiramisu Cheesecake as a wonderful alternative to this light sponge version.
| Component | Science Role | Pro Secret |
|---|---|---|
| Mascarpone Cheese | Provides a dense fat base for the frosting | Keep it very cold to prevent the fats from breaking during whipping |
| Brewed Espresso | Acts as a natural solvent for the sugar in the soak | Use a dark roast to ensure the coffee flavor isn't lost against the cream |
| Large Eggs | Emulsifies the batter and provides the necessary rise | Bring to room temperature so they incorporate without curdling the butter |
| Vanilla Bean Paste | Adds visual flecks and concentrated aromatic depth | Add this last to the frosting to preserve the delicate floral notes |
Selecting Your Prime Dessert Elements
To make this Tiramisu Layer Cake truly shine, we want to use the best versions of these simple pantry staples. The quality of your coffee and your cocoa powder will dictate the final flavor profile, so don't be afraid to use the good stuff here.
- 300g (2 ½ cups) All Purpose Flour: The structural backbone of our sponge.
- Substitute: Cake flour for an even finer, more delicate crumb. Why this? Provides enough protein to hold the heavy espresso soak without falling apart.
- 300g (1 ½ cups) Granulated Sugar: Essential for sweetness and moisture retention.
- Substitute: Caster sugar for easier dissolving during the creaming stage.
- 115g (½ cup) Unsalted Butter, softened: Gives us that classic homemade taste.
- Substitute: Salted butter (just omit the extra 3g of salt). Why this? Softened butter aerates better, creating tiny air pockets for a fluffy rise.
- 3 Large Eggs: The primary binder and leavening support.
- Substitute: 3/4 cup unsweetened applesauce (note: cake will be denser).
- 240ml (1 cup) Whole Milk: Provides hydration and a tender texture.
- Substitute: Oat milk or soy milk for a dairy-free sponge option.
- 60ml (¼ cup) Vegetable Oil: Ensures the cake stays soft even when refrigerated.
- Substitute: Melted coconut oil for a very subtle tropical hint.
- 180ml (¾ cup) Strong Brewed Espresso: The heart of the tiramisu flavor.
- Substitute: Very strong instant coffee dissolved in hot water. Why this? Espresso has a lower acidity and higher intensity than drip coffee.
- 450g (16 oz) Mascarpone Cheese: Authentic Italian creamy goodness.
- Substitute: Full fat cream cheese mixed with 2 tablespoons of heavy cream.
- 480ml (2 cups) Heavy Whipping Cream: Creates the volume for our frosting.
- Substitute: Double cream (common in the UK) for an even richer finish.
Necessary Tools for Your Kitchen
You don't need a professional bakery setup to master this Tiramisu Layer Cake, but a few specific items will make your life much easier. I always tell my friends that a good stand mixer is like having a second set of hands in the kitchen, especially when you're trying to get those stiff peaks just right.
Chef's Tip: Before you start the frosting, pop your mixing bowl and whisk attachment in the freezer for 10 minutes. A chilled bowl prevents the heavy cream from warming up, which is the number one reason frosting fails to stabilize.
You will also want a fine mesh sieve for that iconic cocoa powder dusting. It makes such a difference in the presentation, turning a simple cake into something that looks like it belongs in a window in Rome. If you are ever in a rush and want these same flavors in a fraction of the time, my easy no bake tiramisu uses many of these same tools but skips the oven entirely.
- Two 8 inch round cake pans: Perfect for creating those tall, impressive layers.
- Stand mixer or electric hand mixer: Essential for creaming the butter and whipping the mascarpone.
- Offset spatula: This is your best friend for getting a smooth, velvety finish on the exterior.
- Silicone pastry brush: Used to evenly distribute the espresso soak into the cake layers.
- Serrated knife: Necessary for slicing the cake rounds horizontally without tearing the delicate crumb.
Detailed Steps for Cake Assembly
- Prep the heat: Preheat your oven to 350°F (175°C) and grease your pans well. Note: This ensures the cake starts rising immediately once it hits the oven.
- Cream the base: Beat the 115g softened butter and 300g sugar together until light, pale, and very airy.
- Add the eggs: Incorporate the eggs one-by-one, beating well after each addition. Note: This builds a strong emulsion for a stable cake.
- Mix the batter: Alternately fold in the dry ingredients (flour, baking powder, salt) and the wet ones (milk, oil, vanilla) until just combined and no streaks remain.
- Bake to perfection: Divide into pans and bake for 28–32 minutes until the tops spring back when gently pressed.
- Simmer the soak: Whisk the 180ml espresso, 50g sugar, and 30ml rum over low heat until the sugar has completely dissolved.
- Whip the frosting: Combine cold mascarpone, cream, powdered sugar, and vanilla paste in your chilled bowl. Whip on medium high until stiff, cloud like peaks form.
- Slice the layers: Once the cakes are completely cold, use a serrated knife to cut each round in half horizontally.
- Build the tower: Place a layer down, brush with coffee syrup, and spread a thick layer of frosting. Repeat this three more times.
- The grand finale: Frost the outside, then dust heavily with cocoa powder until the white cream is fully hidden and top with chocolate shavings.
Fixing Your Common Baking Hurdles
Sometimes things don't go exactly as planned, but that is just part of the baking adventure. I have had my fair share of "oops" moments, and most of them are fixable with a little patience and the right trick.
Why Your Frosting Is Grainy
If your mascarpone frosting looks a bit curdled or grainy, it usually means the cheese was either too warm or it was over whipped. Mascarpone has a very high fat content, and if you push it too far, those fat solids start to separate from the liquid.
To fix this, try adding a tablespoon of cold heavy cream and gently folding it in by hand with a spatula until it smooths back out.
Why Your Cake Is Soggy
A "soggy bottom" happens when too much espresso syrup is applied too quickly. The goal is to dampen the cake, not drown it. If you notice the syrup pooling, stop immediately. You can also try "flash chilling" the cake in the fridge for 20 minutes after soaking but before frosting to help the liquid set into the crumb.
| Problem | Root Cause | Solution |
|---|---|---|
| Cake didn't rise | Expired baking powder | Always check the date; replace every 6 months |
| Frosting is runny | Ingredients were too warm | Chill the bowl, whisk, and mascarpone before starting |
| Layers are sliding | Cake was still warm | Ensure cake is room temperature before slicing or frosting |
- ✓ Always use room temperature eggs to prevent the batter from breaking.
- ✓ Tap your cake pans on the counter before baking to remove large air bubbles.
- ✓ Sift your cocoa powder to avoid unsightly clumps on the top of the cake.
- ✓ Let the espresso soak cool completely; hot syrup will melt your frosting.
- ✓ Use a rotating cake stand if possible for easier frosting application.
Fun Variations for Every Occasion
While the classic coffee flavor is wonderful, there are so many ways to make this Tiramisu Layer Cake your own. If you want to scale this recipe down for a smaller gathering, you can easily cut the ingredients in half and bake a single layer 8 inch cake.
Just reduce the baking time by about 5 minutes and watch for that golden brown finish.
For a larger party, you can double the recipe. When doubling, I recommend only increasing the salt and spices by 1.5 times to keep the flavors balanced. You will likely need to bake in batches unless you have a very large oven, as overcrowding can cause the temperature to drop and lead to uneven baking.
| Method | Time | Texture | Best For |
|---|---|---|---|
| Standard Oven | 30 minutes | Even, golden crumb | Classic celebrations |
| Convection/Fan | 25 minutes | Crispy edges | Quick turnaround |
| Cupcake Version | 18 minutes | Portioned and soft | Parties and kids |
The Decadent Mocha Twist
If you have a real chocolate lover in the house, try adding 30g of cocoa powder to the dry ingredients of the cake batter. This creates a mocha flavored sponge that pairs beautifully with the espresso soak. You can also swap the dark rum for a chocolate liqueur to really lean into that richness.
It's a wonderful way to transform the dish for a cozy winter evening.
Saving Your Cake for Later
One of the best things about this Tiramisu Layer Cake is that it actually tastes better the next day. The espresso has time to really move into the sponge, and the flavors meld together in a wonderful way.
Storage: Keep the cake in an airtight container or under a cake dome in the refrigerator. It will stay fresh and delicious for up to 4 days. Because of the dairy in the frosting, it shouldn't sit out at room temperature for more than 2 hours.
Freezing: You can freeze the individual cake layers (unsoaked) for up to 1 month. Wrap them tightly in plastic wrap and then foil. When you're ready to build, thaw them in the fridge overnight.
I don't recommend freezing the fully assembled cake, as the mascarpone texture can change slightly when thawed.
Zero Waste: If you have leftover frosting, it makes a delightful dip for strawberries or ladyfingers. Any cake scraps from leveling the layers can be crumbled into a bowl, soaked with a little extra espresso, and layered with cream in a glass to make "tiramisu trifles."
Delightful Sides for Your Dessert
Presentation is where we can really let our creativity shine, focusing on those beautiful color balances. I like to think of the garnish in three distinct layers. First, the deep mahogany of the cocoa powder provides a matte, earthy base.
Next, the stark white of the mascarpone cream peeking through the edges adds a sense of lightness. Finally, the dark chocolate shavings offer a bit of shine and texture.
For a pop of color, you could add a few fresh raspberries on top just before serving. The tartness of the berries cuts through the richness of the mascarpone in a wonderful way. If you're serving this at a dinner party, a small glass of Vin Santo or a chilled espresso martini on the side makes for a truly elegant experience.
Many people believe that tiramisu must contain raw eggs to be authentic. While traditional recipes do use them, this cake version uses a stabilized whipped cream method which is much safer for parties and provides a better structure for layering. Another common myth is that you need expensive Italian espresso.
While a good roast helps, a high-quality instant espresso powder will honestly give you a very similar result without the need for a fancy machine. Just focus on the joy of the process, and your homemade creation will be wonderful no matter what.

Recipe FAQs
Should tiramisu be layered?
Yes, traditional tiramisu relies on alternating layers to distribute flavor. By creating distinct tiers, you ensure that every bite contains a perfect balance of espresso soaked sponge and whipped mascarpone cream.
Does this dessert feature a layered cake structure?
Yes, this recipe transforms the classic dessert into a four layer cake. By slicing two 8 inch round cakes horizontally, you create the necessary height to mimic the texture of traditional tiramisu while providing a sturdy, sliceable structure.
Can diabetics have this tiramisu cake?
No, this recipe contains significant amounts of granulated and powdered sugar. Due to the high sugar content in the sponge and the frosting, it is not suitable for a diabetic diet.
What are the layers of tiramisu called?
They are simply referred to as sponge and cream layers. In a cake format, these consist of coffee moistened cake rounds alternated with stabilized mascarpone and heavy cream frosting.
How to achieve the perfect cake crumb when mixing?
Combine the wet and dry ingredients only until just incorporated to prevent overworking the gluten. If you enjoyed mastering crumb density here, you can apply the same mixing technique to our other cake recipes for consistent results.
Is it true that I should use warm espresso for the soak?
No, this is a common misconception. You must allow the espresso mixture to cool completely before brushing it onto the cake, as applying hot liquid to the sponge can cause the cake layers to become mushy rather than moist.
How to ensure the mascarpone frosting stays stable?
Whip the mascarpone, heavy cream, and powdered sugar only until stiff peaks form in a chilled bowl. Using cold ingredients is the secret to a stable structure that won't slide when you stack your layers.
Homemade Tiramisu Layer Cake
Ingredients:
Instructions:
Nutrition Facts:
| Calories | 610 calories |
|---|---|
| Protein | 7.8 g |
| Fat | 45.8 g |
| Carbs | 62.8 g |
| Fiber | 1.2 g |
| Sugar | 43.3 g |
| Sodium | 242 mg |
