Haystacks Recipe: Ultimate No Bake Chocolate Peanut Butter Mounds
- Discovering the Irresistible Charm of No-Bake Chocolate Peanut Butter Haystacks
- The Alchemy of Crunch & Cream: Understanding What Makes These Haystacks Perfect
- Gathering Your Gold: Essential Ingredients & Savvy Swaps
- Whip Up Wonders: Your Foolproof Guide to No-Bake Haystacks
- Expert Insights & Troubleshooting for Flawless Haystack Creation
- Keeping Them Fresh: Storage Secrets for Lasting Deliciousness
- Beyond the Plate: Creative Ways to Enjoy Your Chocolate Peanut Butter Haystacks
- Recipe FAQs
- 📝 Recipe Card
Discovering the Irresistible Charm of No-Bake Chocolate Peanut Butter Haystacks
Oh my gosh, friends, imagine walking into your kitchen and instantly being hit with the most delightful aroma that perfect marriage of rich chocolate and nutty peanut butter, maybe a hint of vanilla playing in the background.
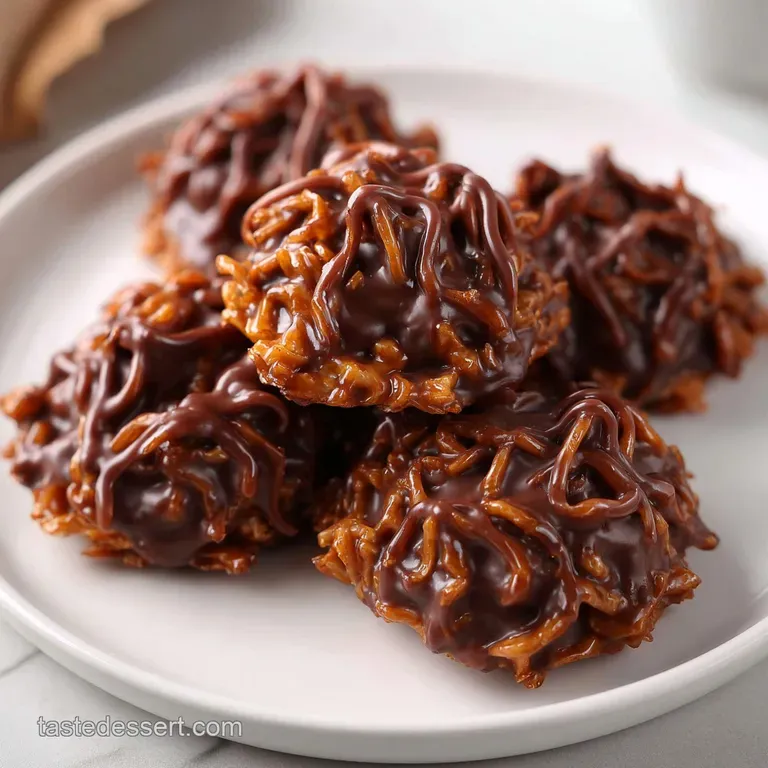
Then you spot them: rustic, craggy little mounds, shimmering slightly, promising an epic crunch followed by a smooth, creamy melt in your mouth. That, my dears, is the magic of no-bake Haystacks .
Seriously, if there’s one recipe that feels like a cheat code for pure happiness, it’s this one. These Haystacks are an absolute lifesaver when you need a quick treat for a bake sale, a last minute potluck dessert, or just a little something sweet to keep your own personal cookie jar stocked without breaking the bank or dirtying every single dish you own.
They're fast, they're easy, and they're undeniably delicious.
So, are you ready to dive into the wonderful world of chocolate peanut butter Haystacks ? Forget about turning on the oven, because we’re about to whip up some serious nostalgia with minimal effort and maximum flavour. Let's make some magic, shall we?
The Alchemy of Crunch & Cream: Understanding What Makes These Haystacks Perfect
There's something incredibly satisfying about a no-bake dessert, isn't there? This isn't just a basic "mix and chill" situation; there's a little science to making these Haystacks truly shine, turning simple ingredients into an absolute showstopper.
A Nostalgic Treat: Why They Endure
What is it about Haystacks that just hits different? For me, it’s the memories of childhood parties, the sheer joy of biting into that crunchy noodle texture, then the immediate comfort of the sweet, salty peanut butter and chocolate.
These aren't just a dessert; they're a hug from your past, a reminder of simpler, sweeter times. Every bite of these homemade Haystacks brings me right back.
The Joy of Effortless Dessert Making
The absolute beauty of this Haystacks recipe is its sheer simplicity. No fancy equipment, no complex techniques, just a saucepan and a spatula. It’s perfect for those days when you crave something decadent but your energy levels are, let’s be honest, non-existent.
And let's be real, who doesn't love a delicious treat that basically makes itself?
What Makes THIS Haystack Recipe Your New Favorite
This particular recipe for Haystacks nails that perfect balance. We're using a specific ratio of chocolate to peanut butter and butter, which creates a glossy, rich coating that's firm enough to hold its shape but still melts beautifully in your mouth.
Adding a touch of powdered sugar and salt really amplifies those flavours, making them taste incredibly professional without any of the fuss. It’s a trick I learned after too many crumbly, bland batches in my early cooking days!
Recipe Snapshot: Quick Highlights
- Difficulty: Super Easy (Seriously, anyone can make these!)
- Prep Time: Around 15- 20 minutes
- Chill Time: 30- 60 minutes
- Yields: About 24 30 glorious Haystacks
Achieving That Signature Crisp Chewy Balance
The secret to that amazing texture in our Haystack cookies recipe is the crispy chow mein noodles. They provide a delightful, airy crunch that contrasts beautifully with the creamy chocolate peanut butter coating. The trick is to fold them in gently; we want texture, not mush!
The Harmonious Blend of Chocolate and Peanut Butter
When you melt good quality chocolate chips with creamy peanut butter and a knob of butter, magic happens. The butter adds richness and helps the mixture set smoothly, while the salt balances the sweetness, creating a flavour profile that's utterly addictive.
It's the kind of blend that makes you want to lick the spoon clean!
Gathering Your Gold: Essential Ingredients & Savvy Swaps
Alright, let's get our ingredients in order. These No Bake Haystacks are pretty forgiving, but using good quality components will truly make them sing. And don't fret if you're missing something; I've got you covered with some clever substitutions!
Decoding Your Chocolate: Which Type Reigns Supreme?
-
Semi Sweet Chocolate Chips:
These are my go-to! They offer a perfect balance of sweetness and deep cocoa flavour.
- Substitute: You can absolutely use milk chocolate chips for a sweeter, creamier result, or even dark chocolate chips (70% cocoa works well) if you prefer a less sweet, more intense chocolate hit. Alternatively, if you're feeling adventurous, try half semi sweet and half butterscotch chips for a delightful twist creating a version of Butterscotch Haystacks Recipe .
The Heart of the Matter: Choosing Your Peanut Butter
-
Creamy Peanut Butter:
Crucial for that smooth, cohesive coating. We're talking about the processed, no-stir kind here Jif or Skippy are perfect!
- Substitute: Natural peanut butter tends to be too oily and separated, which can make your Haystacks a bit greasy and less firm. If you only have natural, try draining off some of the oil first, or be prepared for a slightly different texture. Almond butter or cashew butter can also work, but again, ensure it's a creamy, firmer variety.
The Unsung Hero: Selecting Your Crispy Base
-
Crispy Chow Mein Noodles:
These are non-negotiable for classic
Haystacks
! Their light, airy crunch is what defines the dish.
- Substitute: No chow mein noodles? No problem! Crushed pretzel sticks offer a fantastic salty crunch and make for excellent Pretzel Haystacks . You could also try cornflakes or even crushed Ritz crackers for a different kind of texture, though the chow mein noodles truly are king.
Sweetener Specifics: Adjusting for Your Palate
-
Powdered Sugar (Icing Sugar):
This melts seamlessly into the warm mixture, ensuring a smooth finish.
- Substitute: Granulated sugar might make your mixture a bit grainy, so it’s not ideal. If you absolutely must, blitz granulated sugar in a food processor until it's very fine.
The Supporting Cast: Butter, Vanilla, and Salt
-
Unsalted Butter:
Adds richness and helps the mixture set.
- Substitute: Salted butter is fine, just reduce the added fine sea salt by half. For dairy-free, use a solid plant based butter alternative.
-
Vanilla Extract:
Elevates all the other flavours.
- Substitute: A little almond extract could add a different, delicious dimension!
-
Fine Sea Salt:
The unsung hero! It cuts through the sweetness and makes the chocolate and peanut butter sing.
- Substitute: Any fine salt will do. Just a pinch, remember!
Whip Up Wonders: Your Foolproof Guide to No-Bake Haystacks

Alright, aprons on, metaphorical oven mitts at the ready (because, you know, no oven!). This is where the magic happens, and trust me, it’s going to be so easy, you’ll wonder why you haven’t made these Haystacks every single week.
Prepping Your Station: Setting the Stage for Success
First things first, let's get organised. Grab two baking sheets and line them with parchment paper or silicone mats. This is crucial for easy removal later nobody wants sticky Haystacks ! Have your chow mein noodles measured out and ready to go in a large mixing bowl.
The Gentle Meltdown: Creating the Flavorful Binder
- Combine the Stars: In a large, heavy bottomed saucepan (this is important, it helps prevent scorching), toss in your chocolate chips, creamy peanut butter, and unsalted butter.
- Heat with Care: Place the saucepan over medium low heat. This is not a race! Stir, stir, stir constantly with a rubber spatula or wooden spoon. You’ll see it start to melt into a gorgeous, glossy pool. Keep going until everything is completely smooth and combined no lumps allowed! The aroma will start to fill your kitchen, a heavenly mix of chocolate and peanut.
- Off the Heat & Flavor Boost: Once perfectly smooth, take that saucepan off the heat immediately. Stir in the powdered sugar, vanilla extract, and that crucial pinch of fine sea salt. Mix it well until everything is incorporated and the mixture looks super shiny and inviting.
Chef's Note: Patience is key during the melting phase. High heat is the enemy of smooth chocolate and can lead to a grainy, seized mixture. Go slow and steady, just like a gentle morning stroll!
Incorporating the Crunch: Ensuring Even Distribution
- Introduce the Noodles: Gently pour your crispy chow mein noodles into the warm chocolate peanut butter mixture.
- Fold, Don't Stir Violently! Now, this is important for our amazing Haystacks . Using your rubber spatula, carefully fold the noodles into the coating. You want to lift the mixture from the bottom and fold it over the noodles, coating them evenly without breaking them up too much. We're aiming for that signature crunch, not a pile of crumbs! Keep folding until every noodle is lovingly enrobed in the chocolatey goodness.
Shaping & Setting: The Path to Perfect Mounds
- Forming Your Haystacks: Take a spoonful (or a small cookie scoop for a tidier look) of the mixture and drop it onto your prepared baking sheets. Don't worry about perfection; rustic, craggy "haystack" shapes are part of their charm! Leave a bit of space between each one.
- The Chill Out: Once all your glorious little Haystacks are formed, pop the baking sheets into the refrigerator. Let them chill for at least 30- 60 minutes, or until they’re completely firm to the touch. This is the crucial step for them to hold their shape and become properly delicious.
Expert Insights & Troubleshooting for Flawless Haystack Creation
Even with a super easy recipe like Haystacks , sometimes little things can go awry. But don't you worry, I've made all the mistakes so you don't have to! Here are my top tips for absolute perfection.
Temperature Control: Avoiding a Seized Mixture
The biggest culprit for problematic Haystacks is often overheating the chocolate. If your chocolate or peanut butter mixture looks grainy or suddenly becomes very thick and stiff while melting, it likely got too hot or a tiny bit of water snuck in.
- The Fix: If it seizes, try stirring in a tablespoon of vegetable oil or melted butter, a little at a time, off the heat. It might help loosen it up. Better yet, prevent it by keeping the heat low and stirring constantly.
The Art of Scooping: Uniformity & Presentation
While rustic is charming, uniform Haystacks look fantastic on a platter.
- My Tip: Use a small cookie scoop (about 1.5 inch diameter) to portion out your mixture. This ensures consistent size and shape, and they’ll all set at the same rate. Plus, it makes the process super quick!
Solving Common Hurdles: Sticky, Crumbly, or Too Soft?
- Sticky Haystacks: This usually means they haven't chilled long enough. Pop them back in the fridge (or even the freezer for 10- 15 minutes) until they are completely firm. Humidity can also play a role, so ensure they are stored in an airtight container.
- Crumbly Haystacks: If your Haystacks are falling apart, it might be due to not enough coating mixture, or perhaps your peanut butter was too oily. Next time, try adding an extra tablespoon of butter or a tiny bit more peanut butter to the melting mixture.
- Too Soft Haystacks: Again, likely a chilling issue. Or, if it’s a very hot day, the ratio of fat to chocolate might be slightly off. A bit more chocolate or powdered sugar in the binder can help them firm up better.
Pro Touches: Elevating Your Haystacks with a Pinch of Flair
Want to make your Haystacks extra special?
- Sprinkle of Fancy Salt: Before they set, sprinkle a tiny pinch of flaky sea salt (like Maldon) over the tops. It adds a beautiful visual and an incredible burst of salty goodness.
- Drizzle Magic: Once set, melt a little extra white chocolate or dark chocolate and drizzle it over your Haystacks for an elegant finish.
- Extra Crunch: A few chopped roasted peanuts or miniature chocolate chips folded in with the chow mein noodles can add another layer of texture and flavour. This turns your Homemade Butterscotch Haystacks (if you used butterscotch chips) into something truly gourmet.
Keeping Them Fresh: Storage Secrets for Lasting Deliciousness
You’ve whipped up a batch of glorious Haystacks , now how do you keep them perfectly fresh and ready for snacking? No problem, I've got the scoop!
Short Term Solutions: Refrigeration vs. Countertop
These Haystacks are best kept chilled to maintain their firm structure and prevent them from getting too soft, especially in warmer climates.
- Refrigerate: Once fully set, transfer your Haystacks to an airtight container. Layer them between pieces of parchment paper to prevent sticking. They'll stay fresh and delicious in the fridge for up to 1 week.
- Countertop (Briefly): While tempting, I wouldn't leave them out on the counter for more than a few hours, especially if your kitchen is warm. They can get a bit soft and lose their appealing crunch.
Embracing the Freezer: Long Term Indulgence
But does it freeze well? You bet! These Haystacks are fantastic candidates for the freezer, making them perfect for meal prepping your sweet cravings.
- How to Freeze: Place the firm Haystacks in a single layer on a parchment lined baking sheet and freeze for about 1- 2 hours until solid. This prevents them from sticking together. Once solid, transfer them to a freezer safe airtight container or a heavy duty freezer bag, again, layering with parchment paper.
- Shelf Life: They will keep beautifully in the freezer for up to 3 months.
- How to Thaw & Reheat: When you're ready to enjoy, simply pull out as many as you need. Let them sit at room temperature for about 10- 15 minutes, or pop them in the fridge for 30 minutes to an hour. There’s no need to "reheat" them in the traditional sense; they're meant to be enjoyed chilled or at room temp. They're still perfectly crunchy and creamy straight from the freezer too, if you prefer!
Beyond the Plate: Creative Ways to Enjoy Your Chocolate Peanut Butter Haystacks
So you’ve mastered the art of making Haystacks – congratulations! Now, let’s talk about how to really enjoy these bad boys beyond just grabbing one straight from the fridge (which, let’s be honest, is already a top-tier move).
These crunchy, chewy, sweet, and salty wonders are more versatile than you might think. Whether you're making the classic chocolate peanut butter version or venturing into Old Fashioned Butterscotch Haystacks , they’re a fantastic canvas for fun.
Think about crumbling them over a scoop of vanilla bean ice cream for an instant sundae upgrade. Or, for a more sophisticated presentation, serve a single Haystacks alongside a small espresso or a glass of dessert wine. Seriously, these aren't just for kids' parties anymore.
They make fantastic edible gifts, too! Just package them up nicely in a decorative tin, and you've got a homemade present that screams "I care about your taste buds!"
And there you have it, folks my ultimate guide to creating the most incredible no-bake chocolate peanut butter Haystacks . This recipe for Haystacks is truly a keeper, promising deliciousness with minimal fuss. Go forth and crunch!

Recipe FAQs
Why are my Haystacks not setting properly or too soft?
This often happens if the chocolate and peanut butter mixture isn't thick enough or if there isn't enough chilling time. Ensure you're using proper ratios of chocolate and peanut butter, and let them chill for at least 1-2 hours in the refrigerator until firm.
Sometimes, adding a bit of solid shortening can also help with structure.
My Haystacks are too crumbly and fall apart. What went wrong?
Crumbly Haystacks usually indicate that there wasn't enough melted binder (chocolate/peanut butter mix) to properly coat and hold the chow mein noodles together. Make sure all the noodles are thoroughly coated before portioning, and ensure your melted mixture isn't seized or too dry when combining.
Can I make these Haystacks vegan?
Absolutely! To make vegan haystacks, simply substitute regular chocolate chips with dairy-free chocolate chips and use a plant based butter alternative or coconut oil in place of butter. Most peanut butter brands are already vegan, but always double check the label.
What are some good variations or add-ins for Haystacks?
Haystacks are incredibly versatile! You can add mini marshmallows, crushed pretzels for extra saltiness, chopped nuts like almonds or pecans, or even sprinkles for a festive touch. Experiment with different types of chocolate, such as dark chocolate or white chocolate, for a different flavor profile.
How should I store Haystacks, and how long do they last?
Haystacks should be stored in an airtight container in the refrigerator to maintain their shape and freshness. When properly stored, they will last for up to a week. Keeping them chilled also prevents them from becoming too soft.
Can I freeze Haystacks?
Yes, Haystacks freeze quite well! Place them in a single layer on a baking sheet to freeze solid, then transfer them to an airtight freezer safe container or bag. They can be frozen for up to a month and are best thawed in the refrigerator before serving.
Is there a gluten-free option for Haystacks?
Yes, you can easily make Haystacks gluten-free! Simply ensure you're using certified gluten-free chow mein noodles, or substitute them entirely with gluten-free pretzels, cornflakes, or rice crispy cereal. Always double check the labels on your chocolate chips and peanut butter to confirm they are also gluten-free.
No Bake Chocolate Haystacks Recipe

Ingredients:
Instructions:
Nutrition Facts:
| Calories | 818 kcal |
|---|---|
| Protein | 18.1 g |
| Fat | 56.8 g |
| Carbs | 69.9 g |
