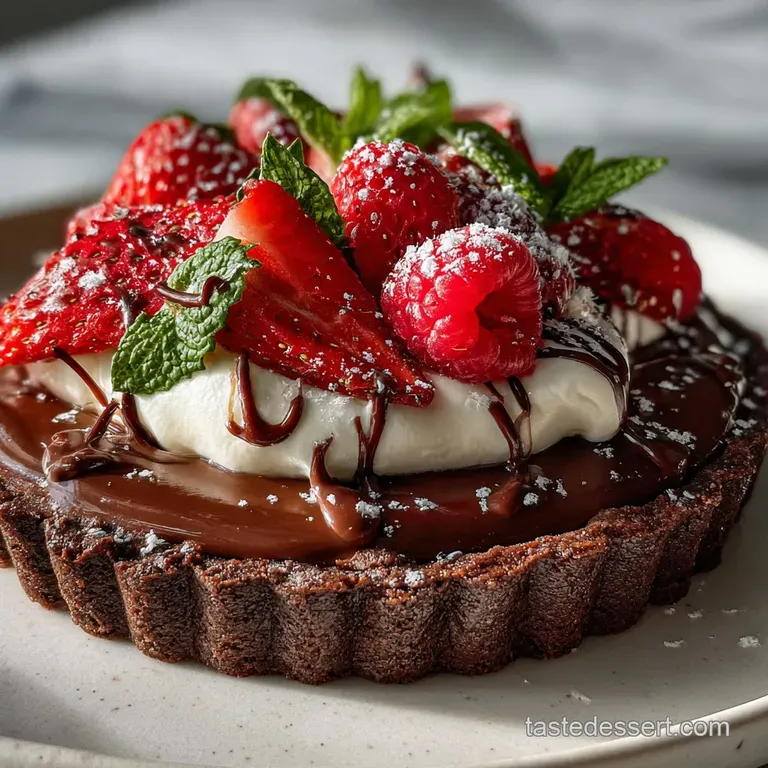
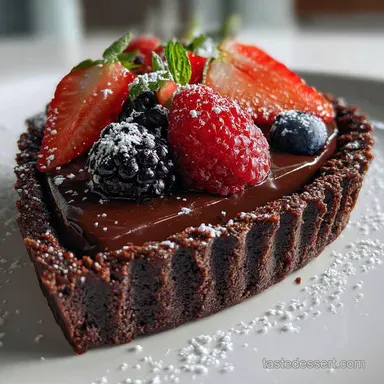
No Bake Chocolate Tart: Velvety Ganache
- Time: Active 20 minutes, Passive 2 hours, Total 2 hours 20 mins
- Flavor/Texture Hook: A dark, velvety ganache paired with a buttery, chocolate cookie snap.
- Perfect for: Last minute dinner parties or hot summer days when baking is out of the question.
- Mastering This Silky No Bake Chocolate Tart
- Essential Numbers for Your Tart
- Component Analysis for Perfect Ganache
- Sourcing the Best Chocolate Components
- Tools for a Perfect Finish
- Preparing the Crust and Filling
- Solving Common Ganache Issues
- Adjusting Your Tart Size
- Debunking Common Chocolate Myths
- Storage and Waste
- Perfect Pairings for Dessert
- Recipe FAQs
- 📝 Recipe Card
Mastering This Silky No Bake Chocolate Tart
I still remember the first time I tried to make a fancy dessert for my best friend’s birthday. The humidity was sitting at about 90%, and my tiny apartment felt like a sauna. I had this grand plan for a triple layer cake, but the thought of turning on the oven made me want to weep.
That was the day I discovered the power of a no bake chocolate tart. It felt like a cheat code something that looked like it came from a high end patisserie but only required a fridge and a bit of patience.
Since then, I’ve made every mistake in the book. I’ve ended up with ganache that was more like soup and crusts that required a literal hammer to break through. But through those messy trials, I found the secret to getting that professional, matte finish and the perfect "shatter" in the crust.
You don't need a pastry degree; you just need to understand how fat and chocolate play together.
We’re going to walk through this together, from the exact way to crush your cookies to the temperature trick that keeps your filling from splitting. If you’ve ever felt intimidated by ganache, let those fears go.
This is the most forgiving, rewarding recipe in my repertoire, and it honestly tastes better than the versions that take four hours to bake.
Essential Numbers for Your Tart
Understanding the "how" behind a recipe makes you a better cook instantly. When we talk about this specific dessert, it's all about managing temperatures and ratios. If your cream is too hot, the chocolate fats separate. If it’s too cold, it won't melt smoothly.
It’s a delicate dance that produces a result far superior to store-bought alternatives.
- Fat Saturation
- High fat heavy cream (36%+) is non negotiable because the fat globules stabilize the chocolate solids, creating that signature velvety mouthfeel.
- Suspension Chemistry
- The espresso powder doesn't make the tart taste like coffee; it contains compounds that amplify the fruity notes of the cacao.
- The Snap Factor
- Chilling the butter bound cookie crumbs reorganizes the saturated fats into a solid lattice that holds its shape against the moisture of the filling.
| Method | Prep Time | Texture | Best Use Case |
|---|---|---|---|
| No Bake (This) | 20 minutes | Creamy and fudgy | Quick, heat free entertaining |
| Traditional Baked | 1 hour 15 mins | Custard like and dense | Formal dinner events |
| Frozen Version | 15 minutes | Semi freddo / Icy | Hot summer afternoons |
Whether you are looking for a quick weeknight treat or a centerpiece for a celebration, choosing the right method changes everything. This no bake version wins on texture every single time because it doesn't dry out in the oven. If you love no bake bases, you should definitely try my Amish Peanut Butter recipe for another crowd pleaser that skips the heat.
Component Analysis for Perfect Ganache
The beauty of a budget smart recipe is knowing where to spend and where to save. We are using dark chocolate as our star, so while you don't need the most expensive brand, you do need something with a decent cacao percentage.
Using a generic chocolate sandwich cookie for the base is a great way to keep costs down without sacrificing that iconic crunch.
| Ingredient | Science Role | Pro Secret |
|---|---|---|
| Dark Chocolate | Structure & Base | Chop it into "shards" not chunks for faster melting. |
| Heavy Cream | Emulsifier | Never let it boil; bubbles mean it's too hot for the chocolate. |
| Unsalted Butter | Shine & Texture | Adding it at the end creates a glossy, professional finish. |
Sourcing the Best Chocolate Components
When you’re looking at your shopping list, remember that the quality of your chocolate dictates the final flavor. I usually grab the 340g dark chocolate bars from the baking aisle rather than chips. Chips often contain stabilizers that prevent them from melting into that perfectly smooth pool we’re after.
- 300g chocolate sandwich cookies: These provide the structure. Why this? The cream filling in the cookies helps bind the crust together naturally.
- Substitute: Graham crackers with 2 tbsp cocoa powder.
- 85g unsalted butter (melted): This is our glue for the crust.
- Substitute: Salted butter (just skip the extra sea salt).
- 0.25 tsp fine sea salt: To balance the sugar.
- 340g dark chocolate (60-70% cacao): The heart of the tart. Why this? Dark chocolate sets firmer than milk chocolate for cleaner slices.
- Substitute: Semi sweet chocolate chips (note: will be sweeter).
- 300ml heavy whipping cream (min 36% fat): For the creamy ganache.
- Substitute: Full fat coconut milk (canned).
- 45g unsalted butter (room temperature): Adds the gloss.
- 1 tsp pure vanilla extract: For aroma.
- 0.5 tsp instant espresso powder: To deepen the chocolate flavor.
- 1 tsp flaky sea salt: For that professional finishing touch.
This ganache technique is a simplified version of what I use for my Classic Homemade Éclairs recipe, proving that one good skill can unlock many different desserts.
Tools for a Perfect Finish
You don't need a kitchen full of gadgets, but a 9 inch tart pan with a removable bottom is your best friend here. It makes the transition from pan to serving plate so much easier without the risk of the crust crumbling into a million pieces.
If you don't have one, a springform pan or even a regular pie dish works, though you'll have to serve it straight from the dish.
A food processor is the fastest way to get your 300g of cookies into a fine sand, but if you're feeling stressed, a rolling pin and a sturdy zip top bag are great for a bit of "kitchen therapy." Just make sure there are no large chunks left, or your crust won't hold together when you try to slice it.
Preparing the Crust and Filling

- Crush the cookies. Pulse 300g chocolate sandwich cookies in a food processor until they look like fine soil.
- Bind the base. Pour in 85g melted unsalted butter and 0.25 tsp fine sea salt. Note: The mixture should feel like wet sand that holds its shape when squeezed.
- Press the tart. Firmly press the mixture into the bottom and up the sides of a 9 inch tart pan. until it is packed tight and even.
- Chill the shell. Place the crust in the freezer for 15 minutes. Note: This prevents the warm filling from dissolving the crust.
- Prep the chocolate. Place 340g finely chopped dark chocolate and 0.5 tsp espresso powder in a heat proof glass bowl.
- Heat the cream. In a small saucepan, bring 300ml heavy whipping cream to a gentle simmer until small bubbles appear at the edges.
- Emulsify the filling. Pour the hot cream over the chocolate. Let it sit for 5 minutes without touching it. Note: This allows the heat to penetrate the chocolate evenly.
- Whisk and gloss. Gently whisk from the center outward until smooth. Add 45g room temperature butter cubes and 1 tsp vanilla until the mixture is shiny and velvety.
- Set the tart. Pour the ganache into the chilled crust and smooth the top.
- Final chill. Refrigerate for at least 2 hours until the center is firm to the touch. Sprinkle with 1 tsp flaky sea salt before serving.
Solving Common Ganache Issues
Even the most experienced home cooks run into trouble sometimes. The most common heartbreak with a no bake chocolate tart is a filling that doesn't set or a crust that turns into a pile of crumbs. Usually, these problems come down to a small detail in the temperature or the way the ingredients were combined.
Why Your Filling Stayed Liquid
If your ganache is still pourable after two hours in the fridge, your cream to chocolate ratio might be off, or the cream was too hot and "burned" the chocolate. It could also be that you used chocolate with a very low cacao percentage (like white chocolate), which requires less liquid to set.
Why Your Crust Is Crumbly
A crust that falls apart usually hasn't been pressed firmly enough into the pan. You really have to put some muscle into it. I like to use the flat bottom of a measuring cup to ensure every inch is compacted.
If you used a different type of cookie, you might also need an extra tablespoon of melted butter to act as the glue.
| Problem | Root Cause | Solution |
|---|---|---|
| Split Ganache | Cream was boiling/too hot | Add 1 tsp cold cream and whisk vigorously to re emulsify. |
| Grainy Texture | Water got into the chocolate | Keep all bowls/spoons bone dry; water causes chocolate to "seize." |
| Soggy Bottom | Filling was poured while hot | Let ganache cool for 10 mins before pouring into the chilled crust. |
Common Mistakes Checklist
- ✓ Never boil your cream; "simmer" means tiny bubbles, not a rolling boil.
- ✓ Chop the chocolate into very small, even pieces so it melts before the cream cools down.
- ✓ Don't skip the espresso powder; it's the secret to making "grocery store" chocolate taste like a luxury brand.
- ✓ Use a heavy bottomed pan to heat your cream to prevent scorching.
- ✓ Wait to add the flaky salt until just before serving so it doesn't dissolve into the chocolate.
Adjusting Your Tart Size
If you want to make mini tarts for a party, this recipe is incredibly easy to scale. For standard muffin tins, you can get about 18-24 mini tarts. You'll just need to be more precise when pressing the crust into the smaller cavities. Use the back of a small spoon to get into the edges.
When cutting the recipe in half for a smaller 6 inch tart, the physics stays mostly the same. However, when doubling the recipe for a large crowd, I recommend working in two separate batches for the ganache.
Whisking a massive amount of chocolate and cream at once can lead to uneven melting and a higher chance of the mixture splitting before you can get it smooth.
Chef's Tip: If you're doubling the crust, only increase the salt to 1.5x the original amount. Spices and salt don't always need a linear 1:1 increase when scaling up.
Debunking Common Chocolate Myths
There's a common belief that you must use a double boiler to melt chocolate for ganache. This isn't true! The "pour over" method we use here is actually safer because it reduces the risk of steam (water) getting into your bowl and causing the chocolate to seize.
As long as your chocolate is chopped finely, the residual heat from the cream is more than enough.
Another myth is that you need "baking chocolate" specifically. While baking chocolate is great because it has no added sugar, high-quality eating bars work just as well and often have better flavor profiles.
Just stay away from "candy melts" or "compound chocolate," which use vegetable fats instead of cocoa butter and will leave a waxy film on the roof of your mouth.
Storage and Waste
Storage: This tart keeps beautifully in the fridge for up to 5 days. Make sure to cover it loosely with plastic wrap or foil so it doesn't pick up the scent of those leftover onions in the back of the shelf.
If you're making it ahead, wait to add the flaky salt until the day of, or it will draw moisture and leave little wet spots on your beautiful tart.
Freezing: You can freeze the tart for up to 2 months! Wrap it tightly in two layers of plastic wrap and one layer of foil. Thaw it in the fridge overnight before serving. The texture might be slightly firmer than fresh, but it's still absolutely delightful.
Zero Waste: If you have leftover cookie crumbs, save them in a jar for an ice cream topping. Leftover ganache? Let it firm up in the fridge, roll it into balls, and dust with cocoa powder to make instant truffles.
You can also melt leftover ganache with a bit more milk to create the richest hot chocolate you've ever tasted.
Perfect Pairings for Dessert
Because this tart is so intensely chocolatey, it needs something bright or creamy to cut through the richness. A dollop of unsweetened whipped cream is the classic choice, but I personally love serving it with a handful of tart raspberries or a quick strawberry coulis.
The acidity of the berries makes the chocolate taste even deeper.
If you’re setting up a full dessert spread, this tart is the perfect anchor for a Delightful Assorted Desserts Platter. It provides that deep, dark element that balances out lighter fruit tarts or buttery shortbreads. Whether you're serving it alone with a stiff cup of coffee or as part of a larger celebration, it's the kind of recipe that makes people think you spent all day in the kitchen, even though you never even struck a match.

Recipe FAQs
Can I substitute the dark chocolate with milk chocolate?
No, you should stick to dark chocolate (60-70% cacao). Milk chocolate contains higher sugar and dairy solids, which throws off the ganache ratio, causing it to set softer, perhaps too soft to slice cleanly.
How to get a perfectly smooth, glossy ganache filling?
Pour the hot cream over the chopped chocolate and wait five minutes before whisking gently. This resting period allows the chocolate to melt evenly via residual heat, preventing streaks or seizing; adding room temperature butter last creates the final glossy sheen.
What is the best way to ensure the cookie crust doesn't crumble when slicing?
Freeze the pressed crust for at least 15 minutes before adding the filling. A solid, cold base resists the warmth of the ganache immediately upon pouring, creating a firmer structure that slices cleanly.
Is it true that espresso powder only adds coffee flavor to the tart?
False. Espresso powder contains compounds that actually deepen and amplify the natural roasted notes of the cacao, making the chocolate taste richer without adding a distinct coffee taste.
How long must the finished tart chill before serving?
Chill for a minimum of 2 hours in the refrigerator. The tart is ready when the center is firm enough to hold its shape when lightly pressed, but avoid chilling longer than 12 hours before adding the flaky salt topping.
What is the secret to making a room temperature butter incorporate smoothly into the warm ganache?
Whisk the butter in after the chocolate is fully emulsified and slightly cooled. This technique prevents the fat from separating; if you enjoyed mastering this emulsification stability, apply the same principle when thickening sauces in our The Edible Cookie recipe.
Can I prepare this tart a full day ahead of serving?
Yes, this tart improves when made ahead, up to 2 days. Wait to sprinkle the flaky sea salt on top until just before serving so it retains its crunch against the smooth filling.
No Bake Chocolate Tart
Ingredients:
Instructions:
Nutrition Facts:
| Calories | 444 kcal |
|---|---|
| Protein | 2.9 g |
| Fat | 32.3 g |
| Carbs | 31.2 g |
| Fiber | 3.6 g |
| Sugar | 19.5 g |
| Sodium | 245 mg |
