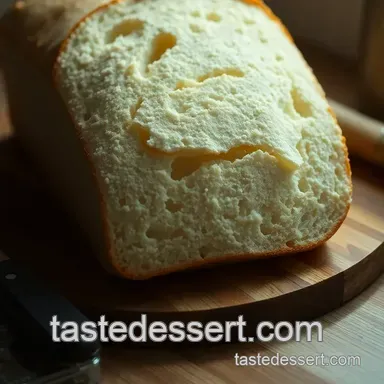
Nothing Beats Homemade Sliced Bread
- Let’s Talk About the Magic of Homemade Sliced Bread
- A Slice of History: Origin and Popularity
- How Much Time and Cash Are We Talking?
- Why You’ll Adore This Recipe
- Ready to Bake Some Bread?
- Essential Ingredients Guide
- Mastering the Art of Professional Cooking
- Additional Recipe Information for Homemade Sliced Bread
- Frequently Asked Questions
- 📝 Recipe Card
Let’s Talk About the Magic of Homemade Sliced Bread
You know that warm, cozy feeling when you step into grandma’s kitchen, and the smell of freshly baked bread hits you like a hug? oh my gosh, that’s the vibe we’re going for today! nothing screams comfort food quite like classic homemade sliced bread .
Honestly, it's one of those skills i've picked up that just makes life feel a little more special. i remember the first time i baked a loaf i felt like a total rockstar when i pulled that golden brown beauty from the oven.
The simplicity, the warmth, and the unbeatable taste really turn regular sandwiches into something extraordinary.
A Slice of History: Origin and Popularity
Guess what? breadmaking is one of the oldest crafts on the planet. dating back thousands of years, it’s been a staple in many cultures from the crusty baguettes of france to the fluffy loaves of the wild west.
In fact, the phrase “the best thing since sliced bread” kind of says it all about how much we love that easy peasy convenience of bread that’s ready to go.
Today, soft bread recipes are all the rage, and this one brings that old-school vibe back to life with pretty minimal effort.
It’s so easy, even your cat could probably make it okay, maybe not, but you get the point.
How Much Time and Cash Are We Talking?
Okay, let's break it down. you’re looking at about 2 hours for this entire process, including rise times totally doable for a saturday afternoon! and let’s be real, the hardest part is waiting for it to rise and get that doughy goodness bubbling.
A loaf gives you about 10-12 slices, so it’s perfect for everyday use or when you’ve got friends coming over.
Plus, it won’t break the bank. you can whip up this easy white bread recipe for just a few bucks.
Cheap eats that are also warm and comforting? count me in!
Why You’ll Adore This Recipe
Now, let’s get to the good stuff why this white bread recipe is a total game changer. first off, it’s way healthier than store-bought options.
You control the ingredients, and no weird preservatives are lurking in there. we’re talking about fresh, wholesome goodness.
And the best part? it’s ridiculously versatile! you can use this soft bread to make classic grilled cheese, hearty sandwiches, or just slather on some butter and jam for a treat.
Seriously, i made a killer french toast last week with this bread. it felt like a fancy brunch, but it was just me using leftovers from the previous day.
This bread shines on special occasions too. serve it at family dinners, holiday gatherings, or even bake a loaf as a thoughtful gift.
Trust me, nothing says “i love you” quite like fresh baked bread. just imagine the smiles when you present a homemade loaf to your favorite people.
Also, don’t forget this is a notable in the world of bread maker recipes . If you’ve got a machine, you can toss in your ingredients and let it do the heavy lifting!
Ready to Bake Some Bread?
So, if you’re itching to fill your kitchen with that heavenly aroma of homemade bread , you’ve come to the right spot.
I can’t wait for you to dive into this delectable world of baking. it really does transform everything. next up, we’ll gather our ingredients for this unforgettable journey into homemade awesome.
Grab your mixing bowl, and let’s get started on making the best sandwich base you ever tasted!
Essential Ingredients Guide
Oh my gosh, if you’re diving into bread making, you’ve got to know your essential ingredients like the back of your hand! there’s just something special about creating your own loaf of that heavenly sliced bread .
It’s like the culinary version of a warm hug. let’s break it down so you can whip up the best homemade white bread around.
Premium Core Components
First things first: measurements . You'll want to have a good scale for precision, but if you’re more of a 'cup-and-scoop' person, that works too! Here’s a quick guide for both:
- 4 cups (500 g) all-purpose flour
- 2 teaspoons (7 g) instant yeast
- 2 tablespoons (25 g) granulated sugar
- 1 tablespoon (15 g) salt
- 1 ½ cups warm water ( 110° F or 43° C) (360 ml)
- 2 tablespoons unsalted butter, melted (30 g)
Now, when you’re eyeballing the quality of your ingredients, check that flour isn’t lumpy, the yeast is fresh (you want that bubbly action when it hits the warm water), and the butter should be a lovely golden hue!
Storage is key too keep flour in a cool, dry place and your yeast in the fridge for longer shelf life.
Signature Seasoning Blend
Listen, bread isn’t just about flour and water. we gotta jazz it up! while the classic white bread recipe is fantastic on its own, adding a signature blend of spices can take it to the next level.
- Essential spice combos : A pinch of garlic powder or onion powder can work wonders.
- Herbs : Fresh rosemary or thyme can add an earthy aroma that makes your kitchen smell divine. Think of it as a little flavor hug!
- Flavor enhancers : Consider throwing in a splash of olive oil or even malt syrup for that deep, rich flavor.
And don’t forget about the regional variations . if you’re feeling adventurous, try a soft bread recipe from a different culture.
A touch of italian herbs or even some asian sesame seeds can put a fun spin on your loaf.
Smart Substitutions
We all know cooking isn’t always smooth sailing. So, here’s the skinny on smart substitutions :
- Common alternatives : If you’re out of all-purpose flour, try bread flour. It gives a chewier bite that’s just delightful.
- Dietary modifications : gluten-free? No problem! Use a good gluten-free blend, and you’re golden.
- Emergency replacements : Ran out of butter? Use olive oil! It’ll give your bread a subtle richness without compromising the taste.
- Seasonal options : Got some pumpkin puree or mashed bananas? You can toss those in for a fun twist! Autumn inspired bread, anyone?
Kitchen Equipment Essentials
Alright, let’s chat kitchen tools . No need to get fancy, but you gotta have some must haves:
- Mixing bowl : A solid, large one this is where all the magic happens.
- Measuring cups and spoons : Not much more to say here. Exactly what you need!
- A good wooden spoon or dough scraper will help mix things up efficiently.
- Loaf pan : Get yourself a sturdy 9x5-inch one! Trust me, you don’t want your dough overflowing and making a mess.
- Towel or plastic wrap to cover the rising dough is practically essential.
Oh, and here’s a tip I love to keep my kitchen organized! Store your equipment where it’s easily accessible. It’ll make baking feel less like a chore and more like an exciting adventure.
There you have it, friend! You’re ready to make some killer homemade bread recipes easy . With the right ingredients, smart options for substitutions, and essential equipment at your fingertips, baking that best bread recipe won’t just be a dream, it’ll be your new reality!
So grab your ingredients and get ready to knead and rise, because our journey into making the fluffiest, most delightful sliced bread is about to begin! sharing the aroma of freshly baked bread with loved ones is something you won't forget.
Mastering the Art of Professional Cooking
So, you’re ready to step up your kitchen game, huh? whether you're an aspiring chef or just a home cook wanting to impress the fam, diving into professional cooking methods can jazz up your meals.
Let’s get you prepped to whip up something amazing, like that easy white bread recipe that’ll have your friends saying, "this is the best thing since sliced bread!" honestly, there's something magical about that fresh loaf of homemade white bread waiting at the end of a cooking adventure.
Essential Preparation Steps
Let’s kick things off with mise en place , or as i like to think about it, putting your cooking gear in a neat little row.
It’s french for “everything in its place.” before you even think about turning on that oven, gather your ingredients.
Prep your space so everything is within arm's reach. nothing feels messier than searching for your measuring cups while your dough starts to take over your life!
Time management is also key. before you know it, that "30-minute" recipe is creeping into an hour because you didn’t factor in cooking times and resting periods.
So, try to keep your timing precise . for bread, you’re looking at about two hours total with some active prep and rise times, of course.
Set a timer, or else you’ll be jumping out of your chair like you’re waiting for the microwave to beep!
And don’t forget safety considerations. if you're mixing anything with heat, remember to keep those hands away from hot surfaces.
Get into the habit of keeping a clean workstation, washing your hands like you're prepping for a top-secret mission!
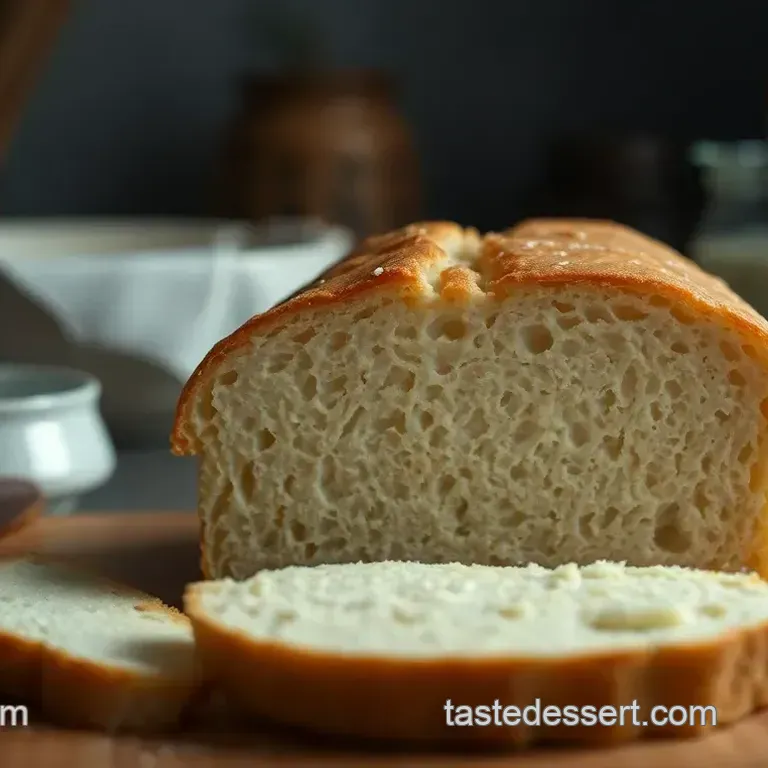
Step-by-step Process
Alright, let’s break down the actual cooking part. Here’s a step-by-step guide that even your grandma would approve of. Follow these:
- Start by mixing 1½ cups of warm water ( 110° F or 43° C) , sugar, and yeast; let it get frothy for about 5- 10 minutes .
- Add melted butter to your yeast mixture. Seriously, a little extra buttery love goes a long way!
- Gradually mix in 4 cups of all-purpose flour until your dough starts to form.
- Knead that dough on a floured surface for 8- 10 minutes until you can pull the windowpane test this is when you stretch it, and it doesn’t rip! You want that elastic texture.
- Let your dough rise in a greased bowl for about 1 hour or until it’s doubled in size. Find a cozy spot for it, like near the fireplace (okay, maybe not that close!).
- Punch it down, shape it into a loaf, and let it rise again for 30 minutes .
Don't forget to preheat your oven to 375° f ( 190° c) while you wait! then toss that beauty in for 30- 35 minutes until it’s golden brown and sounds hollow when you tap it.
Finally, let it cool for a bit before diving in; unless you want to risk burning your taste buds!
Expert Techniques
Now let’s throw in some pro tips to elevate that soft bread:
- Quality checkpoints are important! Check that dough elasticity; it should spring back when you poke it.
- Feeling adventurous? Add herbs or seeds when mixing it’s all about personalizing that Homemade Bread Recipe .
- If the dough is too sticky, sprinkle a bit more flour, but avoid too much! You want that soft bread texture to shine.
Success Strategies
Everyone messes up at some point. It’s part of cooking! Here are some tips to dodge the common pitfalls:
- Keeping track of your ingredients is crucial. Mixing sugar and salt? No bueno!
- For guaranteed freshness, let your bread cool completely before storing it. It'll help avoid that dreaded soggy slice.
- And if you find yourself with leftover dough? Go for make-ahead options, like freezing portions for later! Perfect for unexpected guests!
With these steps in your back pocket, you’ll be well on your way to mastering some serious kitchen skills. Just remember to stir in a sprinkle of patience along with those ingredients.
Every loaf you bake brings more memories and skills into your kitchen. bread may not be the hardest thing to whip up, but it sure brings joy like nothing else! get ready to delight that inner baker in you and bring on the stories because every successful loaf of homemade bread is just the beginning of your culinary journey.
Additional Information
As you embark on this delicious journey of bread making, remember: the process is as much about the learning as it is about the end product.
If you find yourself hitting a wall, it’s okay! just adjust, adapt, and enjoy the delightful aroma that fills your home.
Now, go on, grab those ingredients and start creating because nothing beats the charm of sliced bread , brought to life by your own hands!
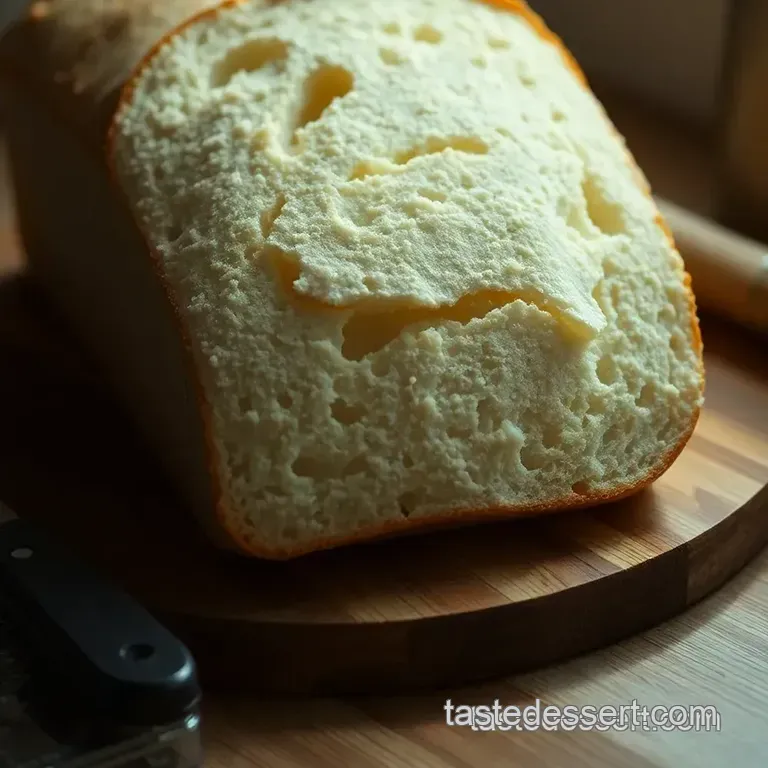
Additional Recipe Information for Homemade Sliced Bread
Oh my gosh ! it’s time to dive into the nitty gritty of making the perfect sliced bread . trust me, there's more to it than just mixing flour and water.
Let’s chat about some pro tips, how to present that soft wonder, store it like a pro, mix things up with variations, and finally, get all nerdy about nutrition.
Grab a snack; you may get hungry thinking about this bread!
Pro Tips & Secrets
Let’s kick things off with some secrets from my own kitchen. first up : when you're mixing that dough, make sure your water is just warm, about 110° f ( 43° c).
If it feels like a hot tub, it’s too hot for the yeast! you wanna make it bubbly, not cooked!
Now, here’s a time saving technique i swear by. after kneading, instead of letting it rise in one spot, put it in the oven (turned off, obviously) with the light on.
It creates a cozy, warm environment, and boom , that dough rises faster. trust me; you'll be speeding up that homemade white bread process in no time.
Flavor enhancement alert ! if you wanna jazz it up, add a tablespoon of honey for sweetness or a teaspoon of garlic powder for a savory twist.
It's like taking your best bread recipe from good to “oh my word, what is that?!”
And don't overlook the presentation. A simple brush of melted butter on top before baking gives you that golden brown crust that feels like a warm hug.
Perfect Presentation
Let’s talk plated bread! you may think it’s just bread, but presentation matters, especially when you’re serving it fresh out of the oven.
Here’s a neat trick: slice your bread thick and fan those slices out on the plate. you want it to look inviting!
Garnish ideas? fresh herbs like parsley or even a sprinkle of sea salt can elevate that loaf. if you’re feeling fancy, a drizzle of olive oil or balsamic vinegar can also give it a mediterranean flair.
For color combinations, try pairing that golden brown crust with a vibrant jam or bright butter (ever tried honey butter?). It’s eye candy for your plate!
Storage & make-ahead
Now, here’s where things get practical. after you’ve baked that heavenly loaf, let it cool completely before storing. i know this is hard, but trust me! otherwise, you'll end up with soggy bread.
Wrap your loaf tightly in foil or parchment if you’re good about portion control. it’ll keep for about 3-4 days at room temperature .
If you wanna keep it longer, slice it up and freeze those bad boys. just pop a slice in the toaster straight from the freezer, and you’re good to go!
Creative Variations
Feeling adventurous? Let’s spice it up! For a seasonal twist, throw in some pumpkin puree and spices during autumn. It’s a hit at Thanksgiving!
If you’re keeping an eye on carbs, you can substitute half the flour with whole wheat for a more nutritious loaf.
Want a gluten-free version? there are fabulous gluten-free flours on the market just check the package instructions.
You could also turn your easy white bread recipe into a savory herb bread by adding rosemary, thyme, or even garlic.
With a few tweaks, it’s like you’ve opened a whole new bakery!
Complete Nutrition Guide
Alright, let’s get real quick about the nutrition. You’re looking at approximately 130 calories per slice . And don’t forget, bread gives you some great carbs to fuel your day!
When made from scratch, you can control the ingredients. want less sugar? go for it! more fiber? use whole grain flour.
The beauty of homemade bread is that you can tailor it to fit your dietary goals.
Encouraging Conclusion
You know, making homemade sliced bread is like viewing a piece of art in your kitchen. it’s more than just a recipe; it’s about filling your home with cozy vibes and heartwarming smells.
So get ready to roll up your sleeves and bake! each loaf is an adventure, a memory in the making, and yes, it’s likely the best thing you’ll have since sliced bread! happy baking, friends, and may your loaves be soft, nutrient packed, and absolutely delicious!
Frequently Asked Questions
What is the best way to store my homemade sliced bread?
To keep your sliced bread fresh, let it cool completely after baking, then store it in a paper bag at room temperature or wrapped in plastic for a bit longer shelf life. If you have leftovers, consider freezing slices in a freezer bag this way, you can simply toast them straight from the freezer when the craving strikes!
Can I make sliced bread without instant yeast?
Absolutely! If you only have active dry yeast, just dissolve it in the warm water with a bit of sugar and let it sit until frothy about 5 to 10 minutes before continuing with your recipe.
Just remember, using active dry yeast may require a longer rise time but don’t worry, the results will still be tasty!
Why is my sliced bread dense and not fluffy?
If your bread turns out denser than expected, it could be due to under kneading. Proper kneading develops the gluten structure, which is key for a light and airy loaf. Also, make sure your yeast is fresh and active expired yeast might not give your bread the lift it needs!
What variations can I try with my sliced bread recipe?
Get creative! You might add herbs like rosemary or thyme for a fragrant twist, or incorporate seeds such as flax or sunflower for extra crunch and nutrition. For a sweet version, think about adding dried fruits such as raisins or cranberries which pair beautifully with warm butter.
How can I tell when my sliced bread is fully baked?
A classic garret know how for checking doneness is to tap the bottom of the loaf; it should sound hollow if it’s baked through. The crust should be golden brown as well just like the British sun on a good day! If you have a thermometer, the internal temperature should reach around 190°F (88°C).
Are there any nutritional considerations for homemade sliced bread?
Homemade sliced bread can be a healthier option compared to store-bought loaves, as you have control over the ingredients. You can use whole wheat flour for added fiber or reduce sugar if you prefer. Just keep in mind that, like any bread, it’s best enjoyed in moderation as part of a balanced diet!
Nothing Beats Homemade Sliced Bread