Oreo Fudge: Quick and Creamy
- Time: Active 10 minutes, Passive 2 hours, Total 2 hours 10 minutes
- Flavor/Texture Hook: Silky smooth vanilla base with a dark cocoa shatter
- Perfect for: Last minute bake sales, holiday gift boxes, or late night cravings
- Making The Best Ever Oreo Fudge
- Why This Creamy Texture Works
- Essential Ingredient Science Analysis
- Components For Transforming Basic Sweets
- Gear Needed For Velvety Fudge
- Transforming Ingredients Into Sweet Treats
- Preventing Typical Kitchen Mistakes
- Customizing Your Homemade Fudge Batch
- Debunking Common Kitchen Myths
- Keeping Your Treats Fresh Longer
- Serving Your Sweets Like Pro
- Recipe FAQs
- 📝 Recipe Card
Making The Best Ever Oreo Fudge
Picture this: it's 10:00 PM on a Tuesday, and the house is finally quiet. You hear that distinct, rhythmic thwack crunch as a heavy knife slices through a stack of chocolate sandwich cookies. The air fills with the deep, roasted scent of cocoa and the floral sweetness of vanilla.
That was me three years ago, desperately trying to whip up something for a neighbor's party using only what I had in the cupboard. I've tried the complicated boiled versions of this treat, and honestly, they usually end up as a grainy mess.
This specific version of Oreo Fudge is the one I swear by because it actually works every single time. We aren't messing around with candy thermometers or worrying about soft ball stages here.
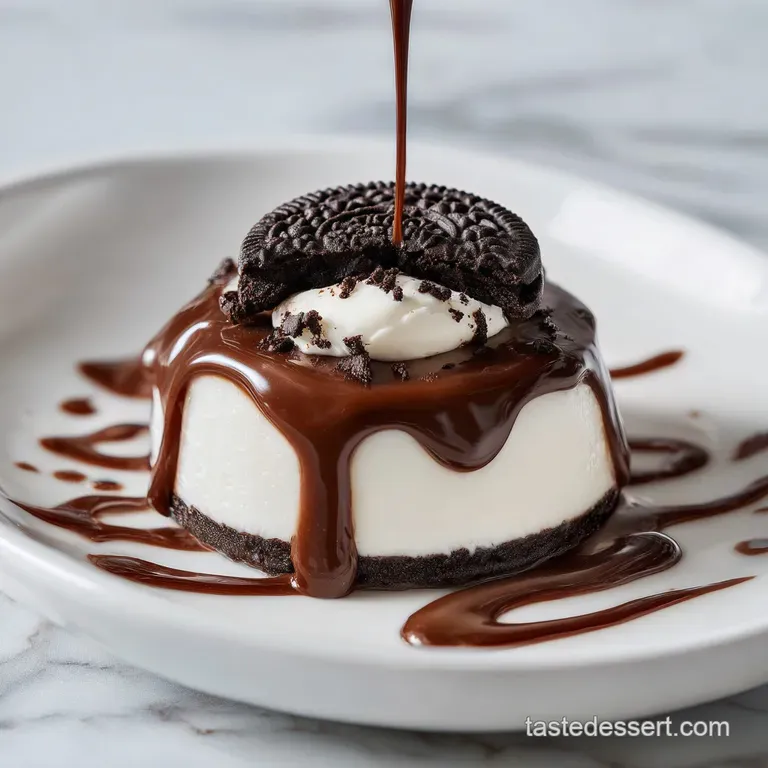
Instead, we are using a technique that relies on the gentle marriage of fats and sugars to get that professional, fudge shop texture. It's about that contrast between the velvety white base and the jagged, dark pieces of cookie that provide a textural "shatter" in every mouthful.
Right then, let's talk about what we are actually doing. We're taking the nostalgia of a childhood cookie and transforming it into something that feels quite sophisticated. You won't find any waxy, over sweet flavor here.
By adding a tiny bit of salt and a good splash of vanilla, we balance the sugar and make the chocolate flavor pop. Trust me on this, once you see how easy it is to get that glossy finish, you'll never go back to the store-bought blocks.
Why This Creamy Texture Works
- Sugar Shielding: The glucose and lactose in the sweetened condensed milk act as interfering agents, preventing the white chocolate from forming large, gritty crystals as it cools.
- Emulsion Stability: Using chips instead of bars ensures a faster, more even melt, which keeps the cocoa butter from separating and becoming oily.
- Starch Structure: The fine crumbs from the crushed cookies absorb a tiny amount of moisture from the milk, helping the fudge set firmly but remain tender.
| Thickness | Set Time | Visual Cue | Texture Goal |
|---|---|---|---|
| 1 inch | 2 hours | Matte surface, no wobble | Dense and creamy |
| 1.5 inches | 3 hours | Firm edges, slight center give | Truffle like melt |
| 0.5 inches | 1 hour | Completely rigid | Snappy and firm |
When you are looking for a quick win, this method beats the traditional "boiled sugar" fudge by a mile. The classic version requires precise temperature control and constant stirring to avoid burning.
This modern approach uses the residual heat from the condensed milk to gently melt the chocolate, meaning there is zero risk of those annoying burnt bits at the bottom of your pan.
Essential Ingredient Science Analysis
| Component | Science Role | Pro Secret |
|---|---|---|
| White Chocolate | Provides the structural fat | Use chips with cocoa butter listed first for the best melt. |
| Condensed Milk | Acts as a liquid sweetener | Never use evaporated milk; the sugar content here is vital for the set. |
| Oreo Cookies | Adds textural contrast | Freeze the cookies for 10 minutes before chopping to get cleaner pieces. |
If you find yourself wanting more of these easy treats, you might also love making The 4Ingredient NoBake recipe which uses a similar flavor profile but in a round truffle form. Both are brilliant for gifting.
Components For Transforming Basic Sweets
- 18 oz white chocolate chips: These provide the backbone. Why this? Chips melt faster and more consistently than large chocolate bars.
- 14 oz sweetened condensed milk: This provides the creamy sweetness and the "fudge" factor. Why this? It's already reduced, saving you 30 minutes of simmering time.
- 26 Oreo cookies: Roughly chopped. Why this? They provide the iconic cocoa flavor and that essential crunch.
- 1 tsp pure vanilla extract: For depth. Why this? It bridges the gap between the milk and the chocolate.
- 1 pinch fine sea salt: To balance. Why this? Salt cuts through the sugar so you can eat more than one piece.
| Original Ingredient | Substitute | Why It Works |
|---|---|---|
| White Chocolate Chips | Almond Bark | Higher melt point; sets faster but has a slightly waxy mouthfeel. |
| Oreo Cookies | Chocolate Wafers | Provides the same dark cocoa color but without the cream filling. |
| Sea Salt | Salted Butter (1 tbsp) | Adds salt and a richer, buttery finish to the overall fudge. |
Gear Needed For Velvety Fudge
You don't need a professional pastry kitchen for this, but a few specific tools make the process much smoother. I always use an 8x8-inch square baking pan because it gives the fudge that thick, chunky "fudge shop" height. If you use a larger 9x13 pan, your squares will be quite thin and might lose that satisfying bite.
A sturdy silicone spatula is also non negotiable. You’ll be stirring a very thick, sticky mixture, and those flimsy plastic spoons will just snap. Make sure you also have some parchment paper on hand. Trying to dig fudge out of a pan without a parchment "sling" is a recipe for heartbreak.
Just line the pan with the paper hanging over the edges, and you can lift the whole block out for clean slicing once it's set.
Transforming Ingredients Into Sweet Treats
- Prep the pan. Line an 8x8-inch square pan with parchment paper, leaving an overhang on two sides. Note: This allows you to lift the fudge out later.
- Chop the cookies. Roughly chop 26 Oreo cookies into various sizes until you have a mix of large chunks and fine dust.
- Combine the base. Pour 14 oz sweetened condensed milk and 18 oz white chocolate chips into a large microwave safe bowl.
- Melt the mixture. Microwave on medium power for 1 minute, then stir. Continue in 30 second bursts until glossy and smooth.
- Infuse the aromatics. Stir in 1 tsp pure vanilla extract and 1 pinch fine sea salt. Note: The aroma will shift from plain milk to rich, floral vanilla.
- Fold in texture. Gently fold in about three quarters of the chopped Oreos until the white mixture is marbled with black crumbs.
- Transfer and level. Pour the mixture into your prepared pan and use a spatula to smooth the top.
- Add the topping. Press the remaining cookie chunks into the top of the fudge until the surface is fully covered in crunch.
- Chill and set. Refrigerate for at least 2 hours until the fudge feels firm to a light touch.
- Slice and serve. Lift the fudge out by the parchment paper and cut into 24 squares using a sharp, warm knife.
Preventing Typical Kitchen Mistakes
Why Your Fudge Is Too Soft
If your fudge feels more like a thick frosting than a solid block, it usually comes down to the chocolate to milk ratio. White chocolate is softer than dark chocolate because it lacks cocoa solids.
If you used a slightly larger can of milk or fewer chips, it won't have enough structure to hold its shape at room temperature.
Why Your Fudge Is Oily
Separation happens when the chocolate gets too hot too fast. If the cocoa butter "splits," you'll see a yellow oil pooling on top. To fix this, you can try stirring in a teaspoon of warm milk very vigorously to re emulsify the mixture, but it's better to prevent it by using low heat and patience.
| Problem | Root Cause | Solution |
|---|---|---|
| Grainy texture | Chocolate seized or overheated | Melt in shorter bursts and stir more frequently. |
| Grey appearance | Over mixing the cookies | Fold the cookies in quickly; don't stir until the cream melts. |
| Sticking to pan | No parchment paper used | Run a knife under hot water and slide it around the edges. |
Common Mistakes Checklist
- ✓ Always use a dry bowl; even a drop of water can make white chocolate seize.
- ✓ Don't use "low-fat" condensed milk; you need the fat for a proper set.
- ✓ Chop cookies by hand rather than a food processor to avoid "grey" fudge.
- ✓ Wipe your knife clean between every single cut for those professional edges.
- ✓ Let the fudge sit at room temp for 10 minutes before slicing to prevent cracking.
Customizing Your Homemade Fudge Batch
If you want to scale this down for just two people, use a small loaf pan. Simply beat one egg (if the recipe called for one, though this one doesn't!) or in this case, just halve the chocolate and milk and reduce the setting time by 20%.
When doubling the recipe for a big party, I recommend working in two separate batches rather than one giant bowl. It’s much easier to control the melting process that way, and you won't risk the bottom scorching while the top stays solid.
| Premium Option | Budget Option | Flavor Impact | Savings |
|---|---|---|---|
| Ghirardelli Chips | Store Brand Chips | Creamier, richer vanilla | Save $3.00 |
| Name Brand Oreos | Store Brand "Twist" Cookies | Slightly less cocoa punch | Save $2.00 |
| Vanilla Bean Paste | Pure Vanilla Extract | Beautiful black specks | Save $5.00 |
This recipe is quite similar to the approach used in My Grandmother's Trifle recipe, where we layer textures to create a more complex dessert. For a holiday twist, you can swap the standard cookies for peppermint filled ones and add a drop of peppermint extract. It changes the whole vibe without changing the chemistry of the set.
Debunking Common Kitchen Myths
One big myth is that you can substitute evaporated milk for condensed milk in fudge. This is a disaster waiting to happen! Evaporated milk has no added sugar and a much higher water content. If you try it, you'll end up with a sweet soup that never sets.
The sugar in the condensed milk is what actually creates the structure of the fudge.
Another misconception is that you need to boil the mixture to get it to set. While that's true for old-fashioned fudge, this "quick" method relies on the saturation of the chocolate. Once the chocolate is melted into the milk, it will naturally return to a solid state as it cools.
Boiling this specific mixture would actually burn the milk solids and ruin the delicate white chocolate flavor.
Keeping Your Treats Fresh Longer
Storage: You can keep this Oreo Fudge in an airtight container in the fridge for up to 2 weeks. I actually think it tastes better after 24 hours because the flavors have time to fully meld.
If you prefer a softer bite, let the squares sit at room temperature for 15 minutes before serving.
Freezing: This fudge freezes beautifully! Wrap the whole block or individual squares tightly in plastic wrap, then place them in a freezer bag. They will stay fresh for up to 3 months. To eat, just thaw them in the fridge overnight.
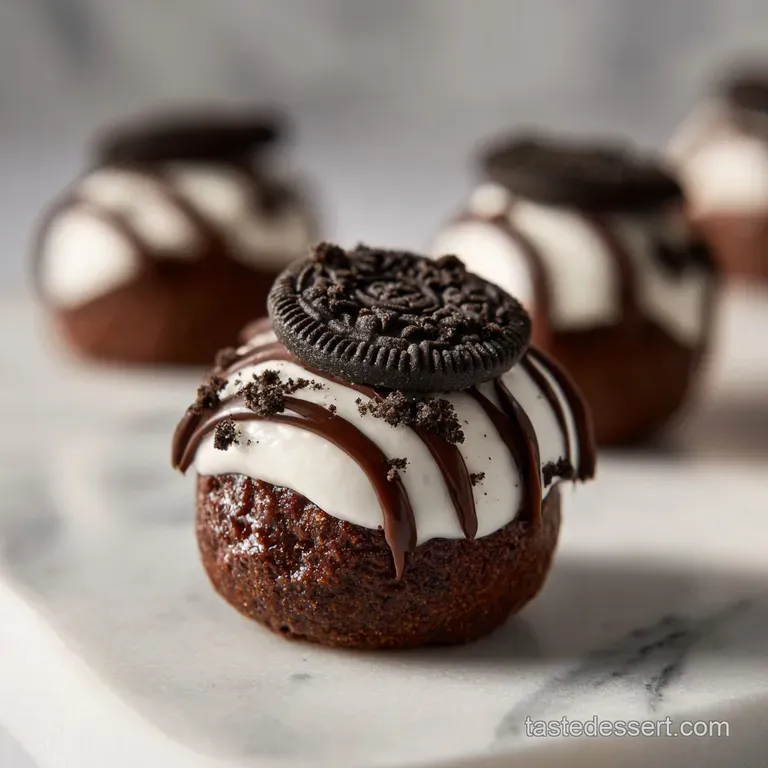
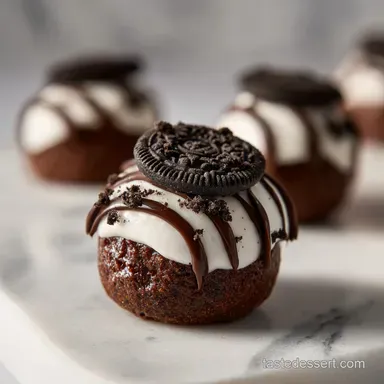
Zero Waste Tip: Don't throw away those tiny cookie crumbs at the bottom of the bag! I save those and stir them into my morning yogurt or sprinkle them over a bowl of vanilla ice cream. You can even press the smallest "dust" into the sides of the fudge for an extra decorative touch.
Serving Your Sweets Like Pro
When it comes to serving, presentation is everything. I love placing each square in a small paper cupcake liner. It makes them look like they came from a high end candy shop and keeps people's fingers from getting sticky.
If you are serving these at a party, try a "Café Style" pairing by offering them alongside a bitter espresso or a strong black tea. The bitterness of the drink cuts through the creamy sweetness of the fudge perfectly.
For a really decadent dessert, you can actually crumble a few pieces of this fudge over a warm brownie or use it as a "sundae topper." Since it's basically a solid block of cream and cookies, it melts slightly when hitting something warm, creating a velvety sauce.
However you choose to serve it, just remember to keep it chilled until the last moment to ensure that perfect, snappy texture. Let's crack on and get some chilling!

Recipe FAQs
What is the rarest Oreo?
This recipe does not use a rare Oreo variety. This fudge relies on the classic chocolate sandwich cookie for its specific cocoa flavor and texture contrast. Using the standard cookie ensures the correct balance against the white chocolate base.
What happened to Oreo fudge creme?
The "fudge creme" filling was largely discontinued by Nabisco. This recipe mimics that decadent, dense texture using sweetened condensed milk and melted white chocolate chips instead of relying on a specific manufactured filling.
What is cowboy fudge?
Cowboy fudge typically refers to a stovetop fudge made without precise temperature control. It often uses evaporated milk or marshmallow fluff as a stabilizer, which contrasts with this recipe's simpler, no-boil white chocolate method. If you are interested in a similar simple base, see how we adapt texture control in our Oreo Chunk Brookies recipe.
What are the three main ingredients in Oreo fudge?
White chocolate chips, sweetened condensed milk, and Oreo cookies are the three core components. These ingredients provide the structure, the creamy binder, and the iconic flavor/crunch, respectively. We also add vanilla and salt for essential flavor balancing.
How do I ensure my white chocolate fudge sets firmly?
Measure the chocolate and milk precisely, ensuring a 1.2:1 ratio by weight of chocolate to milk. The set relies on the cocoa butter solidifying properly, which is compromised if the mixture is too wet. If you are interested in another recipe relying on fat ratios for stability, check out the technique in Valentine Oreos Chocolate Dipped Easy Gourmet Cupids Crunch Recipe.
Can I use dark chocolate instead of white chocolate chips?
Yes, but you must adjust the setting time. Dark chocolate has more cocoa solids and sets much harder than white chocolate due to the lack of milk solids. You might need to add an extra tablespoon of milk or reduce the chilling time by 30 minutes to prevent it from becoming too hard.
Is it necessary to chill the fudge for the full two hours?
No, but chilling guarantees the best texture for clean slicing. While the fudge will firm up faster, the full two hours allows the moisture from the condensed milk to fully integrate, resulting in that desired velvety mouthfeel instead of a brittle snap. For a whole dessert centered around soft layers, review The Heavenly Oreo Dessert recipe
Oreo Fudge In 10 Minutes
Ingredients:
Instructions:
Nutrition Facts:
| Calories | 226 kcal |
|---|---|
| Protein | 3.0 g |
| Fat | 10.8 g |
| Carbs | 30.1 g |
| Fiber | 0.4 g |
| Sugar | 26.1 g |
| Sodium | 100 mg |
