The Ultimate Nofuss Oreo Cookie Crust the Perfect Base for Pies and Cheesecakes
- The Secret Weapon for Desserts: Why This Oreo Cookie Crust Reigns Supreme
- Foundation of Flavor: Understanding the Power of the Chocolate Base
- Assembling Your Minimalist Materials for Peak Performance
- The Essential Duo: Sourcing the Perfect Oreos and Binder
- The Step-by-Step Guide to Crafting Your Impressive Oreo Cookie Crust
- Achieving Optimal Texture: From Crumbs to Compacted Perfection
- Troubleshooting Common Crust Conundrums and Expert Adjustments
- Elevating Your Creation: Customizing the Classic Oreo Cookie Crust
- Recipe FAQs
- 📝 Recipe Card
The Secret Weapon for Desserts: Why This Oreo Cookie Crust Reigns Supreme
As an expert in the sweet sciences, I can assure you that the difference between a good dessert and an unforgettable one often lies in the foundation. Forget fussy pastry dough that requires chilling, rolling, and careful docking; we are talking about instant gratification that delivers maximum flavor and structural integrity.
The Oreo Cookie Crust is that secret weapon. It’s the culinary equivalent of a perfectly tailored suit simple, yet utterly indispensable for anything from towering cheesecakes to the quickest ice cream confection.
This recipe is so straightforward, it feels like cheating, yet the results are consistently show stopping. It’s rich, intensely chocolatey, and sets up flawlessly every single time you prepare it.
Foundation of Flavor: Understanding the Power of the Chocolate Base
A truly superior dessert demands a base that complements, rather than competes with, the filling. This chocolate foundation, made from pulverized chocolate sandwich cookies, brings a deep, slightly bitter cocoa note balanced by the sweetness of the internal cream.
It offers a satisfying textural contrast a slight crunch or chewiness that melts beautifully against creamy fillings. Thinking about How To Make Oreo Cookie Crust often leads people to overcomplicate it, but the beauty here lies in its minimalist approach.
Why a Homemade Crust Outshines store-bought Options
While you can purchase pre-made versions, nothing compares to the fresh, vibrant taste of a homemade base. store-bought options often rely on stabilizers and preservatives to maintain shelf life, which can result in a stale flavor or a texture that becomes overly hard or gritty when chilled.
Our Oreo Cookie Crust Recipe ensures that the butter is freshly melted and the crumbs are vibrant, resulting in that Perfect Oreo Cookie Crust that crumbles just right on the fork.
Perfect Pairing Potential: Which Desserts Need This Chocolate Foundation?
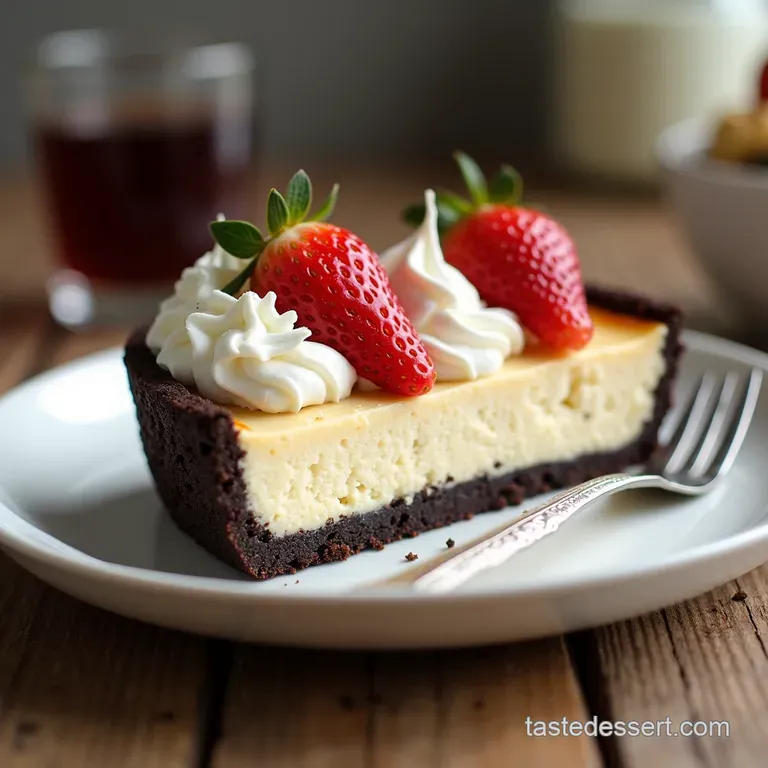
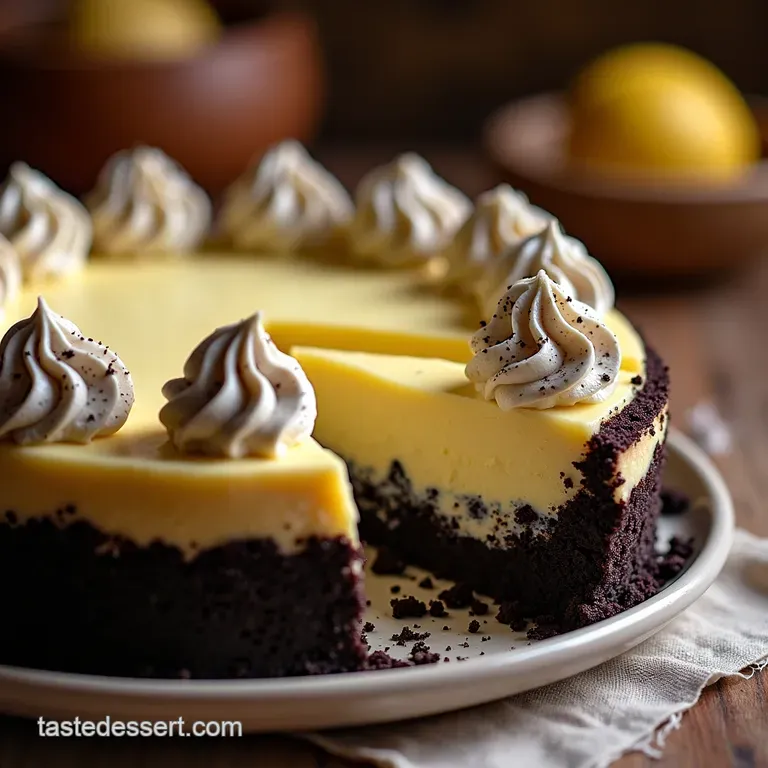
The versatility of this crust is unmatched. It is the quintessential base for a rich, tangy Oreo Cookie Crust For Cheesecake , where the chocolate cuts through the richness perfectly.
It excels as an Oreo Pie Crust Recipe for tangy lemon, peanut butter, or classic chocolate silk fillings. Beyond that,, it’s the only choice for an Oreo Ice Cream Cake Crust , as its density holds up beautifully against thawing ice cream without becoming soggy.
Whether destined for a single serve tart or a grand Oreo Cookie Crust 9x13 pan, this base delivers reliability.
Culinary Confidence Boost: Mastering the Easiest Recipe Ever
If you’ve ever been intimidated by pastry, this recipe offers immediate success. Difficulty level? Easy. It requires no rolling, no specialized skills, and minimal equipment.
This simple two-ingredient base is designed to be assembled in under ten minutes, meaning your total time commitment, including the necessary chill, is remarkably low, making it ideal for weeknight treats or unexpected guests.
Assembling Your Minimalist Materials for Peak Performance
To achieve that enviable firmness and deep chocolate flavor, we need just two core components, but selecting the right ones is key. The blueprint for this unbeatable No Bake Oreo Crust relies on quality input, even if the quantity is small.
We will be using approximately 36 whole Oreo cookies (or about 300 grams) to yield a perfect 9 inch pie or springform pan crust. Remember, the entire cookie wafer and cream filling goes into the mix!
The Essential Duo: Sourcing the Perfect Oreos and Binder
The magic here is not in complex additions but in the quality and ratio of our two main players: the cookies and the fat.
Quantity Control: Measuring for a Standard 9 Inch Pan
For a standard 9 inch pie dish or springform pan, you want a generous, sturdy base. My go-to measurement calls for about 36 whole cookies. If you are using a deep dish pan or planning an Oreo Cookie Crust For Pie that needs substantial height, consider increasing the cookie count by about one-third.
Consistency in measurement ensures the fat-to-crumb ratio remains perfect for setting.
Selecting the Right Fat: Butter vs. Coconut Oil Considerations
Unsalted butter is my champion here, providing a rich, familiar flavor and a superb setting quality once chilled. We melt 6 tablespoons (85 grams) of this butter. While some recipes suggest coconut oil, butter solidifies more reliably in the refrigerator, giving you that clean slice every time.
The melted fat coats every crumb, acting as the glue that locks the structure in place when set.
Do I Need to Scrape the Cream Filling Out?
Absolutely not! Resist this urge entirely. The cream filling within the Oreo cookies is crucial. It contains added fats and sugars that act as secondary binders. Removing it would result in a drier, more crumbly crust that struggles to hold its shape upon slicing.
Leaving it intact contributes to the smooth, cohesive texture of the Perfect Oreo Cookie Crust .
Related Recipes Worth Trying
- The Ultimate Classic Apple Pie Recipe From Scratch Flaky Crust — Learn the stepbystep Apple Pie Recipe for a truly classic deepdish dessert Get our foolproof allbutter crust recipe for that perfect golden finish
- Easy Pecan Pie Bars Recipe with Buttery Shortbread Crust — Make the best homemade Pecan Pie Bars This easy recipe uses a crumbly shortbread crust skipping the mess of traditional pie A proper crowdpleaser
- Fudgy Peanut Butter Stuffed Brownie Cookies Recipe — Meet the ultimate cookie dessert rich fudgy brownie cookies with a creamy peanut butter filling centre Foolproof steps for gourmet cookies
The step-by-step Guide to Crafting Your Impressive Oreo Cookie Crust
Once you have your materials ready, the process moves swiftly. The active preparation time should clock in at around ten minutes, followed by a vital resting period.
- The Preparation: Begin by placing your whole, un-stuffed cookies directly into the bowl of a food processor.
- The Reduction: Pulse the cookies until they break down into fine, sandy crumbs. You want consistency here no large chunks remaining.
- The Infusion: Pour your 6 tablespoons of fully melted unsalted butter directly over the crumbs in the processor. Pulse again several times until the mixture is uniformly incorporated. It should look like very wet sand and, when squeezed, hold its shape easily.
- The Transfer: Scoop the moist crumb mixture into your prepared 9 inch pie plate or springform pan.
- The Compression: This is where technique matters. Use the flat bottom of a dry measuring cup or a flat bottomed glass to press the crumbs firmly. Apply even pressure across the base and work your way up the sides, ensuring the crumbs are tightly packed and uniform, leaving no air gaps.
- The Setting: Place the crust in the refrigerator for a minimum of 30 minutes. This chilling time is essential for the butter to re-solidify, setting your No Bake Oreo Crust firmly before you introduce your filling.
Achieving Optimal Texture: From Crumbs to Compacted Perfection
The final texture whether it’s a slightly softer base for a quick ice cream dessert or a firm foundation for a baked item depends entirely on the steps taken before chilling.
The Art of Crushing: Food Processor Versus Manual Methods
While a food processor is highly recommended for achieving that fine, sandy consistency quickly, it's not mandatory. If you must crush manually, place the cookies inside a heavy duty Ziploc bag, seal it, and use a rolling pin or the bottom of a heavy saucepan.
Use patience; ensure there are no jagged edges remaining, as these can create weak points in your final Oreo Cookie Crust For Pie .
Incorporating the Melted Fat: Mixing Until It Resembles Wet Sand
The visual cue for success is the "wet sand" texture. When you pinch a small amount between your fingers, it should stick together firmly. If the mixture seems too dry and crumbles apart immediately, add another teaspoon of melted butter and mix until the desired cohesion is achieved.
This precise measurement ensures the crust sets up properly.
Pressing Techniques: Ensuring Edge-to-Edge Uniformity Without Gaps
When pressing, focus on compressing the base first, making it flat and dense. Then, carefully build the sides. Use your fingers to guide the mixture up the edges, maintaining an even thickness from the bottom corner to the rim. A well pressed edge guarantees clean slices later on.
Chilling Protocols: Setting Your Crust Firmly (No Oven Required)
For the standard No Bake Oreo Crust , refrigeration for 30 minutes is sufficient. If you are aiming for an exceptionally sturdy base, particularly for rich, heavy fillings or an Oreo Ice Cream Cake Crust , you can opt for a 15-minute blast in the freezer instead.
Troubleshooting Common Crust Conundrums and Expert Adjustments
Even the simplest recipes can encounter hiccups. Knowing how to adjust on the fly guarantees a successful outcome every time you make this Oreo Cookie Crust Recipe .
When Your Crust Won't Hold Together: Recovery Strategies
If, after chilling, your crust still seems too loose or crumbles excessively when sliced, it indicates insufficient fat or over crushing. The fix? Gently remove the loose pieces, melt another tablespoon of butter, and thoroughly mix it into the loose crumbs.
Press this slightly wetter mixture back into the pan and chill again for 20 minutes. A slightly pre-baked crust ( 10 minutes at 350° F/ 175° C) often solves structural integrity issues for very wet fillings.
Optimal Storage Solutions for Unbaked and Fully Set Bases
If you prepare the crust ahead of time, cover the unbaked version tightly with plastic wrap and refrigerate for up to two days. If fully set (after chilling), it will hold beautifully in the fridge for up to five days, ready for filling.
Flavor Twists: Incorporating Espresso or Spices for Depth
To deepen the chocolate profile without altering the texture drastically, incorporate flavor enhancers during the dry-crushing stage. A teaspoon of instant espresso powder dissolved into the melted butter, or 1/2 teaspoon of ground cinnamon mixed with the crumbs, adds sophisticated complexity to your Oreo Cookie Crust .
Scaling Guide: Adjusting Ratios for Mini Tarts and Deep Dish Pies
When scaling down for mini tarts (using standard muffin tins), reduce the cookie count to about 6 cookies per tin and use about 1.5 teaspoons of melted butter. For a larger Oreo Cookie Crust 9x13 pan, scale the recipe up by multiplying all ingredients by 1.5 or 2, depending on the desired depth, ensuring you use enough butter to thoroughly coat all the extra crumbs.
Elevating Your Creation: Customizing the Classic Oreo Cookie Crust
While the classic two-ingredient base is divine, customization is where you truly shine as a baker. Think beyond the basic chocolate wafer to craft unique pairings.
For those seeking a contrasting texture, try folding in 1/2 cup of finely chopped pecans or walnuts after the butter is incorporated but before pressing. This creates a delightful crunch within the otherwise smooth structure.
Another excellent twist for a holiday dessert is to use a mix of Oreos and peppermint cookies to create a festive base perfect for a chocolate mousse pie. Remember, mastering this simple Oreo Cookie Crust unlocks endless possibilities for your dessert repertoire.
Recipe FAQs
How finely do the Oreos need to be crushed for the Oreo Cookie Crust?
You're aiming for a texture like fine, wet sand. If you're using a food processor, pulse until no large chunks remain. If you’re doing it the old-fashioned way with a rolling pin, make sure you crush them until they are nearly dust this ensures the butter binds everything together properly, avoiding a crumbly mess later.
Can I make this Oreo Cookie Crust ahead of time, or does it need to be filled immediately?
Absolutely, this crust is brilliant for advance prep! Once fully chilled (or pre-baked and cooled), the crust will keep happily in the fridge, tightly covered, for up to 2 days. If you’ve pre-baked it, it can even be stored at room temperature for a day, though chilling is always best for sturdiness.
My crust seems too dry/crumbly after pressing it into the pan what’s the trick?
Ah, the dreaded crumbly situation! That means you likely need a little more binder. Gently stir in an extra teaspoon of melted butter at a time until the mixture holds together when you squeeze it, much like you would when building a decent sandcastle. Don't rush this step; moisture is key!
Is it really necessary to chill the Oreo Cookie Crust before filling it, or can I skip straight to the freezer?
Chilling in the fridge for 30 minutes is highly recommended, even if your recipe calls for a no-bake finish. This allows the melted butter to re-solidify, locking those crumbs into place so they don't slough off when you pour in a wet filling.
The freezer is fine in a pinch, but chilling yields a better, less dense base.
I'm making a baked cheesecake; should I pre-bake this Oreo crust?
For a baked cheesecake, a quick 8-10 minute pre-bake at 350°F (175°C) is a cracking idea. It helps set the butter and prevents the bottom from getting soggy while the filling cooks. Just make sure you let it cool completely before adding your filling mixture, otherwise, you'll melt the butter right back out!
Perfect Nobake Oreo Crust

