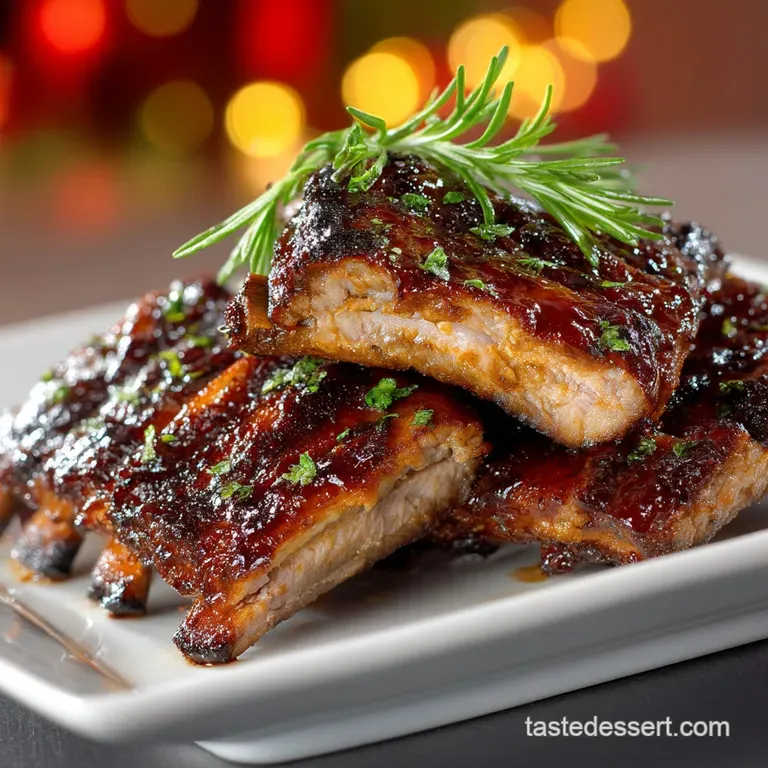
Bbq Baby Back Ribs: Low Slow Oven Method
- The Ultimate Low & Slow BBQ Baby Back Ribs: Oven to Grill Method
- Mastering the Maillard Reaction and Collagen Breakdown
- Essential Ingredients for Magnificent BBQ Ribs
- Step-by-Step: Preparing and Cooking Your Baby Back Ribs
- Chef Julian’s Troubleshooting Guide and Expert Hacks
- Perfect Pairings: What to Serve Alongside Your BBQ Feast
- Storing, Freezing, and Reheating Leftover Ribs
- Recipe FAQs
- 📝 Recipe Card
The Ultimate Low & Slow BBQ Baby Back Ribs: Oven to Grill Method
That unmistakable aroma of dark sugar, smoke, and vinegar hitting the heat it’s pure magic. The moment you pull those glistening racks of BBQ Baby Back Ribs from the oven, you’ll immediately forget every dry, chewy mistake you made back when you were learning to grill.
These perfect BBQ Baby Back Ribs are truly fall off-the-bone, sticky, and absolutely worth the minimal effort.
Honestly, this oven-to-grill method is a genius move for busy weekends or big gatherings, guaranteeing tenderness without forcing you to babysit a smoker all day long. It minimizes the fuss, allows you to manage the timing easily, and makes creating truly amazing BBQ Baby Back Ribs completely stress free.
We are taking the guesswork out of the long, low cook and focusing entirely on flavour layering.
Ready to ditch the dry pork and embrace the juicy, bone slipping perfection that defines competition worthy barbecue? Let’s crack on and make the ultimate BBQ Baby Back Ribs that will make your neighbours insanely jealous, setting the gold standard for every summer cookout from here on out.
Mastering the Maillard Reaction and Collagen Breakdown
The secret to magnificent BBQ Baby Back Ribs isn’t complicated; it's just science applied slowly. Pork ribs have a lot of connective tissue (collagen), and if you hit that tissue with high, fast heat, it seizes up and turns tough that’s how you get tire rubber ribs.
We need sustained, low heat to gently dissolve that collagen into luscious gelatin, which is what gives the meat that moist, satisfying mouthfeel.
Why We Choose Oven Steaming for Tender Ribs
The oven steaming process is our fail safe insurance policy for tenderness. By sealing the racks in heavy duty foil along with a splash of cider vinegar, we create a tiny, humid sauna.
This traps all the essential moisture inside the packet, allowing the internal temperature of the pork to rise gently over several hours. This is how you achieve perfectly tender BBQ Baby Back Ribs every single time, regardless of the weather outside.
Chef Julian's Blueprint for a Perfect Summer Rack
My blueprint focuses on three essential stages: the Rub, the Steam, and the Bark. We use a high sugar, smoky rub (The Rub) to start building flavour depth immediately. Then we steam them low and slow in the oven until the collagen melts (The Steam).
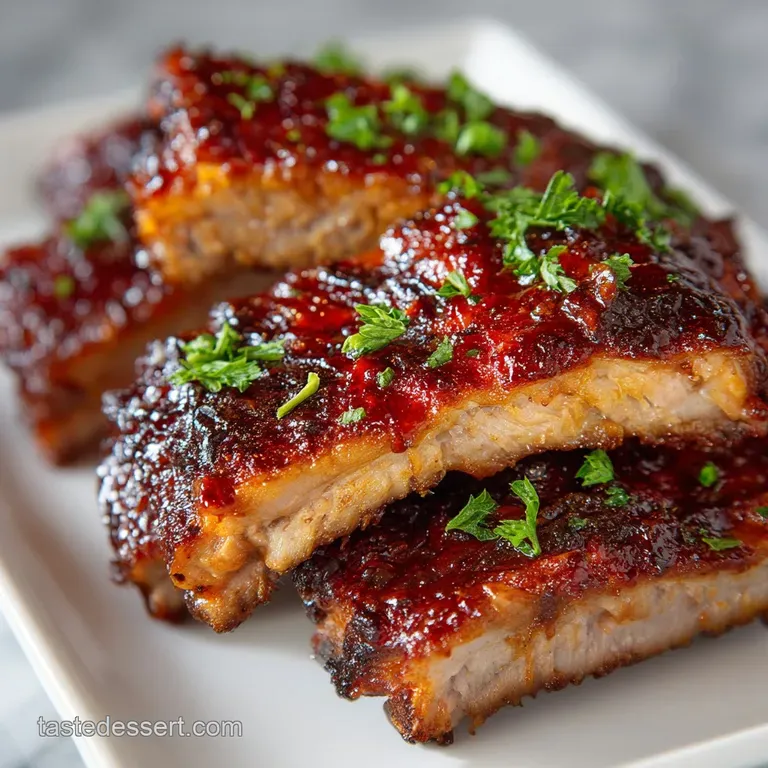
Finally, we hit the glorious racks with direct heat to caramelize the sweet BBQ sauce into a sticky, glossy bark. This method delivers the texture everyone craves when talking about great BBQ Baby Back Ribs.
The Difference Between "Competition Style" and "Fall Off-The-Bone"
This recipe delivers "fall off-the-bone" tenderness, and I am zero percent sorry about that. Competition BBQ is often judged on the ribs having a little tug —the meat should stay attached to the bone, even though it’s fully cooked.
But let’s be real, when you're making BBQ Baby Back Ribs for your family, you want that moment where the bone slides clean out of the pork. That’s what we are achieving here.
The Magic of Wrapping: Steaming Meat to 200°F
Wrapping the ribs, often called the “Texas Crutch,” is non-negotiable for this oven based method. The wrap essentially pushes the ribs through the stall phase where meat temperature plateaus. We are aiming for an internal temperature around 200°F (93°C) for maximum tenderness.
That intense, low and slow steam ensures your BBQ Baby Back Ribs will be juicy and ready to accept that final, glorious glaze.
Building Depth: Layering the Dry Rub and Sauce
Flavour layering is the mark of brilliant cooking. We start with a robust, homemade dry rub that has big salt, big pepper, and lots of smoked paprika. Trust me, don’t skimp on the rub. The spices penetrate the meat during the initial rest and form a foundational flavour.
The sauce, applied only at the very end, is the sticky, sweet, caramelised crowning glory of these fantastic BBQ Baby Back Ribs.
Achieving the Perfect Bark: Finishing on High Heat
The "bark" is that beautiful, dark, crispy exterior layer created by the Maillard reaction (the non-enzymatic browning of sugars and proteins). After the long, gentle steam, the meat is wet. We need to dry the surface quickly and caramelise the sugar in the BBQ sauce.
This happens when the ribs hit the grill or broiler for a quick, hot final blast. This over high heat kiss is essential for the best BBQ Baby Back Ribs you will ever taste.
Essential Ingredients for Magnificent BBQ Ribs
Selecting the Right Cut of BBQ Baby Back Ribs
When you’re at the butcher, you’ll see two main types: Spare Ribs (larger, meatier, from the belly) and Baby Back Ribs (smaller, leaner, from the upper rib cage near the loin). I prefer BBQ Baby Back Ribs for their quicker cooking time and uniform tenderness. Look for racks that have good marbling and consistent thickness across the rack. If you choose the larger spare ribs, you’ll need to increase the oven cook time by at least an hour. If you are ever tempted to go for beef, my BBQ Short Ribs Recipe: Melt-in-Your Mouth Oven Braised Beef uses a similar low and slow technique with incredible results.
The Secret Formula: Building the Custom Dry Rub
A homemade rub is the soul of any excellent BBQ Baby Back Ribs recipe. My formula focuses on balancing sweetness (brown sugar), heat (cayenne), smoke (paprika), and seasoning (salt, garlic, onion).
| Ingredient | Role | Substitution |
|---|---|---|
| Dark Brown Sugar | Sweetener, aids caramelisation | Coconut sugar or light brown sugar |
| Smoked Paprika | Colour, authentic smoke flavour | Liquid smoke (a few drops) + regular paprika |
| Kosher Salt | Seasoning, moisture retention | Fine sea salt (use 2/3 the amount) |
| Apple Cider Vinegar | Steaming liquid, acid | White wine vinegar or beer |
Upgrading Your Sauce: store-bought vs. Homemade Barbecue
You absolutely can use your favourite store-bought BBQ sauce, but choose a thick, high-quality one that you truly love the flavour will dominate. I love incorporating a bit of bourbon into the glaze for depth, which is a trick I learned while perfecting my Smoked Meatloaf: Moist, Wood Fired Flavor with Bourbon BBQ Glaze recipe. If you want something tangier and thinner to accompany the sticky sauce, you could whip up a batch of Carolina BBQ Sauce: Authentic Eastern Vinegar Mop Recipe for dipping.
Necessary Tools for the Oven-to-Grill Method
You don’t need a fancy $5,000 smoker for incredible BBQ Baby Back Ribs; your oven does the heavy lifting. You definitely need heavy duty aluminium foil if you only have the thin stuff, double it up or you risk a leak.
A good set of sturdy metal tongs is also essential for moving the delicate racks after they’ve been steamed; they will be very fragile.
step-by-step: Preparing and Cooking Your Baby Back Ribs
Pre-Preparation: Removing the Silver Skin Membrane
This is where many home cooks fail, but it's the most critical step for tender BBQ Baby Back Ribs. The silver skin is a tough, unpleasant membrane on the bone side of the rack. If you leave it on, the meat will never be truly tender and will be annoyingly chewy.
Crucial Tip: Use a dull butter knife to lift the membrane from the bone corner, then grab it firmly with a dry paper towel or kitchen cloth. Pull slowly and evenly all the way down the rack until it comes completely off. This makes the final product exponentially better.
The Low & Slow Cook: Oven Baking for Maximum Tenderness
Once the membrane is gone and the dry rub has been applied, we seal the racks tightly into foil packets with the cider vinegar and water mixture. The oven should be set to 275°F (135°C). This low temperature allows the fat to render slowly and the collagen to break down into gelatin over a 3 hour period.
You are essentially braising them in their own steam and juices, setting the stage for perfectly juicy BBQ Baby Back Ribs.
The Final Glaze Finish: Applying the Sauce and Caramelizing
After three hours, the ribs will look pale but feel incredibly tender. This is our window to introduce the high heat and the sauce. Apply a liberal coat of your sticky BBQ sauce glaze.
We finish these magnificent BBQ Baby Back Ribs on the grill or under the broiler, ensuring that the sugars in the sauce brown quickly, forming that beautiful, dark, sticky bark without drying the meat underneath.
When to Switch from Oven to Broiler/Grill
The switch happens only when the ribs pass the "tenderness test" when the meat has pulled back about a quarter inch from the bones. Once this happens (around 3 hours 15 minutes), the ribs are ready for the intense heat of the grill or broiler.
Never sauce them before they go into the foil packet; you will just end up with a burnt, bitter crust. The finishing heat should be high around 400°F (200°C) to caramelize fast.
Chef Julian’s Troubleshooting Guide and Expert Hacks
Mistake: Why Your Ribs Are Dry (Too High, Too Fast)
If your BBQ Baby Back Ribs are dry, 99% of the time, the oven temperature was too high or the foil packet was compromised. Collagen needs time and humidity to dissolve. If you bake them at 350°F (175°C), the moisture evaporates too quickly and the muscle fibres seize up.
Stick rigidly to the 275°F (135° C) oven temperature. That low heat is the secret weapon for these BBQ Baby Back Ribs.
The "Bend Test" for Judging Doneness
Forget poking them with a fork that just lets the moisture escape. The best way to judge perfect doneness is the bend test. Using tongs, pick up the rack of ribs from the centre.
If the rack bends significantly and the edges start to crack, but the rack doesn't totally break in half, they are ready to come out of the oven for the final glaze. If they snap cleanly, you’ve cooked them just a touch too long, but don't worry, they will still be delicious BBQ Baby Back Ribs.
Resting Strategy: Slicing Perfectly After the Cook
Don't skip the rest! Once you pull the glazed BBQ Baby Back Ribs off the grill or out of the oven, they need about 10 minutes, lightly tented with foil. This resting period allows the juices (that gelatin we worked so hard to create) to redistribute evenly back into the muscle tissue.
Slicing immediately will cause those glorious juices to spill all over the cutting board, leaving your BBQ Baby Back Ribs less moist than they could be.
Perfect Pairings: What to Serve Alongside Your BBQ Feast
These rich, smoky BBQ Baby Back Ribs need sharp, clean sides to cut through the fat and sweetness of the sauce. Think cool, crunchy, and acidic.
Classic Sides That Complement the Tangy Sauce
- Creamy Slaw: A vinegary or mayonnaise based coleslaw is absolutely essential. The crunch provides a texture contrast, and the vinegar cuts through the rich pork fat.
- Cornbread: Moist, slightly sweet cornbread is the perfect absorbent side dish to mop up any stray bits of sticky sauce from your plate.
- Tangy Beans: Slow cooked baked beans with a molasses kick are a classic pairing that works beautifully with all BBQ Baby Back Ribs.
The Importance of Acid: Pairing with Slaw or Pickles
Acid is the unsung hero of barbecue. When eating sticky, fatty, sweet BBQ Baby Back Ribs, your palate gets coated and needs refreshment. Serving lots of pickles, pickled onions, or a sharply dressed green salad provides that necessary punch of acid.
It keeps every bite of your BBQ Baby Back Ribs tasting fresh and vibrant, stopping the meal from becoming too heavy.
Storing, Freezing, and Reheating Leftover Ribs
The Ultimate Way to Reheat Without Drying Out
Yes, you can absolutely store and reheat these delicious BBQ Baby Back Ribs, but you must do it carefully to retain the tenderness. Leftovers will keep in the fridge for 3 4 days in an airtight container.
When reheating, avoid the microwave! Microwaving will turn the meat tough instantly.
- Wrap: Tightly wrap the sliced or whole leftover ribs in a single layer of aluminium foil.
- Add Moisture: Add 1 tablespoon of water or apple juice inside the foil packet before sealing.
- Bake Low: Reheat in a preheated oven at 300°F (150°C) for 15– 20 minutes until piping hot. The trapped moisture steams the ribs back to their original juicy state.
For longer storage, freeze cooled, unsauced racks (or fully cooked, sauced racks) tightly wrapped in plastic wrap and then foil. They will last 2 3 months. Thaw overnight in the fridge before reheating using the oven method above.
This easy method ensures that even reheated BBQ Baby Back Ribs retain that beautiful tender texture. Enjoy the fruits of your low and slow labour!

Recipe FAQs
Why are my ribs tough and dry after the initial oven bake?
This usually indicates a lack of moisture during the low-and-slow phase or insufficient cook time. Ensure the ribs are tightly wrapped in foil or placed in a completely covered pan to allow the meat to steam in its own juices, which is essential for breaking down tough connective tissue.
Cooking at too high a temperature can also cause moisture loss, so verify your oven temperature is accurate.
Is it absolutely necessary to remove the silver skin (membrane)?
Yes, removing the membrane on the bone side is highly recommended for the best texture and flavor. The silver skin doesn't break down during cooking, resulting in chewy ribs, and it prevents the dry rub and moisture from properly penetrating the meat, resulting in duller flavor.
How do I know when the ribs are truly tender before the grilling stage?
A reliable indicator is the "bend test." When you pick up the rack with tongs, the meat should bend significantly in the middle, and the surface meat should just begin to crack without completely falling apart. If the meat resists the bend, they need more time in the oven.
Can I use this low-and-slow method with St. Louis style spare ribs instead of baby backs?
Absolutely, but you will need to adjust the cooking time slightly. St. Louis style ribs are larger, thicker, and contain more fat than baby backs, so add about 45 to 60 minutes to the initial oven cooking time to achieve that desirable level of tenderness. The finishing steps on the grill remain the same.
When should I apply the BBQ sauce to prevent it from burning?
Apply the BBQ sauce only during the final stage of cooking the high heat grill or broiler finish. Since most BBQ sauces contain high amounts of sugar, applying them too early will cause the sugars to burn and caramelize bitterly during the long, low-temperature oven cook.
Can I prepare the ribs ahead of time, and how should I store them?
You can certainly cook the ribs through the low-and-slow oven stage up to two days in advance. Let them cool completely, then wrap them tightly in foil or plastic and refrigerate. When ready to serve, reheat them gently in a 300°F oven until warmed through before moving to the grill for the sauce application and crisping.
What if I don't have a broiler or an outdoor grill for the final step?
If you lack a grill or broiler, you can still finish the ribs using a very hot oven. Increase your oven temperature to 425°F (220°C), brush the ribs heavily with sauce, and bake them uncovered for 8 10 minutes, or until the sauce is bubbly and slightly caramelized.
Keep a close eye on them to prevent the sauce from burning.
Oven Baked Bbq Baby Back Ribs

Ingredients:
Instructions:
Nutrition Facts:
| Calories | 654 kcal |
|---|---|
| Protein | 70.1 g |
| Fat | 34.7 g |
| Carbs | 14.1 g |
