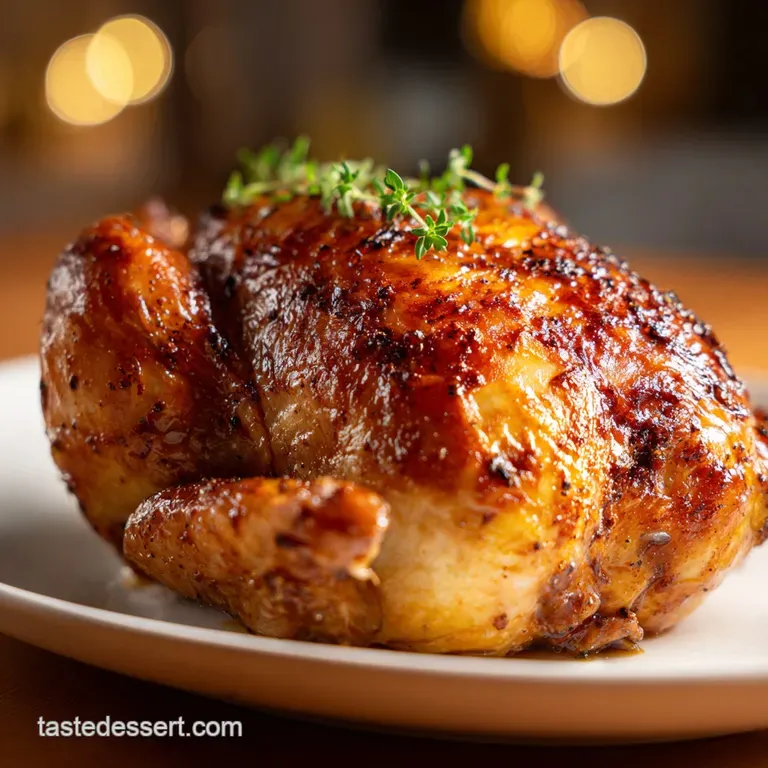
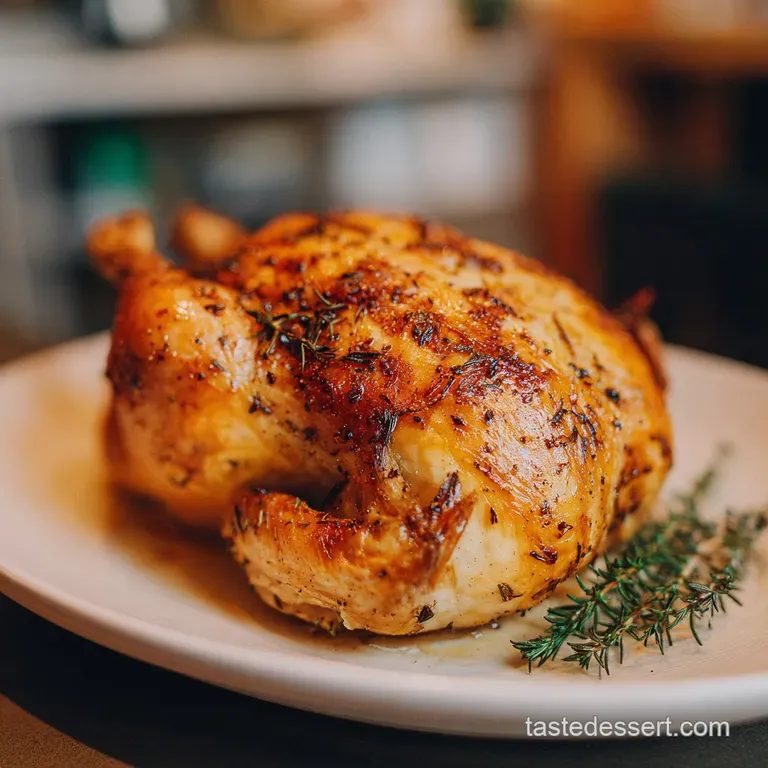
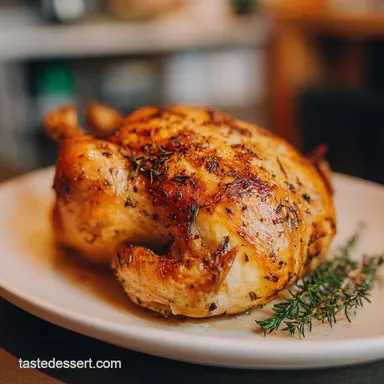
Perfect Simple Roast Chicken: Crispy and Succulent
- Time: Active 15 minutes, Passive 60 minutes, Total 75 minutes
- Flavor/Texture Hook: Shattering crispy skin with velvety, tender meat
- Perfect for: Cozy Sunday dinners or beginner meal prep
- Achieving the Perfect Simple Roast Chicken
- Why This Golden Bird Always Wins
- The Hidden Logic of a Crispy Crust
- Quick Facts for Your Sunday Dinner
- Choosing Quality Components for Maximum Flavor
- The Essential Tools for a Golden Finish
- Step by Step to a Shattering Crust
- Solving the Mystery of Soggy Skin
- Creative Twists for Your Family Table
- Storing Your Leftovers for Tomorrow’s Lunch
- Adding Vibrant Colors to Your Platter
- CRITICAL Sodium Alert!
- Recipe FAQs
- 📝 Recipe Card
Achieving the Perfect Simple Roast Chicken
Forget every complicated French technique you have ever heard about flipping the bird every twenty minutes or bathing it in butter every ten. You don't need a vertical roaster, you don't need a background in culinary arts, and you certainly do not need to wash your chicken in the sink (please, just don't).
The biggest myth in the kitchen is that a beautiful roast requires constant attention. In reality, the more you poke and prod the bird, the more heat escapes the oven, and the more likely you are to end up with a dinner that is unevenly cooked and underwhelming.
I used to think that basting was the secret to moisture, but I learned the hard way that pouring liquid over the skin just turns it into a rubbery, soggy mess. If you want that delightful, parchment like crackle when your knife hits the breast, you have to let the oven do its job undisturbed.
We are treating this almost like a loaf of homemade bread giving it the right environment, the right heat, and then stepping away to let the magic happen. It is truly a transforming experience when you realize that simplicity is actually the most effective tool in your kitchen arsenal.
Today, we are stripping back the noise to focus on what actually matters: dry skin, high heat, and aromatics that work from the inside out. This isn't just a meal; it's a foundational skill that will make you feel like a pro every time you hear that first "crunch" as you carve into the thigh.
We are going to walk through the sensory cues the way the kitchen begins to smell like a rustic herb garden and the specific sizzle of the chicken fat hitting the onions so you know exactly when your masterpiece is ready to hit the table.
Why This Golden Bird Always Wins
There is something deeply satisfying about the physics of roasting a whole chicken in a heavy pan. It isn't just about heat; it's about how that heat is managed and distributed around the bird.
When we place the chicken on a bed of thick onion rounds, we aren't just adding flavor; we are creating a natural convection environment that allows the hot air to circulate under the bird, preventing the bottom from steaming in its own juices.
- Surface Evaporation: Removing every trace of moisture from the skin allows the heat to immediately start rendering the subcutaneous fat instead of wasting energy evaporating surface water.
- Internal Steam Infusion: Stuffing the cavity with lemon and garlic creates a localized "steam room" that seasons the meat from the inside out while keeping the breast tissue from drying out.
- Aromatic Foundation: The onion rounds caramelize in the dripping chicken fat, creating a savory barrier that prevents the delicate skin on the bottom from sticking to the pan.
- Conductive Heat: Using a cast iron skillet provides intense, steady heat from the bottom, which helps cook the dark meat of the thighs more quickly than a thin baking sheet would.
| Premium | Budget | Flavor Impact | Savings |
|---|---|---|---|
| Organic Air Dried Chicken | Standard Grocery Chicken | Air dried is slightly crispier | Save $10-15 |
| Fleur de Sel | Fine Table Salt | Flaky salt adds a nice crunch | Save $5 |
| Fresh Organic Herbs | Dried Poultry Seasoning | Fresh has a more vibrant, floral aroma | Save $3 |
When choosing your bird, look for one that is plump and has a creamy, yellowish hue to the skin. This usually indicates a healthy fat content, which is what we need for that golden brown transformation. If you're looking for another way to use up chicken later in the week, my Rich Silky Chicken Alfredo is a fantastic way to turn leftovers into a completely different homemade delight.
The Hidden Logic of a Crispy Crust
To understand why this specific method produces such a delightful result, we have to look at how different components interact under the high heat of the oven. It is a bit like baking a cake; if your ratios or temperatures are off, the structure fails.
Here, the "structure" is that beautiful, amber colored skin that protects the juicy meat underneath.
| Component | Science Role | Pro Secret |
|---|---|---|
| Flaky Sea Salt | Moisture Extraction | Salt the cavity too; it seasons the meat through the bone. |
| Lemon Halves | Acidic Tenderizing | Poking the lemon with a fork first releases juices faster. |
| Yellow Onion | Thermal Buffer | Thick 1 inch slices keep the bird high enough to "air fry." |
One thing most people skip is letting the bird sit out for 30 minutes before it even sees the oven. If you put a cold chicken into a hot oven, the outside overcooks before the inside can even start to warm up.
By bringing it toward room temperature, you ensure the entire bird reaches that safe internal temperature of 165°F (74°C) without the breast meat turning into sawdust.
It’s a simple step, but it’s the difference between a "fine" dinner and a "how did you make this?" dinner.
Quick Facts for Your Sunday Dinner
Before we get our hands messy, let's look at the hard numbers. Precision is your best friend when you're aiming for a perfect simple roast chicken. You can't just "wing it" when it comes to timing, or you'll end up with a bird that's either underdone at the joint or sadly parched.
- Weight: 3.5 4 lbs (The sweet spot for even cooking).
- Oven Temp: 400°F (200°C) is generally ideal for this weight.
- Internal Temp: 165°F (74°C) measured in the thickest part of the thigh.
- Resting Time: 15 minutes minimum (Don't skip this!).
| Method | Time | Texture | Best For |
|---|---|---|---|
| Cast Iron (This Recipe) | 60 minutes | Maximum crispness | Authentic Sunday Roast |
| Dutch Oven (Lid On) | 75 minutes | Fall off-the bone | Shredded chicken/tacos |
| Sheet Pan | 50 minutes | Evenly browned | Quick weeknight meals |
The rest time is probably the most ignored part of the process, but it is vital. As the chicken sits, the fibers of the meat relax and reabsorb the juices. If you cut into it immediately, all that liquid the stuff that makes the meat velvety will just pour out onto the cutting board, leaving you with dry meat.
Patience is an ingredient here just as much as the salt is.
Choosing Quality Components for Maximum Flavor
For this perfect simple roast chicken, we are using a very short list of items, so each one needs to carry its weight. I always reach for Extra Virgin Olive Oil because it has a lower smoke point than some oils, which actually helps with the browning process without burning the skin too quickly.
- 1 Whole Chicken: Approx. 3.5 4 lbs. Ensure the giblets are removed from the cavity.
- 2 tbsp Extra Virgin Olive Oil: Provides the fat needed to conduct heat across the skin. Why this? It creates a more flavorful, golden crust than butter which can burn.
- 1.5 tbsp Flaky Sea Salt: The large crystals draw out moisture and stay on the surface for crunch. Why this? Table salt is too fine and can make the bird overly salty.
- 1 tsp Freshly Cracked Black Pepper: Adds a necessary bite to cut through the fat.
- 1 Whole Lemon: Halved. Why this? The steam provides acidity that keeps the breast meat bright and tender.
- 1 Head of Garlic: Sliced crosswise. No need to peel; the skins add flavor too.
- 5 Sprigs of Fresh Rosemary or Thyme: These release oils that perfume the entire house.
- 1 Large Yellow Onion: Thickly sliced into rounds to act as your "rack."
If you find yourself short on time and can't do a full roast, you can always pivot to a One Pan Chicken Delight, which gives you that same savory satisfaction in half the time. But for today, let's stick to the classic whole bird method.
| Original Ingredient | Substitute | Why It Works |
|---|---|---|
| Lemon | Small Orange | Provides a sweeter, floral acidity; great for a citrus twist. |
| Rosemary | Dried Oregano | Use 1 tbsp instead. Note: Flavor will be more "earthy" and less "piney." |
| Yellow Onion | Large Shallots | Sliced in half, they provide a similar lift with a milder, sweeter flavor. |
The Essential Tools for a Golden Finish
You don't need a kitchen full of gadgets, but a few specific pieces of equipment will make your life much easier and your chicken much crispier.
- 12 inch Cast Iron Skillet: This is the MVP. It holds heat like nothing else and develops a beautiful fond (those brown bits on the bottom) from the onions.
- Instant Read Meat Thermometer: This is non negotiable. It is the only way to know for sure that your chicken is cooked perfectly without cutting into it and losing the juices.
- Paper Towels: You will need more than you think. The goal is "bone dry."
- Kitchen Twine (Optional): If you want to tie the legs together for a more "presented" look, though it isn't strictly necessary for flavor.
Chef's Tip: If you don't have a cast iron skillet, a heavy stainless steel roasting pan will work, but avoid those thin, disposable aluminum pans. They don't distribute heat well and will likely lead to scorched onions and pale chicken skin.
step-by-step to a Shattering Crust
Now we get to the fun part. Put on your favorite playlist, clear your workspace, and let's get roasting. This is where you transform these raw ingredients into a homemade masterpiece.
- Remove the chicken from the refrigerator 30 minutes before cooking to bring it to room temperature. Note: This ensures the meat cooks evenly from edge to center.
- Preheat your oven to 400°F (200°C) and place the rack in the lower middle position.
- Use paper towels to aggressively pat the entire bird including the cavity until bone dry to ensure a crispy skin. You want the skin to feel like parchment paper.
- Stuff the lemon halves, sliced garlic head, and fresh herbs into the chicken cavity. Note: Don't over stuff; air needs to circulate slightly.
- Rub the extra virgin olive oil all over the skin and season generously with flaky sea salt and black pepper. Don't forget the underside and wings!
- Place the thick onion rounds in the center of a 12 inch cast iron skillet to act as a natural roasting rack.
- Set the chicken directly on top of the onions, breast side up.
- Roast in the preheated oven for 60 minutes. You will start to hear a vigorous sizzle around the 30 minute mark.
- Check the internal temperature at 60 minutes. It should reach 165°F (74°C) at the thickest part of the thigh without touching the bone.
- Remove from the oven and let the chicken rest in the skillet for 15 minutes before carving. This allows the juices to redistribute and the onions to finish soaking up the fat.
Solving the Mystery of Soggy Skin
Nothing is more heartbreaking than pulling a chicken out of the oven only to find the skin is limp and pale. Usually, this is a result of steam. If there is too much moisture in the pan or the oven, the skin can't "fry" in the oil and fat.
Why is my skin soggy?
This usually happens because the bird wasn't dried properly or the oven temperature was too low. If you see liquid pooling in the bottom of the bird rather than fat, it’s a sign of steaming.
Next time, try the "open fridge" method where you leave the salted chicken uncovered in the fridge for a few hours before roasting.
| Problem | Root Cause | Solution |
|---|---|---|
| Pale Skin | Oven temp too low | Increase to 400°F and check oven calibration. |
| Dry Breast Meat | Overcooked | Use a thermometer; pull at 160°F (it will rise to 165°F). |
| Scorched Onions | Slices were too thin | Ensure onion rounds are at least 1 inch thick. |
Why is the meat tough?
If the meat feels "stringy" or tough, it likely didn't rest long enough. When meat is hot, the muscle fibers are tight. Resting lets them loosen up. Another culprit could be a bird that was "enhanced" with a salt solution at the factory always try to buy "natural" chicken whenever possible for the best homemade texture.
Common Mistakes Checklist
- ✓ Forgot to remove the bag of giblets (happens to the best of us!).
- ✓ Didn't pat the cavity dry (internal moisture ruins external crunch).
- ✓ Tucked the wings too tightly (prevents the "armpit" area from browning).
- ✓ Carved too early (all the "liquid gold" juice will run away).
- ✓ Used cold oil on a cold bird (let everything temper slightly).
Creative Twists for Your Family Table
Once you've mastered the basic perfect simple roast chicken, you can start playing with the flavor profiles. It is like having a base cake recipe and changing the frosting. The technique stays the same, but the "vibe" changes completely.
For an Easy Roast Chicken with Vegetables
You can surround the onion "rack" with chunks of carrots, potatoes, and parsnips. Just toss them in a little oil and salt first. They will roast in the chicken drippings, becoming the most delightful side dish you’ve ever tasted.
Just make sure not to overcrowd the pan, or you’ll back into that "steaming" problem we talked about earlier.
For a Spicy Mediterranean Twist
Swap the rosemary for dried oregano and add a teaspoon of smoked paprika and a pinch of red pepper flakes to your oil rub. Stuff the cavity with lemon and halved shallots instead of white onion. It’s a transforming flavor profile that feels like a vacation on a plate.
If you find you have leftover bones, don't you dare throw them away! You can boil them down with some veggie scraps to make a homemade stock that puts the store-bought stuff to shame. It's the ultimate zero waste move for a home cook.
Storing Your Leftovers for Tomorrow’s Lunch
If you actually have leftovers (a rare occurrence in my house), they are incredibly versatile. You can keep the chicken in the fridge for up to 4 days. I recommend removing the meat from the bones while it is still slightly warm, as it comes off much easier.
- Fridge: Store in an airtight container for 3-4 days. To keep it moist, drizzle a little of the pan drippings over the meat before sealing.
- Freezer: Shred the meat and freeze in bags for up to 3 months. This is perfect for quick soups or tacos later on.
- Zero Waste: Save the caramelized onions! They are incredible on a sandwich the next day or chopped up into an omelet. Also, save the "schmaltz" (the rendered fat in the pan) to roast potatoes later in the week.
To reheat, avoid the microwave if you can. It turns the skin into rubber. Instead, put the chicken in a low oven (300°F) with a splash of water or broth and cover it with foil until warmed through. If you want to crisp the skin back up, a quick 2 minute blast under the broiler will do the trick.
Adding Vibrant Colors to Your Platter
A roast chicken can sometimes look a bit "brown on brown." To make it a true centerpiece, we want to focus on color balance and garnish strategy. Think of it like finishing a dessert with a dusting of powdered sugar it just makes everything pop.
- The Green Accent: Fresh sprigs of parsley or extra rosemary. Add these after the bird has rested and is on the serving platter. The bright, forest green against the amber skin is a classic look.
- The Acidic Yellow: Fresh lemon wedges. Don't use the ones that were inside the chicken (they’ll be mushy). Use fresh, bright yellow wedges tucked around the sides. They provide a color pop and a fresh squeeze of juice for the diners.
- The Jewel Tone: Pomegranate seeds or halved red grapes. If you’re feeling fancy, scattering a handful of these around the base adds a delightful sweetness and a stunning ruby color that makes the platter look professional.
When you bring the skillet to the table, make sure the onions are visible. Those deep, mahogany colored rings are a signal to your guests that this bird was cooked with care. It's those little details the color, the aroma, and that final sprinkle of flaky salt that turn a simple roast into a memorable homemade feast.
Now, get in there and enjoy that first, perfect, crispy bite!

CRITICAL Sodium Alert!
1180 mg 1180 mg (51% 51%)
The American Heart Association recommends a limit of 2,300mg of sodium per day, with an ideal limit of 1,500mg for most adults.
Personalized Tips to Drastically Reduce Sodium in Your Roast Chicken
-
Halve the Flaky Sea Salt-25%
Reducing the 1.5 tbsp of flaky sea salt to 0.75 tbsp (or 2.25 tsp) will significantly cut down sodium without sacrificing crispiness. You can also use a mix of coarse salt and herbs for seasoning.
-
Leverage Lemon and Aromatics-10%
The lemon halves, garlic slices, and onion rounds provide immense flavor. Rely on these natural flavor enhancers and the pepper to compensate for reduced salt. You can also add more of these aromatics.
-
Boost with Fresh Herbs
While not directly impacting sodium, incorporating more fresh rosemary or thyme can amplify the overall flavor profile, making the dish more satisfying and less reliant on salt.
-
Add a Pinch of Spice-5%
Introduce a small amount of red pepper flakes or a dash of hot sauce (ensure it's low sodium) for a subtle kick that can distract from the absence of salt.
Recipe FAQs
How to get the skin extra crispy?
Aggressively pat the bird dry with paper towels. Moisture is the enemy of crispiness, so ensuring the skin is bone dry before you rub it with extra virgin olive oil is the most important step for achieving that shattering crust.
Is it necessary to use a roasting rack?
No, you can use onion rounds instead. Placing thick slices of yellow onion in your 12 inch cast iron skillet acts as a natural rack, which promotes airflow under the bird while infusing the meat with flavor.
How to ensure the chicken cooks evenly?
Remove the chicken from the refrigerator 30 minutes before cooking. Bringing the bird closer to room temperature prevents the outer layer from overcooking before the center reaches the safe internal temperature of 165°F (74°C).
How to tell when the chicken is finished roasting?
Use an instant read thermometer at the thickest part of the thigh. Once the temperature hits 165°F (74°C), the chicken is perfectly cooked. If you enjoyed mastering this precise temperature control, you can apply the same logic to our herbaceous turkey brine guide for larger birds.
Can I store the leftovers for later?
Yes, keep leftovers in an airtight container for up to 4 days. To keep the meat from drying out, drizzle a small amount of the pan drippings over the chicken before storing it in the refrigerator.
Should I stuff the cavity with aromatics?
Yes, use the lemon halves, sliced garlic, and fresh herbs. Placing these inside the cavity perfumes the meat from the inside out while it roasts in the oven.
Is there a trick to removing the meat after roasting?
Remove the meat from the bones while the chicken is still warm. The fibers release much more easily when the bird has just finished resting, saving you time and effort.
Perfect Simple Roast Chicken
Ingredients:
Instructions:
Nutrition Facts:
| Calories | 628 kcal |
|---|---|
| Protein | 58.4 g |
| Fat | 41.2 g |
| Carbs | 3.8 g |
| Fiber | 0.9 g |
| Sugar | 1.2 g |
| Sodium | 1180 mg |
