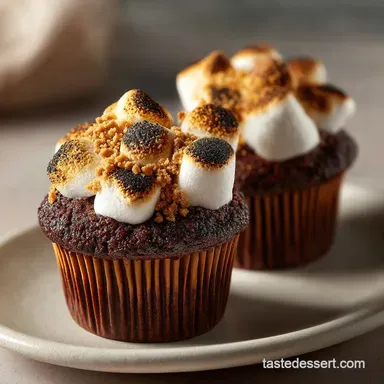
Smores Cupcakes: Toasted and Gooey
- Time:30 minutes active + 20 minutes baking = Total 50 minutes
- Flavor/Texture Hook: Velvety chocolate cake with a shatter crisp toasted topping
- Perfect for: Nostalgic dessert parties, summer potlucks, or a weekend treat for the kids
- Bringing Campfires Home with Smores Cupcakes Recipe
- The Secret Texture Tricks
- Essential Recipe Specs
- Essential Ingredient List
- Kitchen Tools Required
- Step-by-Step Baking Process
- Solving Common Baking Issues
- Troubleshooting Common Issues
- Fun Flavor Variations
- Storage and Waste Tips
- Serving and Presentation Tips
- Recipe FAQs
- 📝 Recipe Card
Bringing Campfires Home with Smores Cupcakes Recipe
That smell of charred sugar and melting chocolate is basically a time machine, right? I remember these same scents from my childhood camping trips at the lake, where the only goal of the evening was to get the marshmallow perfectly golden without it catching fire.
There was something about the smoke and the sticky fingers that made everything taste better.
But let's be real, trying to do that in a living room is a disaster waiting to happen. That's why I've been obsessed with this smores cupcakes recipe. It gives you that same velvety chocolate and gooey center, but you get to stay in your pajamas and use a kitchen torch instead of a pine log.
It's a quick win because you don't need a bonfire to get that toasted flavor.
Trust me on this, the payoff is huge. You get a cake that's moist and dark, a center that oozes marshmallow, and a top that looks like a professional pastry shop creation. We're talking about a classic dessert reimagined for your oven, and it's honestly the best way to bring the outdoors inside.
The Secret Texture Tricks
I've spent a lot of time figuring out why some cakes feel like sponges and others feel like silk. With this smores cupcakes recipe, the goal is a fudgy base that can support the weight of the fluff and the meringue without collapsing. It's all about the balance of fats and sugars.
The Air Bubble Trick: Whisking the eggs and sugar until glossy traps tiny air pockets, which keeps the cocoa powder from making the cake too dense.
The Sugar Anchor: Adding sugar slowly to the egg whites creates a stable structure that doesn't collapse when you hit it with the heat. You can read more about stabilizing egg whites over at King Arthur Baking to see why the timing matters so much.
The Fat Ratio: Using melted butter instead of creamed butter gives the crumb a tighter, more velvety feel, which is exactly what you want for a chocolate treat. If you love this kind of texture, you'd probably enjoy a Chocolate Souffle for something even airier.
The Cocoa Bloom: Sifting the cocoa with the flour prevents those annoying little bitter clumps from ruining the smooth bite of the cake. According to Serious Eats, the quality of your cocoa powder can drastically change the depth of the chocolate flavor.
| Method | Time | Texture | Best For |
|---|---|---|---|
| Oven Baked | 20 mins | Soft & Spongy | Classic party batches |
| Stovetop Steam | 15 mins | Moist & Dense | Small, fudge like portions |
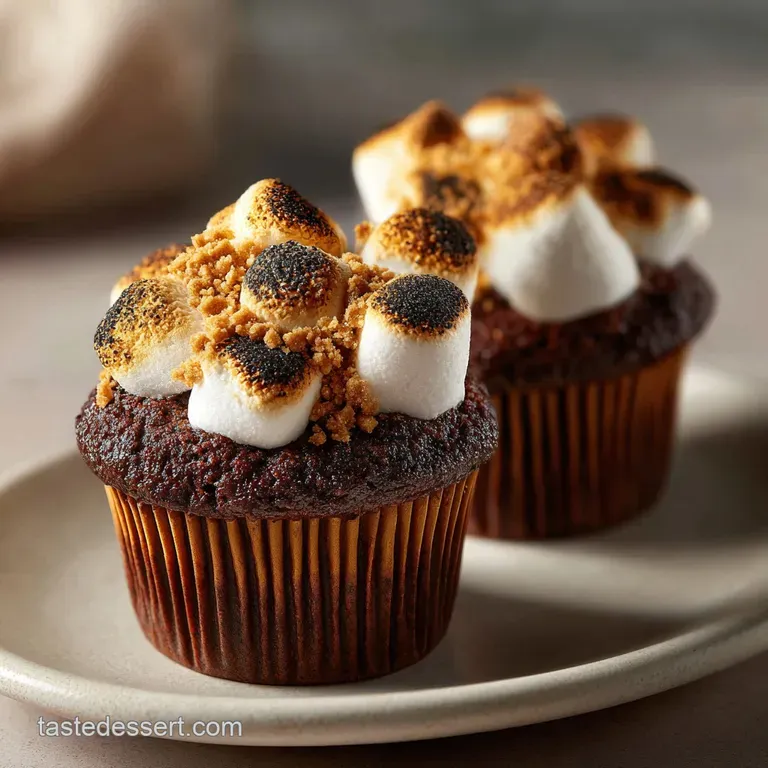
Right then, before we get into the nitty gritty, remember that the key to the "campfire" feel is the toast. Don't be afraid of a little bit of brown on those meringue peaks - that's where the nostalgia lives.
Essential Recipe Specs
When you're planning your baking flow, it helps to have a timeline. I like to treat my kitchen like a production line so I'm not scrambling while the oven is hot.
- 1. The Prep (15 minutes)
- Sifting dry ingredients, whisking the wet, and getting the liners in the pan.
- 2. The Bake & Cool (30 minutes)
- 20 minutes in the oven and about 10 minutes of cooling time so the filling doesn't melt the cake.
- 3. The Finish (15 minutes)
- Coring the centers, piping the fluff, whipping the meringue, and the final torching.
If you're in a rush, you can use store-bought chocolate frosting instead of the meringue, but you'll lose that toasted marshmallow look. If you want the full experience, stick to the plan.
Essential Ingredient List
I'm a big believer in using real butter and full fat milk. Honestly, don't even bother with low-fat cheese or skim milk in desserts - it just kills the velvety mouthfeel.
For the Chocolate Base
- 1.5 cups (190g) all purpose flourWhy this? Standard protein level for a steady rise
- 1 cup (200g) granulated sugarWhy this? Provides the necessary sweetness and moisture
- 0.5 cup (45g) unsweetened cocoa powderWhy this? Deep, dark chocolate base
- 1 tsp (5g) baking sodaWhy this? Reacts with cocoa for lift
- 0.5 tsp (3g) saltWhy this? Balances the sugar
- 2 large (100g) eggsWhy this? Binds everything together
- 0.5 cup (120ml) whole milkWhy this? Adds richness and hydration
- 0.5 cup (115g) unsalted butter, melted and cooledWhy this? Creates a moist, fudgy crumb
- 2 tsp (10ml) vanilla extractWhy this? Enhances the chocolate notes
For the Marshmallow Core - 8 oz (225g) marshmallow fluff Why this? Stays stable at room temperature - 0.25 cup (30g) crushed graham crackers Why this? Adds the classic s'mores crunch
For the Toasted Frosting
- 3 large (90g) egg whitesWhy this? The base for the light meringue
- 0.75 cup (150g) granulated sugarWhy this? Stabilizes the foam
- 0.25 tsp (1g) cream of tartarWhy this? Prevents the whites from collapsing
- 1 tsp (5ml) vanilla extractWhy this? Adds a floral sweetness
For the Garnish - 4 oz (115g) semi sweet chocolate, melted Why this? Provides a bitter contrast to the fluff - 0.5 cup (60g) graham cracker crumbs Why this? Final textural pop
| Original Ingredient | Substitute | Why It Works |
|---|---|---|
| All Purpose Flour | Almond Flour | Grain free. Note: Denser crumb, less rise |
| Whole Milk | Oat Milk | dairy-free. Note: Very similar taste, slightly thinner |
| Unsalted Butter | Coconut Oil | Vegan friendly. Note: Adds a slight coconut hint |
| Granulated Sugar | Cane Sugar | Natural alternative. Note: Nearly identical result |
One little tip from my kitchen: make sure your eggs are at room temperature. If you forgot to take them out, just pop them in a bowl of warm water for 5 minutes. It helps the batter emulsify much better.
Kitchen Tools Required
You don't need a professional kitchen for this smores cupcakes recipe, but a few tools make life a lot easier.
- Muffin Tin (12 cup): Standard size works best.
- Sifter or Fine Mesh Strainer: This is non negotiable for the cocoa powder.
- Hand Mixer or Stand Mixer: Essential for getting those meringue peaks stiff.
- Apple Corer or Small Knife: For creating the hollow center.
- Piping Bag with Round Tip: For the fluff and the meringue swirls.
- Kitchen Torch or Oven Broiler: To get that mahogany color on top.
I usually use a KitchenAid mixer for the meringue because it's faster, but a hand mixer works just fine if you have a bit more patience. Just make sure your bowl is sparkling clean - any trace of grease will stop the egg whites from peaking.
Step-by-step Baking Process
Let's crack on. This is where the magic happens. Follow these steps closely to ensure your smores cupcakes recipe turns out perfectly.
1. Building the Foundation
Preheat your oven to 350°F (175°C). Grab your sifter and combine the all purpose flour, granulated sugar, cocoa powder, baking soda, and salt. Sift them directly into a large bowl to remove any lumps. Note: Sifting cocoa is the only way to avoid bitter pockets.
Now, whisk in the eggs, milk, melted butter, and vanilla extract. Stir until the batter is glossy and smooth. You're looking for a consistency that's thick but pours easily.
Fill your cupcake liners 2/3 full. Don't overfill them or they'll spill over the edges and lose their shape. Bake for 18-22 minutes until a toothpick inserted comes out with just a few moist crumbs. Let them cool completely on a wire rack.
If you try to fill them while warm, the fluff will melt into a puddle.
2. Creating the Molten Center
Once the cakes are cool, take your apple corer or a small knife and remove the center 1 inch of each cupcake. Be gentle so you don't crack the sides.
Pipe a generous dollop of marshmallow fluff into the cavity. Now, here's the trick: press a pinch of crushed graham crackers onto the top of the fluff to seal it. This creates a barrier so the meringue doesn't sink into the cake.
3. The Final Architecture
Whip your egg whites and cream of tartar together until soft peaks form. Gradually add the granulated sugar, beating on high until stiff, glossy peaks form. Stir in the vanilla extract at the very end.
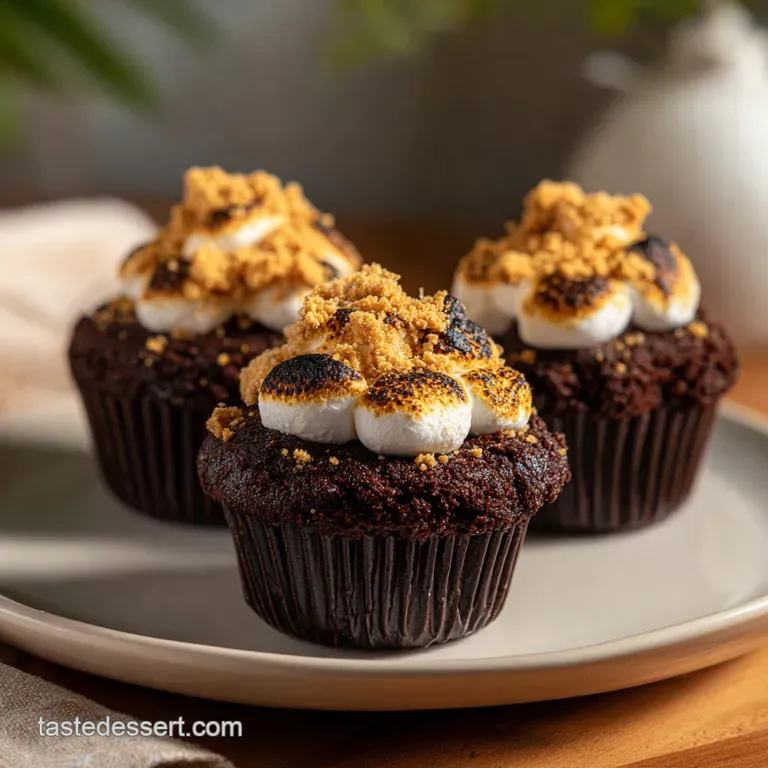
Pipe high swirls of meringue onto each cupcake. Now, for the best part: use a kitchen torch or the oven broiler to toast the peaks until they are mahogany colored. Keep a close eye on them, as meringue goes from golden to burnt in seconds.
Finally, dip the edges of the cupcake into the melted semi sweet chocolate and immediately roll them in graham cracker crumbs. This adds a final shatter crisp texture that balances the softness of the cake.
Solving Common Baking Issues
Even the best of us mess up sometimes. I once forgot the cream of tartar and my meringue turned into a sugary soup. It was a disaster, but I learned from it!
Troubleshooting Common Issues
| Issue | Solution |
|---|---|
| Why Your Centers Sink | If the middle of your cake dips, it's usually because you over mixed the batter or the oven was too cool. Over mixing develops too much gluten, which can cause the cake to collapse after it rises. |
| Why Your Toppers Weep | "Weeping" is when little beads of syrup form around the meringue. This happens when the sugar isn't fully dissolved or the meringue sits too long before being served. |
| Why Your Toppers Burn | Meringue is basically sugar and air, so it burns incredibly fast. If you're using a broiler, stay right there and watch it. Don't walk away to check your phone! |
Common Mistakes Checklist
- ✓ Did you sift the cocoa powder? (Prevents lumps)
- ✓ Are the cakes completely cool before filling? (Prevents melting)
- ✓ Was the mixing bowl grease free for the meringue? (Ensures peaks)
- ✓ Did you seal the fluff with graham crumbs? (Prevents sinking)
- ✓ Did you watch the broiler constantly? (Prevents burning)
Fun Flavor Variations
Once you've nailed the basic smores cupcakes recipe, you can start playing around with the flavors. I love experimenting with these during the holidays.
The Peanut Butter Twist Swap the marshmallow fluff for a mix of peanut butter and marshmallow fluff. It adds a salty kick that cuts through the sweetness of the meringue. If you like this combo, you might also love my Butterscotch Fudge for another rich treat.
The Dark Chocolate Upgrade Replace the semi sweet chocolate garnish with a 70% dark chocolate. This makes the dessert feel more "grown up" and less like a sugar bomb. It's a great way to balance the sweetness of the meringue.
Gluten-free Swap Use a high-quality 1:1 gluten-free flour blend. You'll find the crumb is a bit more fragile, so let them cool for an extra 10 minutes before coring them.
Vegan Friendly Shift Use an aquafaba (chickpea brine) replacement for the egg whites in the meringue and a vegan butter substitute. Note: The meringue won't be quite as stable, so serve them immediately after torching.
| Goal | Action | Result |
|---|---|---|
| More Crunch | Add toasted pecans to the base | Earthy, nutty flavor |
| Less Sweet | Use dark cocoa powder | Bitter, intense chocolate |
| Tropical Vibe | Use coconut milk in the batter | Subtle coconut aroma |
Right then, a quick decision shortcut for you: - If you want more crunch, add toasted pecans to the base. - If you want it less sweet, use dark cocoa powder. - If you want a tropical twist, use coconut milk in the batter.
Storage and Waste Tips
Storing these can be tricky because of the meringue. Meringues don't love humidity, so they can get sticky if left out too long.
Storage Guidelines Keep these in an airtight container in the fridge for up to 3 days. However, the meringue may soften slightly. For the best experience, I recommend baking the cakes and making the meringue separately, then assembling and torching them just before you serve.
Freezing Tips You can freeze the baked chocolate cakes (without filling or frosting) for up to 2 months. Just wrap them tightly in plastic wrap and foil. Thaw them at room temperature before filling them with fluff and topping them with fresh meringue.
Zero Waste Ideas Since this smores cupcakes recipe uses only egg whites for the frosting, you'll have a few leftover yolks. Don't throw them away! Use them to make a rich vanilla custard or a lemon curd. You can even whisk them into your morning scrambled eggs for an extra creamy breakfast.
Serving and Presentation Tips
Presentation is everything when it's a treat like this. You want them to look as good as they taste.
I like to serve these on a wooden platter or a slate board to lean into the "camping" aesthetic. If you're feeling fancy, place a small piece of a real graham cracker on top of the meringue peak before you torch it.
Another tip: serve these with a cold glass of milk or a bitter espresso. The acidity of the coffee cuts right through the richness of the chocolate and marshmallow, making every bite feel fresh.
When you take that first bite, you'll notice the contrast: the shatter of the chocolate edge, the cloud like meringue, and then that surprise burst of marshmallow fluff. It's exactly what a smores cupcakes recipe should be - a nostalgic, messy, wonderful treat that brings everyone together.
Enjoy the process, don't stress the small stuff, and most importantly, make sure you sneak a taste of the marshmallow fluff before it goes into the cake!
Recipe FAQs
How long do I bake the chocolate cupcakes?
Bake for 18-22 minutes at 350°F (175°C). Check them with a toothpick to ensure it comes out with just a few moist crumbs.
Why did the centers of my cupcakes sink?
Overmixing the batter or a cool oven caused the collapse. If you enjoyed mastering the batter consistency here, apply the same precision to our tangy pound cake.
Is it true that I must use a kitchen torch for the meringue?
No, this is a common misconception. An oven broiler works just as well to toast the peaks to a mahogany color.
How to fill the cupcakes with marshmallow fluff?
Remove the center 1 inch of each cooled cake using a small knife or apple corer. Pipe in the fluff and seal the top with crushed graham crackers.
Can I store these cupcakes in the refrigerator?
Yes, keep them in an airtight container for up to 3 days. Be aware that the meringue may soften slightly during storage.
Why is my meringue topping weeping?
The sugar was not fully dissolved or the topping sat too long. This leads to small beads of syrup forming around the edges.
How to freeze the cupcakes for later?
Wrap baked cakes without filling or frosting in plastic wrap and foil. These can be stored in the freezer for up to 2 months.
Smores Cupcakes Recipe