The Ultimate Comfort Rich Silky Homemade Gravy from Scratch
- Ditching the Cube: The Quest for Truly Proper Homemade Gravy
- Why This Classic Recipe Is Your Culinary Foundation
- Gathering Your Gravy Components: The Essential List
- The Ultimate Comfort: Rich & Silky Homemade Gravy from Scratch
- The Ultimate Comfort: Rich & Silky Homemade Gravy from Scratch
- Elevating Your Gravy Game: Troubleshooting and Variations
- Mastering the Magic Thickener: Understanding the Roux: Ratios and Cooking Times
- The Crux of Comfort: Getting Your Liquid Right for Proper Homemade Gravy
- Troubleshooting: Fixing Lumpy or Thin Gravy When Making Your Homemade Gravy
- Dialling Up the Delicious: Herbs, Wine, and Seasoning Secrets for Proper Homemade Gravy
- How to Serve Your Glorious Homemade Gravy
- Frequently Asked Questions
- 📝 Recipe Card
Right then, grab your apron! Today, we are tackling the pinnacle of comfort food. I remember being a kid, sneaking spoonfuls of cooling gravy straight off the spoon when Mum wasn't looking that rich, earthy smell just hits different, doesn't it?
We’re talking about the sort of velvety river of flavour that makes a simple boiled potato feel like a royal treat. Forget those sad, thin jars. We’re making proper, unapologetic Homemade Gravy .
Ditching the Cube: The Quest for Truly Proper Homemade Gravy
If you’ve ever reached for one of those salty stock cubes hoping for magic, then you know the disappointment. They’re fine in a pinch, granted, but they lack soul. This Homemade Gravy Recipe proves you don't need a chemistry lab or hours of simmering bones to get a magnificent result.
Unlocking Deep Savoury Flavour from Scratch
The secret to depth isn't complexity; it's utilizing what’s already there. When you roast a chicken or a joint of beef, those browned, sticky bits left in the bottom of the tray? That’s the fond , and it’s liquid gold for a Brown Gravy Recipe Easy .
We are going to capture that using a simple roux. My biggest early mistake? Thinking I could rush the roux. You can't!
Effortless Comfort Food Achieved
Honestly, once you master the roux base, making Gravy From Scratch becomes ridiculously fast. This whole thing takes less time than making a decent cup of tea sometimes. It's quick enough for mid-week bangers and mash but elegant enough for Christmas dinner.
That’s why this Easy Homemade Gravy is my go-to.
Why This Classic Recipe Is Your Culinary Foundation
Every good cook needs a failsafe. This isn't fussy; it’s foundational. Think of it as the building block for every satisfying meal you ever loved. This Classic Homemade Gravy sets the standard.
The Bedrock of Sunday Lunch Perfection
What’s a Sunday roast without gravy? It’s just sad, dry meat. We need that beautiful, thick coating. If you’re wondering about the stock, use Homemade Gravy with Beef Broth if you’ve got beef leftovers, or chicken stock for a lighter touch. The key?
Make sure whatever liquid you use is already hot when it hits the roux. Trust me on this one cold liquid equals instant lumps, and nobody wants to spend ten minutes wrestling with a whisk trying to fix a lumpy mess.
That’s where you learn How to Make Gravy Easy —keep the heat low and the liquid warm.
Why This Classic Recipe Is Your Culinary Foundation
We need flavour boosters that don't involve huge effort. That tiny splash of Worcestershire sauce? That’s my little cheat code for bringing out that deep, savoury punch. It transforms simple Homemade Gravy with Flour into something truly memorable.
If you’re short on time, you can even make a batch of this Proper Homemade Gravy ahead of time and gently reheat it, stirring well before serving. Perfect job done.
Related Recipes Worth Trying
- Easy Instant Pot Beef Tips with Brown Gravy Under an Hour — Forget slow cooking This easy Instant Pot Beef Tips with Gravy recipe delivers forktender meat and rich brown gravy in under an hour Perfect for a speedy...
- The Best Sloppy Joe Recipe Easy Proper Homemade Sauce Cider Vinegar — Forget the tinned versionthis is the proper Homemade Sloppy Joe Our easy recipe uses cider vinegar for the perfect tangy sauce Ultimate weeknight comfort food
- The Ultimate Homemade Sloppy Joes Recipe Best Easy Weeknight Dinner — Forget the can Learn how to make the best homemade Sloppy Joes recipe from scratch This gourmet ground beef sandwich filling is a quick proper weeknight dinner
Right then, let's get cracking on a truly proper Homemade Gravy ! Forget those little sachets you shake up in a mug; we’re making the real deal here the kind that makes Sunday lunch sing.
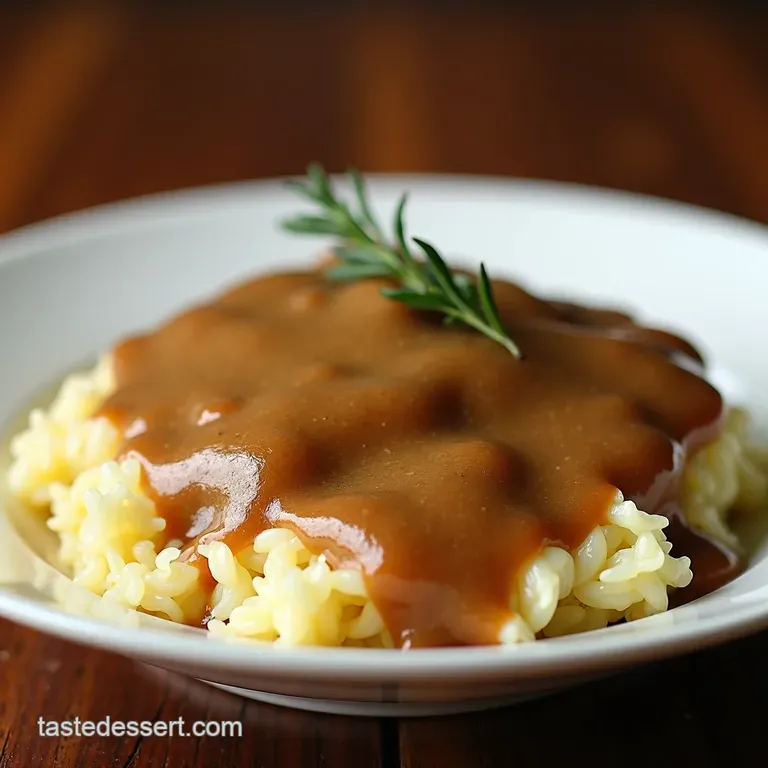
This Classic Homemade Gravy is the bedrock of comfort food, perfect dolloped over roast potatoes or swirled into mashed spuds. Simple, reliable, and utterly delicious. This is your foolproof guide to creating a deeply savoury, velvety gravy entirely from scratch.
It’s the essential British kitchen staple, perfected.
Gathering Your Gravy Components: The Essential List
Making fantastic Gravy From Scratch really boils down to getting three things right: the fat, the flour, and the liquid. If you nail these ratios, you are halfway to making an Easy Homemade Gravy that'll make your Nan proud.
We're aiming for about 4 good servings here, so keep those measurements handy.
The Core Trio: Fat, Flour, and Stock Ratios
The foundation of any good Brown Gravy Recipe Easy is the roux. That’s just a fancy word for mixing fat and flour together. We need equal parts, so we are using 4 level tablespoons (60g) of fat and 4 level tablespoons (30g) of plain flour.
This ratio creates a medium thick gravy what I call the perfect coating consistency. If you want it thicker, like wallpaper paste (which nobody wants!), just add a little more flour next time.
I learned the hard way that using drippings from roasting meat gives the best flavour, but if you’re cooking something lean, good old unsalted butter works a treat instead.
Selecting the Best Beef or Chicken Stock Substitute
You need about 2 cups (480 ml) of liquid, and it absolutely must be hot! Using cold stock is the number one way to get lumps in your gravy. While Homemade Gravy with Beef Broth is my personal favourite for Sunday roasts, chicken stock works wonderfully too.
If you’re vegetarian or need a lighter option, a good quality vegetable stock is fine. A top tip for adding depth especially if using chicken stock is to drop in a teaspoon of soy sauce or Worcestershire sauce.
It’s my secret weapon for that savoury umami hit when making Homemade Gravy with Flour .
Must Have Utensils for Smooth Emulsification
You don’t need a load of fancy gear to learn How to Make Gravy Easy . Honestly, what you need most is a decent, sturdy whisk. Seriously, ditch the spoon here; a whisk stops those nasty lumps from forming when you introduce the stock to the roux.
A medium saucepan or a high sided skillet is perfect. Just make sure whatever pan you use has a flat bottom so you can mix everything properly over the heat. Using a ladle to slowly introduce the liquid helps immensely too.
We've got the components ready. Now, let’s turn this simple list into a truly Proper Homemade Gravy !
Right then, let's get cracking on a truly proper gravy! Forget those little sachets you shake up in a mug; we’re making the real deal here the kind that makes Sunday lunch sing. This classic recipe is the bedrock of comfort food, perfect dolloped over roast potatoes or swirled into mashed spuds.
Simple, reliable, and utterly delicious. This is your foolproof guide to creating a deeply savoury, velvety gravy entirely from scratch. Perfect for smothering everything from a Sunday roast chicken to simple bangers and mash, this recipe balances the richness of rendered fat with the earthy depth of good stock.
It’s the essential British kitchen staple, perfected. Making Homemade Gravy doesn't need to be a massive headache, promise!
The Ultimate Comfort: Rich & Silky Homemade Gravy from Scratch
The Technique: Crafting Velvety Homemade Gravy Without Lumps
Lumps, folks, lumps are the enemy of good comfort food. If you’ve ever tried to rescue a lumpy batch, you know the panic. The secret to truly brilliant Homemade Gravy with Flour lies entirely in how you manage the heat and incorporate the liquid.
We are aiming for silky smooth perfection here, no gritty texture allowed!
Building the Flavourful Roux Base
First things first: the roux. This is just flour cooked in fat the thickener for our Brown Gravy Recipe Easy .
- Heat your chosen fat (drippings are king!) in the saucepan over medium heat for about 1 minute . If you’re using butter, let it melt completely.
-
Add your 4 tablespoons of flour to the fat. Now, this is where you need patience. Whisk constantly for
1 to
2
minutes
.
- Sensory Checkpoint: You want the mixture to look like wet sand and smell nutty, not raw. If it smells like raw flour, cook it longer! My big lesson learned early on? Don't rush this; burnt flour tastes bitter.
Gradual Stock Incorporation for Zero Clumps
This step separates the pros from the panicked novice. We are introducing the liquid slowly to ensure the flour absorbs it smoothly.
- Take the pan off the heat briefly. Pour in about half a cup of your hot stock.
- Whisk like mad! You are aiming to turn that thick roux paste into a smooth, slightly runny slurry. It will look weirdly thick at first, but keep going until it’s uniform.
- Return the pan to medium low heat. Now, continue pouring the rest of the stock in a slow, steady stream, never stopping the whisking motion. This is How to Make Gravy Easy without lumps!
Achieving Deep Colour and Richness
A pale, beige gravy just isn't the business, is it? We want deep, savoury tones, which comes from cooking the roux long enough and using quality stock. This is what elevates it to a Proper Homemade Gravy .
The Crucial Simmering Period for Maximum Impact
Once the stock is fully incorporated and you have a liquid, you need to let it do its magic.
- Let the mixture reach a gentle simmer don't boil it aggressively. Keep the heat low enough that it’s bubbling gently, like a lazy river.
-
Simmer, stirring often, for
5 to
10
minutes
.
- Sensory Checkpoint: You'll notice the volume reduce slightly and the consistency thicken so that it coats the back of a wooden spoon nicely. That’s the starch molecules activating. If you used roast drippings, the aroma right now should be heavenly.
Final Seasoning Adjustments: Salt, Pepper, and Beyond
Never season too early! Stock varies wildly in salt content, so we season at the very end.
- Take the gravy off the heat. Stir in your teaspoon of Worcestershire sauce it adds that umami backbone for a brilliant Gravy From Scratch .
- Add black pepper now. Give it a good taste. Only then, if needed, add a tiny pinch of salt. It's much easier to add salt than to take it out!
For the ultimate Easy Homemade Gravy experience, remember this: you can make this ahead! Cool it completely, then store it in an airtight container in the fridge for up to three days.
Reheat gently, adding a splash of hot water or Homemade Gravy with Beef Broth if it’s too stiff. This will be the best Classic Homemade Gravy you’ve ever made!
Right then, let's get cracking on a truly proper Homemade Gravy ! Forget those little sachets you shake up in a mug; we’re making the real deal here the kind that makes Sunday lunch sing.
This Classic Homemade Gravy recipe is the bedrock of comfort food, perfect dolloped over roast potatoes or swirled into mashed spuds. Simple, reliable, and utterly delicious.
If you’ve ever wondered how to make gravy easy but still taste like Grandma made it, you’re in the right spot.
The Ultimate Comfort: Rich & Silky Homemade Gravy from Scratch
This is your foolproof guide to creating a deeply savoury, velvety gravy entirely from scratch. Perfect for smothering everything from a Sunday roast chicken to simple bangers and mash, this Brown Gravy Recipe Easy balances the richness of rendered fat with the earthy depth of good stock.
It’s the essential British kitchen staple, perfected.
Difficulty Level: Easy
Why this level? While making gravy involves building a roux, which sounds fancy, it’s fundamentally just mixing flour and fat. The key steps (making the roux and whisking in liquid) are simple, provided you use low heat and a sturdy whisk to avoid lumps.
Honestly, if you can make toast, you can master Gravy From Scratch .
Time Estimates
- Prep Time: 5 minutes active prep (gathering ingredients, heating the pan)
- Cook Time: 10– 15 minutes
- Total Time: Approximately 15– 20 minutes
Serving Size
Yields approximately 2 cups (about 4 large servings)
Ingredient List
| Ingredient | US Customary | Metric | Notes |
|---|---|---|---|
| For the Roux & Base | |||
| Drippings/Fat | 4 Tablespoons | 60g | Preferably pan drippings from roasted meat (chicken, beef, or pork). If unavailable, use unsalted butter. |
| All-Purpose Flour | 4 Tablespoons | 30g | Sifted, if you like to be extra thorough! |
| For the Liquid & Seasoning | |||
| Meat Stock (Beef, Chicken, or Vegetable) | 2 Cups | 480 ml | Low sodium is best, so you can control the salt. Must be hot or warm. |
| Soy Sauce or Worcestershire Sauce | 1 Teaspoon | 5 ml | For depth of flavour (The Secret Weapon!) |
| Black Pepper | 1/2 Teaspoon | To taste | Freshly ground is highly recommended. |
| Salt | Pinch, to taste | To taste | Only add after tasting, as stock is often salty. |
Equipment
- Medium saucepan or high sided skillet (the same pan you roasted the meat in works wonders!)
- Whisk (essential for a lump free finish)
- Measuring cups and spoons
- Ladle or heat proof jug for pouring stock
step-by-step Instructions (Outline)
- Prepare the Fat: Heat the saucepan over medium heat. If using pan drippings, spoon off any loose browned bits (the fond ) but leave the rendered fat behind. You need 4 full tablespoons of fat/drippings.
-
Make the Roux (The Thickener):
Add the flour to the melted fat. Whisk constantly for 1 to
2
minutes until the mixture forms a smooth paste (the roux).
- Visual Cue: Cook until the raw flour smell disappears and the mixture turns a light, sandy colour (a blond roux). Do not let it burn!
- Whisk in Liquid: Remove the pan from the heat momentarily. Gradually pour in about half a cup of the hot stock while whisking vigorously to incorporate it fully into the roux, creating a thick slurry.
- Continue Adding Stock: Return the pan to medium low heat. Slowly pour in the remaining stock in a steady stream, whisking constantly until the mixture is smooth and lump free.
- Simmer & Thicken: Bring the gravy to a gentle simmer. Continue to cook, stirring frequently, for 5 to 10 minutes until the gravy has thickened enough to coat the back of a spoon.
- Season & Finish: Remove from the heat. Stir in the soy/Worcestershire sauce and black pepper. Taste carefully, then add salt if necessary.
- Serve: Serve immediately, or strain through a fine mesh sieve for an ultra silky finish.
Nutritional Information (Estimate)
Per serving (based on 4 servings, using chicken stock and butter if no drippings are available):
- Calories: Approx. 110-130 kcal
- Protein: 3g
- Fat: 8g (Varies heavily based on fat source)
- Carbohydrates: 7g
- Note: This is a rough estimate and does not account for sodium intake from stock/salt.
Tips & Tricks
- Hot Liquid is Key: Always use hot or very warm stock when adding to the roux. Cold liquid causes the flour to seize up, resulting in frustrating lumps.
- The Power of the Fond: If you’ve roasted meat, ensure you scrape up all those lovely browned bits ( the fond ) from the bottom of the roasting tin before using the drippings. That's where the deep, meaty flavour lives.
- Whisking Technique: When incorporating the liquid, lower the heat and whisk like you mean it! Don’t stop whisking until the slurry is smooth before adding the rest of the liquid.
- Achieving Silky Smoothness: For restaurant quality texture, strain the finished gravy through a fine mesh sieve just before serving. It removes any tiny undissolved bits.
Variations & Substitutions
- For a Richer Flavour (Beef Gravy): Use rich Homemade Gravy with Beef Broth and a teaspoon of Marmite or Bovril instead of soy sauce.
- Herbal Infusion: Simmer a sprig of fresh thyme or rosemary in the stock before adding it to the roux. Remove the herb before serving.
- gluten-free Option: Substitute the all-purpose flour with an equal volume of cornflour (cornstarch). Mix the cornflour with a splash of cold stock to make a slurry before adding it to the simmering liquid in Step 4. This is a great trick for Easy Homemade Gravy .
- Substitution: If you don't have soy sauce, use a splash of balsamic vinegar for acidity and depth, though the flavour profile will change slightly.
Serving Suggestions
- The Classic Combo: Absolutely essential alongside Yorkshire Puddings and roast beef.
- Comfort Essential: Perfect poured liberally over Homemade Gravy with Flour based fillings like shepherd’s pie or steak and ale pie.
- Brunch Twist: A decadent drizzle over bubble and squeak cakes or hash browns.
Elevating Your Gravy Game: Troubleshooting and Variations

Making this Homemade Gravy Recipe is usually straightforward, but sometimes things go a bit pear shaped. Don’t panic! A bit of common sense sorts most gravy dramas right out. My biggest lesson learned? Always taste before you salt.
I once drowned a batch in Worcestershire sauce thinking I needed more punch, only to realise the stock I used was already mega salty. Rookie error!
Troubleshooting Thin or Overly Thick Results
If your gravy has ended up looking more like thin washing-up liquid, don’t despair. This is where the magic of cornflour (cornstarch) comes in handy, though we avoided it initially for that proper roux texture.
For Thin Gravy: Take a teaspoon of cornflour and mix it really well with two teaspoons of cold water in a small cup this is crucial, it must be cold. Once it’s smooth, slowly pour this slurry into your gently simmering gravy while whisking non-stop.
Let it bubble for about 30 seconds, and it should tighten up nicely. If it’s still thin, repeat the process with another half teaspoon of cornflour mix. We are aiming for the consistency that just clings to a spoon, like a good school dinner classic.
For Overly Thick Gravy: If your Proper Homemade Gravy has gone solid, you’ve either used too much flour or cooked it too long. Simply take the pan off the heat and whisk in a splash of hot stock, a little bit at a time, until you reach your desired consistency.
Heating the stock first prevents lumps.
Creating Umami Bombs: Savoury Enhancements
To move beyond good and into spectacular , you need to boost that savoury backbone that’s the umami element. This is where quality stock really shines. If you’re using store-bought stock, try enriching it first.
- Mushroom Powder: A teaspoon of dried mushroom powder (porcini or standard button mushroom works) dissolved into your hot stock before adding it to the roux adds incredible earthiness.
- Browning Agents: As mentioned, Worcestershire sauce is brilliant. Another top tip is a tiny bit of Marmite or Bovril . Seriously, just half a teaspoon stirred in right at the end gives it that dark, slow cooked flavour, even if you only used chicken drippings. It’s fantastic for enhancing a Homemade Gravy with Beef Broth .
Storage Protocols for Leftover Liquid Gold
If you’ve made a massive batch (and honestly, who doesn't when making a Homemade Gravy Recipe ?), storing it is simple. Gravy hates the fridge if left unstirred it turns into a solid, yellowish block of fat and jelly, looking suspiciously like something from a 1970s cookbook.
Cooling and Storage: Let the gravy cool down slightly at room temperature first. Then, transfer it to an airtight container. It keeps well in the fridge for about 3 to 4 days .
Reheating: When you go to reheat it, it will be solid. Don’t try to microwave the block! Place the solidified gravy in a saucepan over low heat with a splash of water or stock.
Stir frequently as it melts; it usually returns to its smooth texture within 5 minutes. If you want to get really fancy, strain it again after reheating for maximum silkiness.
Mastering the Magic Thickener: Understanding the Roux: Ratios and Cooking Times
Right then, we’ve talked about what makes a stellar Homemade Gravy Recipe —namely, ditching the powders and getting stuck in. But the real secret sauce, the thing that separates a watery mess from a proper, velvety coat for your Sunday dinner, is the humble roux.
Honestly, mastering this little combination of fat and flour is the gateway to making any decent Gravy From Scratch .
I remember the first time I tried. It looked like wallpaper paste that had gone a bit funny. Too thick, too lumpy, and smelling suspiciously like raw flour. It put me off making Homemade Gravy for ages! Don't let that happen to you. It’s not complicated, I promise.
It’s just chemistry that tastes brilliant.
The Golden Ratio: Fat to Flour for Perfect Gravy
When we talk about a roux, we are talking about equal parts, by volume, of fat and flour. Think of it as a 1:1 partnership. For this Easy Homemade Gravy recipe, we used 4 tablespoons of fat and 4 tablespoons of flour. That’s the bedrock for a medium thickness sauce, perfect for ladling.
If you want a thicker gravy the kind that practically stands up on the plate you can bump that up to a 1:1.5 ratio (say, 4 tbsp fat to 6 tbsp flour). But be warned: the more flour you use, the longer you must cook it to get rid of that raw, chalky taste.
My personal tip? Stick to the 1:1 ratio for your first few goes. It's forgiving. Whether you use rendered meat drippings or just good old butter, the measurement must match exactly. Precision here means success later. This forms the base for our rich, flavourful Homemade Gravy with Flour .
Colour Coding Your Roux: From Blond to Brown
This is where things get interesting, and it directly impacts your final flavour and your cooking time. The colour of your roux dictates how long you need to cook it after the flour and fat are combined, but before you add the liquid.
For Homemade Gravy , especially when aiming for a Brown Gravy Recipe Easy guide, we aim for what’s called a blond or light brown roux.
- White Roux: Cooked for only about 1 minute. This is used for creamy sauces like Béchamel (think cauliflower cheese). It has almost no flavour contribution itself, relying entirely on the stock.
- Blond Roux (Our Target): Cooked for about 2 to 3 minutes. The mixture should look like damp sand, and the raw flour smell should be gone, replaced by a faint, nutty aroma. This gives our Classic Homemade Gravy just a hint of roasted flavour without darkening the final colour too much.
- Brown Roux: Cooked for 5 minutes or more, until it’s the colour of peanut butter. This develops a much deeper, nuttier, almost toasted flavour. If you want a very dark, deep Proper Homemade Gravy , you need this stage. Just watch it like a hawk, as it burns quickly once it hits that deep colour.
The critical time check: Do not rush this browning step. If you only cook it for 30 seconds, your Homemade Gravy with Beef Broth will taste like flour paste. A minimum of 90 seconds of constant whisking over medium heat is essential to cook out the starch.
Timing the Thickening: From Slurry to Simmer
Once your roux is coloured correctly, you introduce the liquid. This is where many people panic and create those dreadful lumps. Remember what I said? Use hot stock. Cold liquid hitting hot fat and flour is a recipe for disaster; the flour grips the cold liquid instantly.
For the smoothest How to Make Gravy Easy , drop the heat right down medium-low is perfect. Pour in about a quarter of your hot stock while whisking like mad. It will seize up into a thick, tight slurry. This is normal! Keep whisking.
Once that small amount is completely incorporated and smooth, you can start adding the rest of the stock slowly, stream by stream.
The final crucial timing is the simmer. After all the liquid is in and the mixture is smooth, you must let it simmer gently. This isn't just to warm it up; this is the time the starch granules swell up and the gravy actually thickens.
For a standard Homemade Gravy Recipe , aim for a gentle bubble for 5 to 8 minutes . If you stop too soon, it might look good when hot, but it will go runny as it cools. You want it thick enough to cling to the back of a metal spoon.
If it's still too thin after 8 minutes, gently whisk in a slurry made from 1 tsp cornflour mixed with 1 tbsp cold water, and simmer for another minute.
Getting the roux right takes practice, but once you nail that ratio and the low-and-slow cooking time for thickening, you’ll never look back. This Proper Homemade Gravy will elevate every single meal you serve it with.
Trust me on this one it’s worth the five extra minutes of stirring!
The Crux of Comfort: Getting Your Liquid Right for Proper Homemade Gravy
Right then, we’ve sorted the fat and the flour that’s our roux, the engine room of any decent sauce. But a sauce needs body, flavour, and depth, doesn't it? This is where your choice of liquid becomes absolutely crucial if you’re aiming for a truly Proper Homemade Gravy .
Honestly, skimping here is where most people fall down. You can’t make a five star Homemade Gravy Recipe using cheap, watery stock; it’s just physics, I’m afraid.
Drippings vs. Stock: The Flavour Foundation
When I first started making Gravy From Scratch , I used to just chuck in any old stock cube dissolved in water. Disaster. It tasted thin, metallic, and utterly boring. The game changer was learning to respect the base layer.
If you’ve roasted a joint of beef, chicken, or even pork, those sticky, browned bits clinging to the bottom of the tin that’s the fond . Mixing your flour into that fat and those bits first is key.
That’s what gives you that magnificent, deep Brown Gravy Recipe Easy flavour without needing loads of extra seasoning.
If you don’t have pan drippings, or perhaps you’re making a vegetarian version (which is still lovely!), then good quality butter is your next best mate. But remember, butter doesn't give you the meaty essence. That essence must come from your stock.
This section is all about making Easy Homemade Gravy that tastes anything but easy.
The Great Stock Debate: Hot or Cold?
This is non-negotiable, folks. You must use hot stock when you introduce the liquid to your roux. I cannot stress this enough! If you pour cold stock into your cooked flour and-fat mixture, the starch instantly seizes up. What do you get? Lumps bigger than marbles.
And trying to whisk out those lumps when the mixture is thick and cold is a recipe for an absolute meltdown.
My personal lesson learned? I once rushed this step because the phone rang mid-roast. I used room temperature stock. I whisked for ten minutes, sweating buckets, only to end up with gravy that resembled wallpaper paste with bits in it. Since then, I keep the stock simmering gently in a separate saucepan.
It keeps everything flowing smoothly, helping you achieve that silky texture required for Classic Homemade Gravy .
Making the Most of store-bought Liquids
Let's be real: nobody is always boiling bones all day. Sometimes, you need an Easy Homemade Gravy solution fast. If you're reaching for cartons or cubes, choose wisely.
- Low Sodium is Your Friend: Always go for low-sodium stock. Stock, especially beef broth, can be incredibly salty. If you use salty stock, you’ll never be able to dial back the seasoning later. You want control when How to Make Gravy Easy .
- Concentrated Flavour: If you’re using a bouillon cube or powder, use slightly less water than recommended to make it extra concentrated. We are aiming for deep savouriness, not watery disappointment. If you are using Homemade Gravy with Beef Broth , make sure it’s a rich one.
- The Secret Weapon (Umami Bomb): Whether you use chicken, beef, or vegetable stock, I always sneak in a teaspoon of soy sauce or Worcestershire sauce. It’s not to make it taste Asian or vinegary; it’s pure umami. It deepens the flavour profile so much that people will ask, "What did you put in that Homemade Gravy with Flour ?" They’ll never guess it’s just a splash of brown sauce!
Choosing the right liquid guarantees you a luscious, glossy sauce that clings perfectly to your roasties. Get this bit right, and the rest is straightforward simmering.
Troubleshooting: Fixing Lumpy or Thin Gravy When Making Your Homemade Gravy
Right, let’s be honest. You’ve followed the recipe for your Homemade Gravy Recipe , the roux looks perfect, it smells heavenly, but then you take a taste, and oh dear. It’s either thick as wallpaper paste or thin as dishwater. Happens to the best of us, mate.
Even when aiming for that Proper Homemade Gravy , hiccups occur. Don't panic and definitely don’t reach for the cheap jarred stuff! We can sort this out easily.
Lumps Be Gone: Rescuing a Clumpy Disaster
If your beautiful sauce has gone bobbly, it almost always means one thing: the flour didn't dissolve properly when it met the liquid. Usually, this happens because the stock was too cold, or you didn't whisk fast enough when introducing it.
I remember the first time I tried to make a Brown Gravy Recipe Easy for my Nan; it looked like I’d stirred in tiny dumplings!
The secret to fixing lumps is friction and time.
First, turn the heat right down low and slow is the mantra here. Grab a balloon whisk and beat the lumpy gravy like you mean it for a solid minute. Sometimes, that’s all it takes; the heat and agitation break down the flour clumps.
If that fails, try straining. Pour the whole lot through a fine mesh sieve into a clean saucepan. You might lose a tiny bit of flavour from those trapped bits, but you'll gain back that silky texture we’re after.
For a truly foolproof fix when making Gravy From Scratch , I sometimes blitz it quickly with a stick blender (immersion blender). It’s a bit dramatic, but incredibly effective for knocking out those stubborn lumps in your Easy Homemade Gravy .
Too Thin? Getting That Velvety Coating
A thin gravy, while still flavourful if you used good Homemade Gravy with Beef Broth , just won't sit right on your Sunday roast. This happens when you haven't cooked the roux long enough, or you used too much stock for the amount of flour.
This is where we talk about the "slurry." This method works wonders for thickening, whether you're using Homemade Gravy with Flour or not.
Take two tablespoons of cornflour (cornstarch) and mix it into about four tablespoons of cold water or stock in a separate mug. Whisk it until it’s completely smooth no lumps allowed in this mixture, mind you.
Now, bring your thin gravy back to a gentle simmer. Pour in the cold slurry slowly while whisking constantly. You’ll see it thicken almost immediately. Let it simmer for another minute or two to cook out that starchy taste.
Remember, a good Classic Homemade Gravy should coat the back of a spoon nicely. If it thickens too much, just whisk in a splash more hot stock until you hit perfection.
Dialling in the Flavour
Once the texture is spot on, it’s time for the final seasoning check. Never season until the gravy has thickened, because concentrating the liquid concentrates the salt too! Taste it now. Does it need a little lift?
A tiny splash of red wine vinegar or even a squeeze of lemon juice can brighten up heavy Homemade Gravy . And seriously, if you haven't added that dash of Worcestershire sauce yet, do it now! It’s what separates a decent gravy from a genuinely great one.
Getting How to Make Gravy Easy is all about these little tweaks at the end. Happy cooking!
Dialling Up the Delicious: Herbs, Wine, and Seasoning Secrets for Proper Homemade Gravy
Right then, we’ve got the basics down. We know how to build that brilliant roux foundation the backbone of any truly Homemade Gravy . But now, this is where things get exciting.
This is where we stop making just gravy and start crafting something that sings on the plate. Think of this stage as giving your sauce a little pep talk before it heads out to the party.
Secret Weapons: Depth Without Drama
Most folks just use stock and salt, which is fine, but a bit… beige, isn't it? If you want that deep, slightly mysterious flavour that makes people ask, "What is in this Brown Gravy Recipe Easy ?" listen up.
My biggest game changer? A tiny splash of something acidic or salty. I mentioned soy sauce or Worcestershire sauce earlier, and honestly, they are magic for a Gravy From Scratch . You aren’t adding 'soy sauce flavour'; you are just adding umami .
It just deepens the meatiness of your Homemade Gravy with Beef Broth without needing an entire carcass overnight. I learned this years ago when I ran out of stock base and had to improvise. A dash of Worcestershire saved the whole Sunday lunch, bless its heart!
Another simple trick? A glug of red wine. If you’re making Gravy From Scratch using beef drippings, deglazing the roasting pan with about a quarter cup of a hearty red (something you’d actually drink, mind you no cooking wine nonsense!) before you add your flour elevates it immediately.
Let that alcohol bubble away until it’s almost gone that's crucial. You want the flavour, not the booze, remember? It gives the Classic Homemade Gravy an extra layer of complexity.
Herbs: Don't Just Throw Them In
Herbs need respect, especially in a quick cooking item like this. If you chuck fresh thyme or rosemary in right at the end with the stock, it often tastes a bit raw or grassy. For an Easy Homemade Gravy , you have two main options.
First, if you used them when roasting your meat, you've already got the flavour locked into the drippings brilliant! Second, if you are using just butter for your fat, try adding one small sprig of thyme right into the roux while it cooks with the flour (Step 2 in the instructions).
Give it about 30 seconds to warm up and release its essential oils into the fat before adding the flour. That gentle heat wakes the herb up beautifully.
It’s the difference between having a background note and having the flavour pop. Remember, we are aiming for Proper Homemade Gravy , not something that tastes like it came from a dusty old tin.
The Final Seasoning Check: Tasting is Believing
This is the most important part of How to Make Gravy Easy : tasting before you serve. Because every bit of stock is different some are saltier than others you absolutely must taste it after it has simmered and thickened.
When you add your salt and pepper, do it in stages. A good rule of thumb for this Homemade Gravy Recipe is to wait until it’s thick. The thickening process concentrates the flavour, so if you salt it too early, you risk overdoing it later.
Add a pinch, stir, let it sit for 30 seconds, and then taste again. That’s how you nail the balance. We are finishing this Homemade Gravy with Flour perfectly, so make sure it sings before it hits the plate!
How to Serve Your Glorious Homemade Gravy
Right then, you’ve nailed it. You’ve got this rich, silky pot of Homemade Gravy bubbling away. The aroma alone is enough to bring the whole family running, isn't it? Don't let all that hard work go to waste by just slopping it on any old plate.
This isn't just a sauce; it's the finishing kiss on a proper meal.
This Homemade Gravy Recipe is the bedrock of comfort food, and how you present it really elevates the whole dish. Forget those dusty little pots you buy from the supermarket this is the real McCoy.
The Perfect Plate-Up: Pairing Like a Pro
When you’re making something as deeply flavourful as this Gravy From Scratch , you need companions that can stand up to it. Think about what you’d find at a cracking Sunday carvery, but done better.
First off, the classics. Mashed potatoes are non-negotiable. They need to be creamy, buttery, and sturdy enough to hold a pool of gravy. I always make sure my mash has a little well in the middle, ready to receive the deluge.
If you’re making a Brown Gravy Recipe Easy like this, it’s practically crying out for a pile of fluffy roasties, too. You want the fat from the roasties to mix with your Proper Homemade Gravy in the serving dish that’s where the magic happens, honestly.
And don’t forget the vegetables! Peas and carrots are fine, but if you’ve got some nicely steamed green beans or some tender stem broccoli, the gravy cuts through their freshness brilliantly.
Dealing with the Lumps (Or Avoiding Them Altogether)
I’ve made enough gravy in my time to know that lumps are the bane of every cook’s existence. Remember the golden rule: always use hot stock when adding it to your roux. If you use cold liquid, the flour tightens up, and you end up shaking your whisk like mad trying to beat the lumps out.
Lesson learned the hard way, believe me!
If you do end up with a few pesky bits, don't panic. A quick strain through a fine sieve works miracles for achieving that professional, velvety texture we’re after. It might feel fussy, but running your Easy Homemade Gravy through a sieve just before pouring is the trick to making it look utterly superb.
Keeping it Hot and Ready
This recipe for Homemade Gravy with Flour is great because it holds its heat well. If you’re cooking a big roast, you don't want to be making gravy right at the last minute.
My top tip? Make the Classic Homemade Gravy about 10 minutes before everything else comes out of the oven. Pour it into a small, pre-warmed jug. Keep that jug tucked away near the stove not directly on the heat, mind you, or it will skin over.
A slightly warm spot on the side of the counter works a treat. This way, it’s piping hot and ready to go the second the meat is carved. A truly Proper Homemade Gravy should never be served lukewarm; it loses all its impact.
If you’ve used Homemade Gravy with Beef Broth , the flavour will intensify beautifully as it rests, so don’t worry if you make it slightly ahead of time. Mastering How to Make Gravy Easy means mastering the timing, too!
If you're craving more ideas, explore Philly Cheesesteak Recipe Easy Homemade My 5 Secrets for the Best Ribeye Sandwich , Rollin in the Fruit Homemade Fruit Leaather Recipe Fun and Unbelievably Good Homemade Pastrami on Rye Forget the Deli .

Frequently Asked Questions
My Homemade Gravy is lumpy! What’s the secret to getting it perfectly smooth?
Ah, the dreaded lump! This almost always happens when cold liquid hits hot roux. The number one tip is to ensure your meat stock is piping hot before you add it. Also, add the liquid gradually while whisking furiously if you add it all at once, the flour seizes up.
How can I make my Homemade Gravy taste richer and more like it came from a proper Sunday roast?
You need to maximise that savoury depth, or umami. Make sure you are scraping up all those dark, sticky bits from the bottom of your roasting tin that's called the fond, and it's flavour gold dust!
Using good quality beef or dark chicken stock, plus a teaspoon of Worcestershire sauce or Marmite, really boosts the savoury notes beautifully.
My gravy is too thin; how do I thicken it up without making it gluey?
If you've let it simmer for 10 minutes and it’s still too runny, don't panic! The best way to fix this is to make a small slurry: mix one tablespoon of cornflour (cornstarch) with two tablespoons of cold water in a small cup until smooth.
Whisk this mixture into your simmering gravy it will thicken up almost instantly. Just remember to taste for seasoning afterwards!
Can I make this gravy ahead of time, and how should I store leftovers?
Yes, you absolutely can make it ahead; it keeps brilliantly! Cool the gravy completely, then store it in an airtight container in the fridge for up to three days. When reheating, you might find it a bit set, so stir in a splash of extra hot stock or water to loosen it up and bring it back to your preferred consistency.
What if I don't have any meat drippings after roasting my chicken or beef?
Don’t fret; you can still make a decent gravy! If you don't have drippings, substitute the fat component with an equal amount of good quality, unsalted butter. It won't have that deep, roasted flavour, but it creates a wonderful, classic roux base that you can compensate for by using a richer stock and maybe a dash more Worcestershire sauce.
The Ultimate Comfort Rich Silky Homemade Gravy F

Ingredients:
Instructions:
Nutrition Facts:
| Calories | 752 kcal |
|---|---|
| Protein | 13.3 g |
| Fat | 11.0 g |
| Carbs | 56.1 g |
| Fiber | 7.3 g |
| Sodium | 414 mg |
