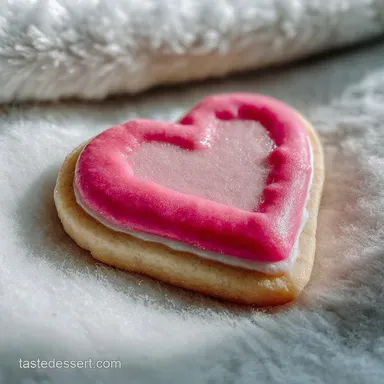
Cutest Valentines Day Sugar Cookie with Royal Icing

- Time: Active 45 minutes, Passive 10 minutes, Total 55 minutes
- Flavor/Texture Hook: Buttery, velvety crumb with a crisp icing snap
- Perfect for: Valentine's Day gifting, school parties, or a cozy baking afternoon
- Master Cutest Valentines Day Sugar Cookie with Royal Icing
- Scientific Secrets for Soft Cookie Success
- Essential Components for Precise Baking Results
- Professional Tools for Precision Cookie Shaping
- Step-by-Step Guide to Heart Shapes
- Fixing Common Decorating and Baking Blunders
- Smart Swaps for Diverse Dietary Needs
- Keeping Your Sweet Treats Fresh
- Classic Pairings for Valentine Spreads
- Expert Answers to Frequent Baking Queries
- Recipe FAQs
- 📝 Recipe Card
Can you smell that? It is the heavenly scent of almond extract and butter wafting through the kitchen, a sure sign that Valentine's Day is just around the corner. Bake the Cutest Valentines Day Sugar Cookie with Royal Icing using our simple recipe.
I have spent years trying to find a sugar cookie that actually keeps its shape in the oven, and trust me, I have had my share of "heart" cookies that ended up looking like blobs.
There is something truly joyous about taking a tray of pale, perfectly cut shapes out of the oven. It is a transformation that never gets old, and once you master the icing, you will feel like a professional pastry chef.
I remember the first time I tried royal icing; it was a total disaster because I didn't understand the "flood" consistency. We are going to avoid all those headaches today.
We've all been there excitedly decorating only to have the icing run off the sides or the cookies turn out rock hard. This recipe is designed to be approachable and fun, focusing on the techniques that actually matter.
We are going to walk through every step, from creaming that 1 cup (227g) of unsalted butter to that final, satisfying drizzle of pink icing. Let’s get our aprons on and start baking.
Master Cutest Valentines Day Sugar Cookie with Royal Icing
The secret to why this recipe succeeds where others fail lies in the balance of fats and starches. We aren't just making a sweet treat; we are engineering a base that can support intricate decorations while remaining soft to the bite.
- Gluten Inhibition: The high ratio of 1 cup (227g) of unsalted butter coats the flour proteins, preventing tough gluten chains from developing.
- Starch Gelatinization: Adding 0.25 cup (32g) of cornstarch helps absorb excess moisture, creating a velvety texture that feels sophisticated.
- Protein Denaturation: Using 3 tbsp of meringue powder in the icing allows the proteins to bond quickly, setting the icing into a stable, matte finish.
- Inverted Sugar Synergy: Including 1 tbsp of light corn syrup in the icing provides a flexible, high shine finish that won't shatter when you bite it.
The way the butter interacts with the sugar here is very similar to the melt in-your mouth texture found in the Aunt Millies Butter recipe. It creates a foundation that is sturdy enough to handle, yet tender enough to melt as soon as it hits your tongue.
Chef's Tip: Freeze your butter for exactly 10 minutes before you start creaming it. This ensures it stays cool enough to hold air bubbles without becoming too greasy, which is the main culprit for cookies spreading in the oven.
Scientific Secrets for Soft Cookie Success
Understanding what happens inside the oven helps us control the outcome. When the heat hits the dough, the 0.75 tsp of fine sea salt enhances the perception of sweetness while the sugars begin to melt. Because we aren't using chemical leaveners like baking powder, the cookies won't puff up and lose their crisp edges.
1. Cornstarch Secret for Velvety Texture
Cornstarch acts as a tenderizer by diluting the protein content of the 2.5 cups (315g) of all purpose flour. This results in a "short" crumb that breaks cleanly rather than stretching. It also helps the cookie maintain a pale, elegant look by preventing excessive browning.
2. Science of Cold Sheet Rolling
Rolling the dough between sheets of parchment while it is still slightly warm from the mixer, then chilling it, prevents overworking the dough. If you roll cold dough, you end up kneading it more, which activates gluten and makes the cookies tough.
Chilling the flat sheets ensures the 227g of butter is solid before cutting.
3. Inverted Sugar for Flexible Icing
Royal icing can sometimes feel like eating a chalkboard if it is too dry. The addition of light corn syrup introduces an inverted sugar that keeps the icing from becoming brittle. This ensures a silky mouthfeel that complements the buttery base perfectly.
| Component | Science Role | Pro Secret |
|---|---|---|
| Unsalted Butter | Fat Barrier | Use at 65°F for optimal aeration |
| Cornstarch | Moisture Absorber | Sift with flour for zero lumps |
| Meringue Powder | Structural Protein | Whisk until soft peaks for stability |
| Corn Syrup | Crystallization Inhibitor | Adds "stretch" to the icing lines |
The interaction between the 0.75 cup (150g) of granulated sugar and the butter creates tiny air pockets. These pockets expand slightly in the heat, giving the cookie its lightness without the need for yeast or soda.
Essential Components for Precise Baking Results
Selecting the right ingredients is the difference between a "good" cookie and the "cutest" one. I always reach for pure vanilla extract because the flavor is deeper and more complex than the imitation stuff.
For this recipe, that 2 tsp of vanilla paired with 0.5 tsp of almond extract creates a nostalgic, bakery style aroma.
- 1 cup (227g) Unsalted Butter: Provides the rich, creamy base. Why this? Controls salt levels and ensures a tender, buttery crumb.
- Substitute: Salted butter (omit the extra salt in the recipe).
- 0.75 cup (150g) Granulated Sugar: Adds sweetness and structure. Why this? Creates a fine texture without the grit of larger crystals.
- Substitute: Caster sugar for an even finer texture.
- 1 Large Egg: Binds the dough together. Why this? Adds protein for structure and moisture for the flour.
- Substitute: 1/4 cup of unsweetened applesauce (cookies will be softer).
- 2.5 cups (315g) All Purpose Flour: The main structural element. Why this? Provides the right amount of protein for a sturdy cookie.
- Substitute: 1:1 gluten-free flour blend with xanthan gum.
- 0.25 cup (32g) Cornstarch: Softens the flour's bite. Why this? Prevents spreading and ensures a velvety finish.
- Substitute: Arrowroot powder.
- 3 tbsp Meringue Powder: Stabilizes the royal icing. Why this? Safer than raw egg whites and much more consistent.
- Substitute: 2 large egg whites (adjust water carefully).
- 1 tbsp Light Corn Syrup: Gives the icing a glossy finish. Why this? Prevents the icing from drying into a dull, matte gray.
- Substitute: Honey or agave nectar (will add a slight tint).
| Original Ingredient | Substitute | Why It Works |
|---|---|---|
| Unsalted Butter (1 cup) | Vegan Butter Sticks | High fat content mimics dairy butter. Note: Ensure it is the stick variety, not tub. |
| All Purpose Flour (2.5 cups) | White Whole Wheat | Higher fiber but fine enough for cookies. Note: Cookies will be slightly darker. |
| Cornstarch (0.25 cup) | Tapioca Starch | Provides similar tenderizing effects. Note: Dough may feel slightly stickier. |
If you are worried about raw eggs but want that dough flavor, you can always pivot to The Edible Cookie recipe for a safe to eat alternative that works great as a filling or a snack.
Professional Tools for Precision Cookie Shaping
You don't need a professional kitchen, but a few specific tools make this process much smoother. A stand mixer, like a KitchenAid, is your best friend here because it can cream the butter and sugar thoroughly without you breaking a sweat.
- Rolling Pin with Spacer Rings: This is a lifesaver. It ensures every single cookie is exactly 1/4 inch thick, which means they all bake at the same rate.
- Fine Mesh Sieve: You must sift your 4 cups (500g) of powdered sugar. Even the smallest lump will clog your piping tip and ruin your design.
- Heart Shaped Cutters: Various sizes add visual interest to your platter.
- Scribe Tool or Toothpick: Essential for popping air bubbles in the royal icing and pulling the "flood" into tight corners.
- Parchment Paper: Don't use wax paper; it can't handle the heat. Parchment ensures no sticking and easy cleanup.
step-by-step Guide to Heart Shapes

Now, let's get into the fun part. The smell of the butter and sugar coming together is the first sign of success. Pay attention to the textures as you go; the dough should feel like soft play dough, not sticky or crumbly.
1. Creating the Dough Foundation
In your mixer, beat the 1 cup (227g) of unsalted butter and 0.75 cup (150g) of granulated sugar on medium speed. You are looking for a pale, fluffy texture which usually takes about 3 minutes. Until you see the mixture turn a creamy white.
2. The Dry Integration
Whisk together the 2.5 cups (315g) of all purpose flour, 0.25 cup (32g) of cornstarch, and 0.75 tsp of fine sea salt. Gradually add this to the butter mixture on low speed. Until the flour just disappears and the dough starts to clump.
3. The Cold Sheet Technique
Divide the dough in half and roll it out between two sheets of parchment paper to 1/4 inch thickness. Slide these flat sheets into the fridge for at least 30 minutes. Note: This prevents the dough from sticking to your cutters later.
4. Precise Cutting and Baking
Preheat your oven to 350°F. Peel off the top layer of parchment and cut out your hearts. Place them on a lined baking sheet. Bake for 9 to 11 minutes. Until the edges are just set and the tops look matte but not brown. The smell will be a sweet, toasty vanilla.
5. Mastering Royal Icing Consistency
Whisk 4 cups (500g) of powdered sugar, 3 tbsp meringue powder, and 6 tbsp of warm water. Add 1 tbsp of light corn syrup and 2 tsp vanilla. For "flood" consistency, the icing should take 12 seconds to disappear into itself. Until it looks like thick, glossy ribbons.
Chef's Note: To get the perfect pink and red, use gel food coloring. Liquid coloring will water down your icing and ruin the consistency. Add just a tiny drop with a toothpick; a little goes a long way!
6. Decorating with Precision
Pipe a border around the edge of the cooled cookie with a slightly thicker icing, then immediately fill the center with your flood icing. Use your scribe tool to swirl the colors together or pop any tiny bubbles. Until the surface is silky and smooth.
Fixing Common Decorating and Baking Blunders
Even the best bakers run into trouble sometimes. The most common issue is the "spread," where your beautiful hearts turn into circles. This usually happens if the butter was too warm or if the dough wasn't chilled enough before hitting the hot oven.
Signs of Over Mixed Dough
If your cookies are tough or have large air bubbles on the surface, you likely mixed the flour for too long. Only mix until the white streaks disappear. Over mixing develops gluten, which we want to avoid for a tender bite.
Solutions for Runny Icing
If your icing is sliding off the cookie, it is too thin. Add sifted powdered sugar one tablespoon at a time. If it’s too thick and won't smooth out, add water one drop at a time. It is a delicate balance, but you will feel it once it is right.
| Problem | Root Cause | Solution |
|---|---|---|
| Cookies are brittle | Too much flour or overbaked | Measure flour by weight (315g) and pull from oven at 10 minutes. |
| Icing looks dull | Missing corn syrup or humid air | Ensure 1 tbsp corn syrup is added and dry cookies near a fan. |
| Colors are bleeding | Icing was too wet or humid | Use less water in icing and let the first color dry before adding the next. |
A common myth is that you need to grease your cookie sheets. Don't do it! The high fat content in these cookies means they won't stick to parchment or silicone mats. Adding extra grease to the pan actually encourages the cookies to spread more than they should.
Smart Swaps for Diverse Dietary Needs
I love that baking can be inclusive. If you have friends with dietary restrictions, these cookies are surprisingly easy to adapt. Just keep in mind that any change in fat or flour will slightly alter the final texture.
dairy-free Ingredient Alternative
You can swap the 1 cup (227g) of unsalted butter for a high-quality vegan butter stick. Look for one with a high fat content (around 80%). The cookies will be slightly crispier and may have a subtle nutty flavor, but they will still hold their shape beautifully.
Naturally Colored Icing Options
If you want to avoid artificial dyes, you can use beet powder for red or freeze dried strawberry powder for pink. These add a lovely, subtle fruit flavor to the icing that pairs wonderfully with the almond extract in the base.
- If you want maximum softness, don't skip the 0.25 cup (32g) of cornstarch.
- If you want sharp edges, freeze the cutouts for 10 minutes before baking.
- If you want high shine icing, add the 1 tbsp of light corn syrup as specified.
The comparison between an oven baked cookie and a stovetop "pan" cookie is often debated. While you can cook dough in a skillet, it won't give you the even, dry heat needed for royal icing to set properly.
| Method | Texture Result | Best For |
|---|---|---|
| Oven Baking | Crisp edges, soft center | Precision shapes and royal icing |
| Stovetop Skillet | Chewy, caramelized | Thick, rustic "pan" cookies |
| Air Fryer | Very crispy, fast | Small batches of simple rounds |
Keeping Your Sweet Treats Fresh
Once your cookies are decorated, patience is key. The royal icing needs at least 6 to 8 hours (or overnight) to dry completely before you can stack them. If you stack them too soon, the icing will smudge, and all that hard work will be for naught.
Storage: Keep these in an airtight container at room temperature for up to 1 week. If you need them to last longer, they freeze beautifully. Place the decorated (and dry!) cookies in a freezer safe container with parchment paper between the layers for up to 3 months.
Zero Waste: Don't throw away those dough scraps! After cutting your hearts, ball up the extra dough, re roll it, and cut more. If you have leftover royal icing, pipe small dots or hearts onto parchment paper, let them dry, and use them as homemade sprinkles for future projects.
Classic Pairings for Valentine Spreads
These cookies are the star of the show, but they play well with others. I love serving them with a hot cup of Earl Grey tea or a glass of cold milk. The bitterness of the tea cuts through the sweetness of the icing perfectly.
These cookies look stunning when served on a platter alongside some Hershey Kiss Thumbprint Cookies recipe. The combination of the snappy royal icing and the soft, chocolatey center of a thumbprint cookie provides a wonderful variety of textures for your guests.
If you are hosting a Valentine's brunch, consider serving these alongside a fresh fruit salad with a honey lime dressing. The acidity of the fruit balances the rich, buttery flavor of the sugar cookies, making for a well rounded dessert spread.
Expert Answers to Frequent Baking Queries
Many people think that royal icing is "too hard" for beginners, but it's really just about understanding consistency. I used to be terrified of it until I realized that it's basically just edible glue. Once you get the "12 second rule" down, you'll be piping like a pro.
Searing heat vs. Low heat: Unlike meat, cookies don't need a sear. We bake at a steady 350°F to ensure the middle cooks through without the edges burning. This allows the starch gelatinization to happen evenly across the entire heart.
Myth: Salt makes cookies salty. The 0.75 tsp of fine sea salt isn't there to make them taste like pretzels. Salt is a flavor enhancer; it suppresses bitterness and makes the vanilla and almond extracts pop. Without it, the cookies would taste flat and overly sweet.
Myth: You must use fresh egg whites for royal icing. Actually, meringue powder is often better for home cooks. It is pasteurized, making it shelf stable and safe, and it provides a more consistent rise and set than unpredictable fresh eggs.
It also helps the icing dry with a much smoother, matte finish.
Right then, you are all set to create the most delightful Valentine's treats. Remember to enjoy the process the smell of the oven, the silky feel of the icing, and the joy of sharing something handmade.
Trust me on this: once you see the look on someone's face when you hand them a perfectly decorated heart, all the effort will be worth it. Happy baking!

Recipe FAQs
Why do my sugar cookies spread so much?
It's likely the butter temperature or insufficient chilling. Warm butter melts too quickly in the oven, causing the dough to spread excessively. Ensure your butter is cool but not frozen, and chill the dough thoroughly before cutting.
How do I get my royal icing to be smooth and shiny?
Add a touch of light corn syrup and avoid overmixing. Corn syrup acts as a humectant and crystallization inhibitor, giving the icing a glossy finish. Whisk gently until just combined to prevent incorporating too much air, which can make it dull.
Can I make these sugar cookies dairy-free?
Yes, you can substitute dairy-free butter sticks. Use a high-quality vegan butter stick with around 80% fat content to achieve a similar texture. The cookies might be slightly crispier and have a subtle nutty note.
How long does royal icing need to dry before I can stack the cookies?
Allow 6 to 8 hours, or preferably overnight. Royal icing needs ample time to harden completely to prevent smudging or damage when stacking. Ensure they are fully dry before storing or stacking them.
What is the secret to a tender sugar cookie crumb?
The cornstarch is key for that velvety texture. Cornstarch dilutes the flour's protein, preventing toughness and creating a "short" crumb that breaks cleanly. This is similar to the tender crumb achieved in Classic Buttery Spritz Cookies Recipe Easy Press Cookies.
Can I make the sugar cookie dough ahead of time?
Absolutely, the dough can be chilled for up to 3 days. Divide the dough into discs, wrap them tightly in plastic wrap, and refrigerate. This advance chilling actually improves the dough's flavor and handling.
My royal icing colors are bleeding. What went wrong?
The icing was likely too thin or the environment too humid. Use gel food coloring sparingly, as liquid colors can water down the icing. Ensure you're working in a dry environment, and allow each color layer to set slightly before adding another.
Valentines Day Sugar Cookie
Ingredients:
Instructions:
Nutrition Facts:
| Calories | 236 kcal |
|---|---|
| Protein | 2.1 g |
| Fat | 8.1 g |
| Carbs | 39.8 g |
| Fiber | 0.4 g |
| Sugar | 28.2 g |
| Sodium | 76 mg |
