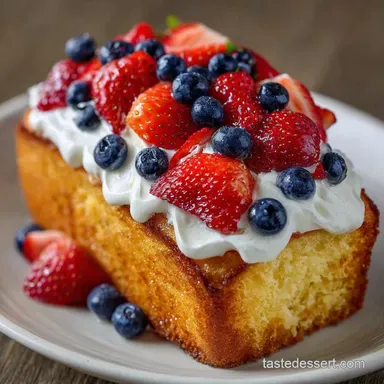
3Ingredient Flag Cake: Fresh and Festive
- Time:30 minutes active + 1 hour chilling
- Flavor/Texture Hook: Velvety cream paired with tart, fresh berries and buttery cake
- Perfect for: Family reunions, 4th of July potlucks, or beginner hosts
Making a Simple 3Ingredient Flag Cake
Ever wondered why the easiest desserts always taste the most nostalgic? There is something about the combination of a store-bought pound cake and fresh berries that takes me straight back to my grandma's backyard picnics.
I remember the smell of charcoal grills and the sight of a massive sheet cake sitting on the picnic table, waiting for everyone to dig in.
I used to think I had to bake a fancy sponge from scratch to impress the family, but I learned the hard way that mid July heat makes homemade frosting a nightmare. One year, my "fancy" cream melted into a puddle before we even sat down. That's when I switched to the shortcut method.
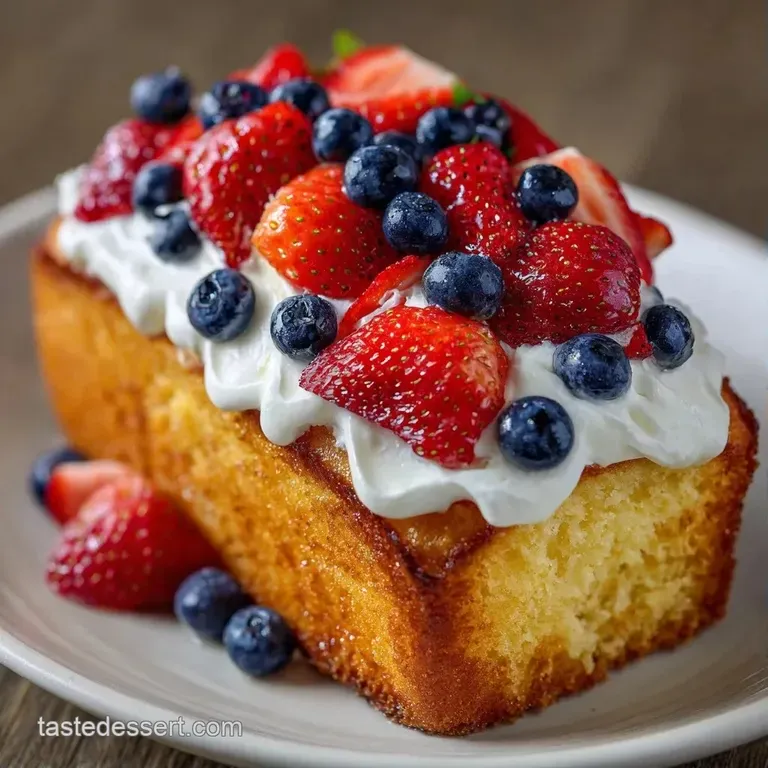
This 3Ingredient Flag Cake is my go to because it stays stable and tastes like a classic summer memory.
You can expect a dessert that is creamy, bright, and incredibly satisfying. It isn't about complex technique, it's about the freshness of the fruit and the stability of the base. Whether you're rushing to a party or hosting a big group, this recipe lets you spend more time with your guests and less time stressing over a timer.
Why This Method Works
- Structural Integrity: A dense pound cake acts as a sturdy anchor, preventing the berries from sinking or the cream from sliding.
- Moisture Balance: The fat in the cake and the stabilized whipped topping create a barrier that slows down the fruit juices from soaking into the base.
- Temperature Control: Chilling the assembled cake for 60 minutes firms up the topping, which locks the berries in place for easier slicing.
- Acidity Contrast: The tartness of the blueberries and strawberries cuts through the sweetness of the cake, keeping it from feeling too heavy.
If you're looking for something more traditional, you might enjoy a baked flag cake, but for a hot summer day, this no bake version is much more practical.
| Setup Style | Prep Time | Texture | Best For |
|---|---|---|---|
| Fresh/Shortcut | 30 minutes | Velvety & Juicy | Quick parties |
| Baked/Traditional | 2 hours | Spongy & Sweet | Formal events |
| From Scratch | 3 hours | Airy & Light | Baking enthusiasts |
Component Analysis
| Ingredient | Science Role | Pro Secret |
|---|---|---|
| Pound Cake | Structural Base | Use a chilled cake for cleaner slices |
| Whipped Topping | Moisture Barrier | Thaw completely before spreading |
| Fresh Berries | Acidic Balance | Pat dry with a paper towel first |
The Essential Shopping List
- 450g (1 lb) pound cake Why this? Provides a dense, buttery base that doesn't crumble.
- 225g (8 oz) whipped topping Why this? More stable than fresh whipped cream in heat.
- 150g (1 cup) fresh blueberries Why this? Deep indigo color and tart pop.
- 150g (1 cup) fresh strawberries, hulled and sliced Why this? Vibrant crimson color and sweetness.
| Original Ingredient | Substitute | Why It Works |
|---|---|---|
| Pound Cake | Angel Food Cake | Lighter texture. Note: Much softer, so it may compress under fruit |
| Whipped Topping | Mascarpone Blend | Richer flavor. Note: Melts faster than stabilized topping |
| Strawberries | Raspberries | Similar color. Note: More fragile and can bleed into cream |
Right then, before you head to the store, make sure your berries are firm. If the strawberries are too mushy, they'll release too much liquid and ruin the clean lines of your stripes.
Required Kitchen Tools
You don't need a professional kitchen for this. A few basic items will do the trick: - A 23x33 cm (9x13 inch) baking pan or a rectangular platter. - A sharp serrated knife for the cake. - An offset spatula or a flat butter knife for the cream. - A paper towel for drying the fruit.
Step-by-step Assembly
Phase 1: Preparing the Foundation
- Slice the pound cake into uniform slabs about 1.3 cm (½ inch) thick.
- Arrange the slices tightly in the bottom of your 23x33 cm pan.
- Press the pieces gently together until there are no visible gaps. Note: This prevents the cream from leaking to the bottom.
Phase 2: Applying the Canvas
- Spread the thawed whipped topping over the cake.
- Use your spatula to smooth it out until the surface is a velvety, seamless plane.
- Ensure the cream reaches the very edges of the pan for a clean look.
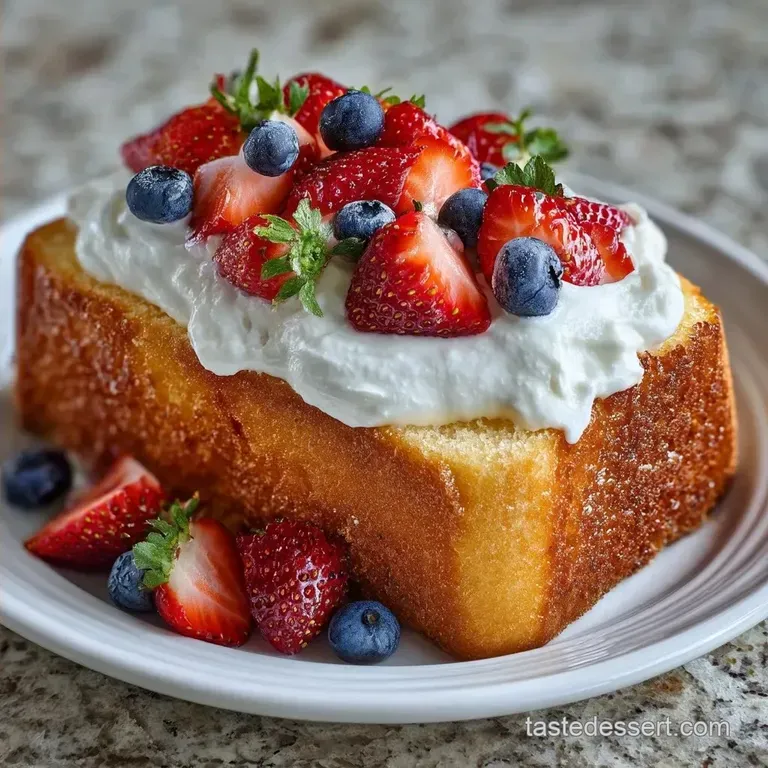
Phase 3: Creating the Patriotic Design
- Press blueberries into the top left corner until a neat, deep indigo rectangle is formed.
- Create the stripes by alternating rows of sliced strawberries and bare cream.
- Press the strawberry slices firmly into the frosting until the crimson stripes are complete.
- Chill the assembled cake in the refrigerator for 1 hour until the topping feels firm to the touch.
Chef's Note: To get those perfectly straight stripes, use a ruler or the back of a knife to lightly mark lines in the cream before adding the strawberries.
Fixing Common Issues
Why Your Cake Is Soggy
If the cake feels mushy, it's usually because the berries were wet when added. Water from washing fruit seeps into the cream and then the cake. Always pat your berries dry.
Avoid the "Sliding Fruit"
Fruit often slides if the whipped topping wasn't thawed properly or was too warm. Make sure the topping is cold but spreadable, and always finish with that 60 minute chill.
Prevent Color Bleeding
Strawberries can bleed red into the white cream if they sit too long. To stop this, don't slice them until you are ready to assemble.
| Problem | Root Cause | Solution |
|---|---|---|
| Fruit Sinking | Cream too soft | Chill for full 60 mins |
| Gaps in Base | Slices too thick | Press slabs firmly together |
| Red Streaks | Over sliced berries | Slice just before assembly |
Success Checklist:
- ✓ Berries patted dry with paper towels.
- ✓ Pound cake sliced evenly.
- ✓ Topping smoothed without peaks.
- ✓ Chilled for at least 60 minutes before slicing.
- ✓ Strawberries hulled and sliced thinly.
Fun Flavor Twists
If you want to move away from the classic version, try these ideas. For those who love a more detailed dessert, you might check out my fluffy homemade flag cake for a different texture.
- Zesty Twist: Mix a teaspoon of lemon zest into the whipped topping before spreading. It brightens the whole dish.
- Richer Profile: Use a lemon flavored pound cake instead of plain vanilla. The citrus pairs beautifully with blueberries.
- Lighter Option: Swap the whipped topping for a mixture of Greek yogurt and a touch of honey, though this will be less stable in heat.
Decision Shortcut:
- If you want a tangier taste → Use lemon pound cake.
- If you're serving outdoors → Stick to stabilized whipped topping.
- If you want a more "natural" look → Use whole blueberries and halved strawberries.
Storage and Waste
Storage Guidelines
Keep this cake in the refrigerator at all times. It stays fresh for 2 to 3 days. Once the fruit is on the cream, the clock starts ticking because the berries will eventually release their juices.
Freezing and Reheating
I don't recommend freezing this once assembled, as the berries will turn mushy upon thawing. However, you can freeze the pound cake slices separately for up to 3 months. Just thaw them in the fridge overnight before assembling.
Zero Waste Tips
If you have leftover strawberry tops or blueberry stems, don't toss them. Throw them into a freezer bag for smoothies. If you have a few leftover slices of pound cake, toast them with a bit of butter for a quick breakfast.
Best Serving Ideas
To get the best slices, use a sharp knife dipped in hot water and wiped dry between every cut. This gives you those clean, professional looking edges.
Serve this on a large platter with a few extra berries scattered around the base for a more organic look. Since it's so sweet, it pairs well with a tart iced tea or a crisp sparkling water. If you're serving a crowd, pre cut the cake into 12 squares before bringing it to the table to avoid the "first slice" stress.
Recipe FAQs
How to assemble the flag pattern?
Spread whipped topping first, then press blueberries into the top-left corner for the Union. Finish by alternating rows of sliced strawberries and bare cream to create the stripes.
Does this cake require any baking?
No, it is a no-bake dessert. Since you use pre-made pound cake, it is much faster than a classic bake.
How long should the cake chill before serving?
Chill for 1 hour in the refrigerator. This ensures the whipped topping is stable and the cake slices cleanly.
Is it true that frozen berries work just as well as fresh for the decoration?
No, this is a common misconception. Frozen berries release excess moisture and bleed color, which would stain the white whipped topping.
How to prevent the whipped topping from sliding?
Press the fruit firmly into the cream. Ensuring the pound cake slabs are tightly packed in the pan also provides a sturdy foundation.
Is it true I can skip the chilling step and serve it immediately?
False. Without the one-hour chill time, the cake may lack the stability needed for professional looking slices.
How to slice the pound cake for the base?
Slice into uniform slabs approximately ½ inch thick. Arrange them tightly in a 9x13 inch pan to eliminate any gaps.
3ingredient Flag Cake