The Allnighter Brown Butter Chocolate Chip Cookies
- Unveiling the Secret to Truly Proper Chocolate Chip Cookies
- Why This Recipe Outshines All Others: Texture Guaranteed
- Assembling Your Arsenal: Essential Components for Perfection
- Decoding the Dough: Ingredient Quality Matters
- The Alchemy of Baking: Step-by-Step Construction
- Crucial Timing: Temperature Control for Superior Results
- Troubleshooting and Pro-Tips for Consistent Success
- Elevating Your Next Batch of Chocolate Chip Cookies
- Recipe FAQs
- 📝 Recipe Card
Unveiling the Secret to Truly Proper Chocolate Chip Cookies
Welcome, fellow baking enthusiasts, to the definitive guide for crafting the kind of Chocolate Chip Cookies that halt conversations mid-sentence. We all have a memory associated with that perfect, golden disc crisp at the edges, impossibly soft in the middle, and utterly loaded with molten chocolate.
Achieving this ideal is often viewed as a magical feat, reserved only for professional bakeries. I’m here to debunk that myth. This recipe, which I call ‘The Properly Perfect’ batch, is rooted in fundamental techniques rather than complicated measurements.
It’s designed to deliver consistent, show stopping results every single time you decide to bake from scratch.
Why This Recipe Outshines All Others: Texture Guaranteed
What sets this particular approach apart from countless other Easy home-made Chocolate Chip Cookies Recipes ? It comes down to the deliberate manipulation of fat and sugar ratios to control spread and texture.
Many standard recipes yield flat, brittle biscuits, but we are aiming for architectural integrity: height, chewiness, and a complex flavour profile. The dedication to achieving this superior texture is what transforms a simple snack into a truly memorable bake.
The All-Nighter Brown Butter Advantage Explained
The cornerstone of this entire operation is the use of browned butter. This isn’t just about melting the butter; it involves cooking it gently until the milk solids caramelize, creating a deep, toasted, almost toffee like flavour base.
This simple 10-minute addition elevates the final product beyond measure, injecting a richness you won't find in standard recipes. The initial step involves melting 1 cup (2 sticks or 226g) of unsalted butter over medium heat, swirling constantly until the desirable nutty aroma emerges and the solids turn a deep amber colour.
Crucially, once browned, you must immediately transfer this liquid gold to a heatproof bowl to halt the cooking process, allowing it to cool for about 15 minutes before proceeding.
Setting Expectations: Crisp Edges, Gooey Heart
Our sugar combination is precisely calibrated to control structure. We use a mix of 1 cup plus 2 tablespoons (220g) of packed light brown sugar, which draws in moisture and ensures the centre remains profoundly chewy, alongside 1/2 cup (100g) of granulated white sugar.
The white sugar is the agent that promotes those desirable, slightly crisped edges. When you combine these with the cooled brown butter, you are pre-setting the stage for a magnificent textural dichotomy.
A Reliable Blueprint for Biscuit Bliss
This recipe is constructed not just to taste fantastic but to be repeatable. Yielding approximately 18 large cookies, the active prep time is around 20 minutes, though I highly recommend allocating 30 to 60 minutes for chilling.
We are building one of the Best Cookies Recipe templates imaginable, ensuring that whether you are an absolute novice or a seasoned baker looking for a quick upgrade, this blueprint for biscuit bliss is entirely manageable.
For those needing immediate gratification, while this recipe strongly suggests a chill period, we will discuss how to bake these Chocolate Chip Cookies No Chill later, though with minor textural compromises.
Assembling Your Arsenal: Essential Components for Perfection
Baking is chemistry, and every ingredient plays a vital role. For this Chewy Chocolate Chip Cookie Recipe , ingredient quality directly translates to flavour outcome.
You will need two large eggs (preferably at room temperature for better emulsification), 1 tablespoon of high-quality pure vanilla extract do not skimp here! 2 1/4 cups (280g) of all-purpose flour, 1 teaspoon of baking soda, and 3/4 teaspoon of fine sea salt to be incorporated into the dry mix.
Finally, you need a generous 1 1/2 cups (250g) of chocolate, which brings us to the most exciting decision in any cookie venture.
Decoding the Dough: Ingredient Quality Matters
To achieve the pinnacle of Chocolate Chip Cookies Homemade , we must focus on how these basic components interact. The structure, rise, and overall flavour profile hinge on careful attention to these elements.
The Butter Breakdown: Achieving Nutty Depth
As mentioned, the pre-treatment of the butter is paramount. By taking the time to achieve that beautiful amber hue and nutty scent, you are infusing every single molecule of the resulting dough with deep, complex flavour far beyond what standard melted or softened butter provides.
This depth is what differentiates a good cookie from the kind of Easy Choc Chip Cookies that become legendary in your household.
Flour, Leavening, and Salt: The Structural Trio
Flour provides the framework, but the combination of baking soda and salt fine tunes it. The baking soda reacts with the acids present in the brown sugar and the slight bitterness from the browned butter to provide lift and a subtle chewiness.
On top of that,, incorporating 3/4 teaspoon of fine sea salt directly into the flour mixture ensures that the salt is distributed evenly, seasoning the dough internally, which is necessary before we even consider the finishing salt.
Chocolate Choices: Chips vs. Chunks for Maximum Melt
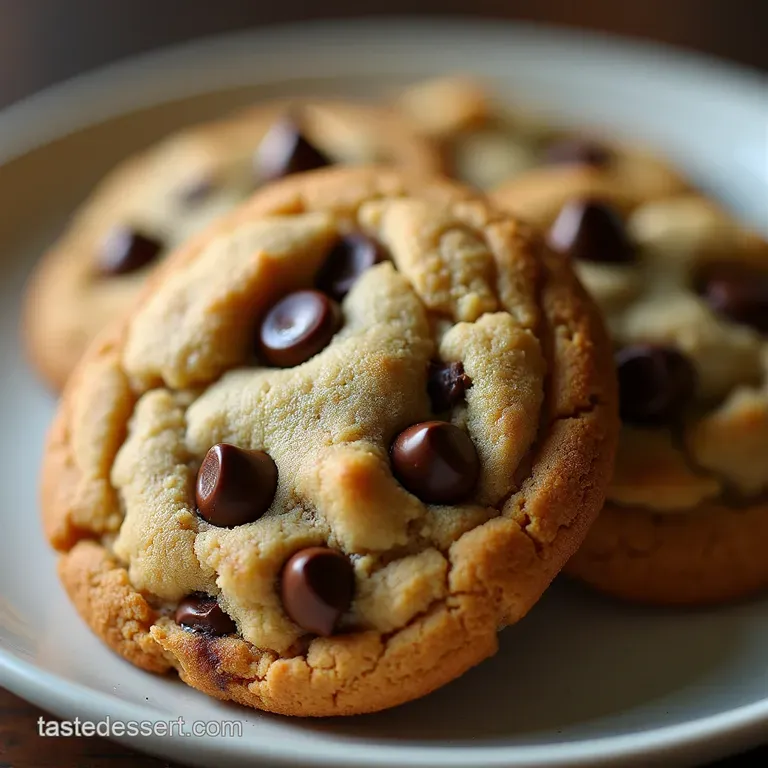
For the ideal presentation, I advocate for a dual approach to your chocolate. While standard semi sweet chips are reliable, mixing them with roughly chopped dark chocolate chunks or discs creates superior texture.
The chips maintain their shape during baking, providing defined pockets of sweetness, while the chopped bars melt aggressively, resulting in those highly desirable pools of glossy, liquid chocolate across the cookie surface. This approach ensures the final product feels luxurious.
Related Recipes Worth Trying
- The Quintessential Crosshatch Truly Classic Perfectly Chewy Peanut Butter Cookies — Forget fussy recipesthis is the benchmark Peanut Butter Cookies Recipe you need Achieve soft chewy bakerystyle results every time Get the foolproof method here
- The Ultimate Chocolate Dump Cake Recipe Effortless Lava Cake — Ditch the fuss Learn how to make this ridiculously rich Chocolate Dump Cake that bakes into a molten brownielike marvel Perfect for a quick impressive treat
- Foolproof Chocolate Covered Pretzels Recipe The Ultimate Snap — Master the art of beautiful Chocolate Covered Pretzels This easy recipe guarantees a glossy professional finish Perfect for your next gathering
The Alchemy of Baking: step-by-step Construction
Once your brown butter is ready and slightly cooled, the mixing process flows quickly. After incorporating the sugars, you must slowly beat in the two large eggs, one at a time, followed by the vanilla extract, ensuring they are fully emulsified into the buttery sugar mixture.
In a separate bowl, whisk your flour, baking soda, and internal salt together. Then, introduce the dry ingredients to the wet mixture gradually on low speed until they are just combined. Overmixing at this stage develops gluten unnecessarily, leading to a tougher cookie.
The final, gentle step involves folding in your 1 1/2 cups of chocolate mixture using a rubber spatula.
Crucial Timing: Temperature Control for Superior Results
The difference between a flat mess and a perfectly domed, soft cookie often comes down to precise control over temperature both in the oven and in the dough preparation.
Creaming Fundamentals: Mastering Sugar Integration
When combining the cooled brown butter with both the brown and granulated sugars, don’t be afraid to whip this mixture with energy (either via a stand mixer or strong arm work). You are aiming to lighten the mixture considerably before introducing the eggs.
This initial aeration is critical for trapping air, which contributes significantly to the final cookie’s loft and tender texture.
Folding In the Melty Gold: Integrating the Chocolate Chips
The chocolate must always be the final addition before chilling. Use a spatula, not the electric mixer, to gently fold them in. The goal here is distribution, not agitation. You want the chocolate pieces nestled throughout the dough mass, ready to melt when baked, preserving the structural integrity you’ve worked hard to build.
The Chill Factor: Why Resting the Dough Is Non-Negotiable
This is perhaps the single most critical step for guaranteeing a superior Homemade Soft Chocolate Chip Cookie . Chilling the dough for a minimum of 30 minutes, but ideally for an hour allows the flour to fully hydrate and, more importantly, solidifies the fat.
Solid fat melts slower in the oven, preventing the dough from spreading too rapidly before the edges have a chance to set. This results in a thicker, chewier cookie every time.
Baking Dynamics: Achieving Golden Brown Perfection
Preheat your oven to 375° F ( 190° C) and line your baking sheets with parchment paper or silicone mats. Scoop the chilled dough into uniform balls (a 3-tablespoon scoop works wonderfully) and space them at least two inches apart.
Before they enter the heat, sprinkle the tops generously with flaky sea salt (like Maldon) for that professional finish. Bake for 10 to 12 minutes. You are looking for edges that are beautifully set and golden brown, but the centre should still appear slightly puffy and underbaked.
They will continue to cook on the hot tray after removal. Let them rest on the sheet for five minutes before transferring them to a wire rack to cool completely.
Troubleshooting and Pro-Tips for Consistent Success
Even with the best directions, baking can throw curveballs. If your cookies spread too thin (the dreaded "puddle cookie"), it usually means your butter was too warm when mixing, or you skipped the chill time.
If they dome too high and remain cakey, your flour measurement might have been too high, or you used too much baking soda. For those who simply cannot wait, you can bake these Chocolate Chip Cookies No Chill immediately, but expect a flatter profile.
Remember: precise measurement of flour (spooned and leveled, never scooped directly from the bag) is key to success in any of the Easy Choc Chip Cookies Recipes you attempt.
Elevating Your Next Batch of Chocolate Chip Cookies
Once you have mastered this foundational recipe, it's time to explore its potential. These Chocolate Chip Cookie Recipes Homemade offer endless avenues for experimentation.
Storage Solutions: Keeping Cookies Fresh for Days
To maintain that perfect texture, store cooled cookies in an airtight container at room temperature. For extra longevity, place a slice of bread inside the container; the cookies will absorb moisture from the bread, keeping them wonderfully soft for up to five days.
Beyond Vanilla: Unique Flavor Additions and Swaps
The flavour profile can be deepened significantly. Consider swapping the standard vanilla for almond extract, or infusing the vanilla extract itself by steeping a vanilla bean pod in it for a few weeks prior to baking.
Another fantastic addition is folding in 1 teaspoon of espresso powder with your dry ingredients; this enhances the chocolate notes without making the cookie taste explicitly like coffee.
The Science of Spreading: Adjusting for Altitude
If you are baking at a high altitude (above 3,500 feet), the lower air pressure causes baked goods to rise faster and spread more readily. To combat this when making your Chewy Chocolate Chip Cookie Recipe in the mountains, slightly increase the flour by 1 to 2 tablespoons and reduce the leavening agent (baking soda) by 1/4 teaspoon to slow the rise and encourage a firmer structure that resists excessive spreading.

Recipe FAQs
My Chocolate Chip Cookies spread out flat like pancakes! What did I do wrong?
Ah, the dreaded cookie puddle! This is usually down to two things: either your butter was too warm when mixing, or you skipped chilling the dough. Chilling is crucial as it firms up the butter, preventing the dough from melting too fast in the oven.
Give your dough a solid hour in the fridge next time, and you'll get that lovely thick centre!
Why does this recipe call for browning the butter, and is it really worth the hassle?
Browning the butter is our little secret weapon here; it toasts the milk solids, giving the cookies a deep, nutty, toffee like flavour that regular melted butter just can't match. It might seem like an extra step, but honestly, once you taste the difference in these Chocolate Chip Cookies, you’ll never go back to the standard method!
How should I store my homemade Chocolate Chip Cookies to keep them chewy?
To keep them tasting fresh, store them in an airtight container at room temperature for up to five days. If you want to keep that chewy heart going strong, place half a slice of fresh bread in the container with the cookies; the cookies will slowly steal the moisture from the bread and stay softer longer.
Avoid the fridge, as that tends to dry them out!
Can I bake these cookies from frozen, and if so, how long do I add to the baking time?
Absolutely! Baking from frozen is brilliant for batch cooking just scoop your dough balls onto a tray and freeze them solid. When ready to bake, place the frozen balls straight onto a lined baking sheet and add about 3 to 5 extra minutes to the standard baking time.
Keep an eye on them; you want the edges to look set before taking them out.
My cookies are perfectly baked but taste a bit too sweet. How can I balance the flavour next time?
That sweetness is easily managed! The key is contrast. Make sure you are using a mixture of chocolate not just milk chocolate as semi sweet or dark chocolate lowers the overall sugar profile.
Most importantly, don't skip sprinkling that flaky sea salt on top right before they go into the oven; it really sharpens the butter and chocolate notes beautifully.
Brown Butter Choc Chip Cookies

Instructions:
Nutrition Facts:
| Calories | 250-260 kcal |
|---|---|
| Fat | 14g |
| Fiber | 1g |
