Chocolate Peanut Butter Brownies with a Salty Swirl

- Time: 15 min active + 25 min baking + 30 min cooling
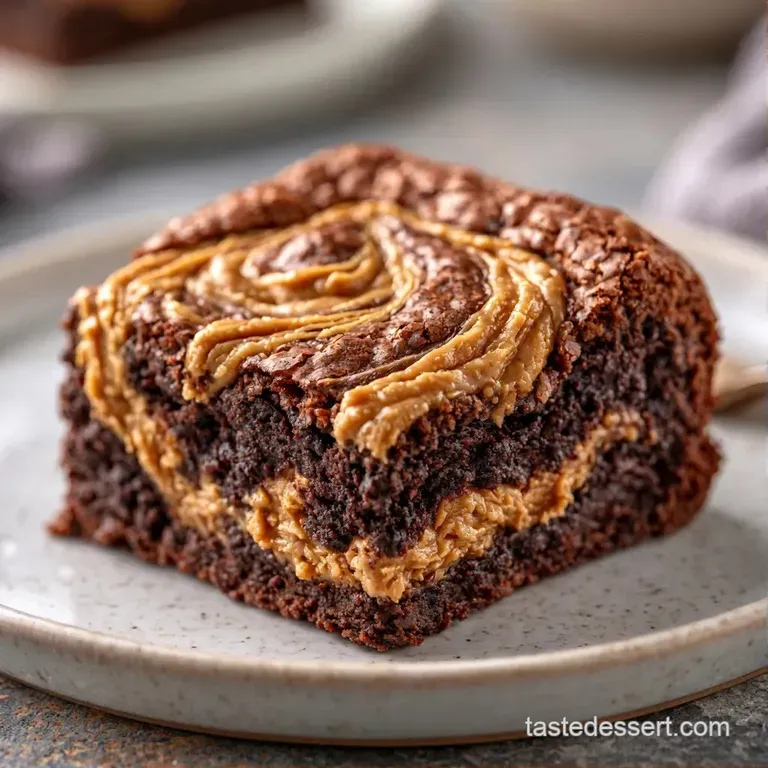
- Flavor/Texture Hook: Fudgy center with a glossy, crackly top
- Perfect for: Potlucks, late night cravings, or beginner bakers
- Fudgy Chocolate Peanut Butter Brownies
- What Each Ingredient Does
- Gathering Your Ingredients
- Essential Tools for Baking
- From Prep to Plate
- The Trick Behind the Texture
- Troubleshooting Guide
- Adjusting the Batch Size
- Common Baking Myths
- Storage and Zero Waste
- Dietary Adaptations
- Serving Suggestions
- Recipe FAQs
- 📝 Recipe Card
The smell of melted butter and cocoa filling the kitchen is honestly the best part of my weekend. There is something about that heavy, chocolate scent that just makes everything feel cozy.
I remember the first time I tried to swirl peanut butter into a batter, and it just sank straight to the bottom, leaving me with a weird layer of PB at the base.
But once I figured out the right ratio of powdered sugar and butter in the swirl, everything changed. These Chocolate Peanut Butter Brownies aren't just about the flavor, they're about that contrast between the dark chocolate and the creamy ribbons of peanut butter.
You can expect a brownie that is heavy and decadent, not cakey. It's the kind of dessert that feels a bit indulgent, but it's surprisingly simple to pull off.
Fudgy Chocolate Peanut Butter Brownies
The Fat Balance: Using melted butter instead of softened butter ensures a denser, fudgy texture rather than a light, airy cake.
The Swirl Density: Adding powdered sugar to the peanut butter makes it thick enough to sit on top of the batter instead of sinking.
The Cooling Phase: Letting them sit for 30 minutes allows the fats to solidify, which creates that chewy bite.
| Method | Time | Texture | Best For |
|---|---|---|---|
| Oven Bake | 25 mins | Fudgy & Crackly | Classic batches |
| Stovetop (Steamed) | 40 mins | Moist & Dense | Humidity control |
What Each Ingredient Does
| Ingredient | What It Does | Best Swap |
|---|---|---|
| Cocoa Powder | Provides the deep chocolate base | Dutch process cocoa |
| Granulated Sugar | Creates the glossy top and moisture | Brown sugar (makes it chewier) |
| Eggs | Binds everything and adds structure | Flax eggs (vegan) |
| Peanut Butter | Adds salty contrast and richness | Almond butter |
Gathering Your Ingredients
Here is what you need to get this started. I recommend using a high-quality cocoa powder for a deeper flavor.
- 1/2 cup (115g) unsalted butter, melted Why this? Adds richness and helps the fudgy texture
- 1 cup (200g) granulated sugar Why this? Helps create that thin, crackly crust on top
- 2 large eggs
- 1 tsp (5ml) vanilla extract
- 1/3 cup (30g) unsweetened cocoa powder
- 1/2 cup (65g) all purpose flour Why this? Keeps the structure without making it cakey
- 1/4 tsp (1.5g) salt
- 1/2 cup (90g) semi sweet chocolate chips
- 1/2 cup (128g) creamy peanut butter
- 2 tbsp (30g) powdered sugar
- 1 tbsp (15g) melted butter
If you're looking for more ways to use nut butters, you might like making some homemade peanut milk for a creamy drink on the side.
Essential Tools for Baking
You don't need a professional kitchen for this, but a few basics make it easier.
- 8x8 inch baking pan
- Parchment paper (crucial for easy removal)
- Large mixing bowl
- Whisk and a rubber spatula
- Sifter or fine mesh strainer
- Toothpick or butter knife for swirling
From Prep to Plate
Let's get into it. The goal here is to avoid overmixing once the flour goes in, as that's how you end up with cake instead of fudge.
- Preheat the oven to 350°F (175°C). Line your 8x8 inch pan with parchment paper, leaving an overhang on two sides so you can lift the whole block out later.
- Whisk the melted butter and granulated sugar together. Beat in the eggs and vanilla extract until the batter looks glossy.
- Sift in the cocoa powder, flour, and salt. Fold gently with a spatula until no streaks of flour remain.
- Fold in the semi sweet chocolate chips.
- Pour the chocolate batter into the pan and smooth it out with your spatula.
- In a small bowl, stir the peanut butter, powdered sugar, and melted butter until the mixture is smooth.
- Drop dollops of the peanut butter mixture onto the raw batter. Use a toothpick to swirl in a figure eight motion.
- Bake for 22–25 minutes until the edges are set but the center still has a slight jiggle.
- Remove from the oven and cool completely in the pan for at least 30 minutes.
Chef's Note: Don't be tempted to poke the center with a toothpick to see if it's "done" like a cake. If the toothpick comes out clean, you've overbaked them. You want a few moist crumbs clinging to the pick.
The Trick Behind the Texture
To get that specific chew, you have to manage the air. When you whisk the eggs and sugar, you're creating a stable structure, but once the flour enters, you want to stop. According to King Arthur Baking, overworking flour develops gluten, which leads to a tougher, bread like texture.
For these Peanut Butter Brownies, the goal is a high fat to flour ratio. This is why we use only 1/2 cup of flour for a whole pan. The result is a dense, almost truffle like consistency that melts in your mouth.
If you love this kind of richness, you'd probably enjoy these cookie dough cups for another quick sweet fix.
Troubleshooting Guide
Dealing with a batch that doesn't look right is frustrating, but it's usually a quick fix.
| Issue | Solution |
|---|---|
| Why Your Brownies Are Cakey | If your brownies feel more like a sponge cake than a fudge, it's usually because of too much air or too much flour. Over whisking the flour is the main culprit. |
| Why Peanut Butter Sinks | When the peanut butter disappears into the chocolate, it's usually because the PB mixture was too thin. Ensure you're using the powdered sugar and melted butter as specified. |
| Why Edges Are Burnt | This happens if the oven runs hot or the pan is too thin. Using a light colored metal pan or a glass dish can change the heat distribution. |
Adjusting the Batch Size
Sometimes you only want a few brownies, or you're feeding a whole crowd. Here is how to handle that.
Scaling Down (Half Batch): Use a 4x8 inch loaf pan. You'll need to beat one egg in a small bowl and use exactly half of it. Reduce the baking time by about 20%, checking for doneness at the 18 minute mark.
Scaling Up (Double Batch): Use two 8x8 pans rather than one large deep pan. If you use a deeper pan, the edges will burn before the middle cooks. Lower the oven temperature to 325°F (160°C) and extend the baking time by 5-10 minutes.
Only double the salt and vanilla to 1.5x to avoid an overwhelming taste.
Common Baking Myths
Searing the top with a broiler for a "crust" is a common suggestion, but it's unnecessary. The sugar and butter already create a crackly top if you whisk the eggs well.
Another myth is that you need to chill the batter before baking. While chilling works for cookies to prevent spreading, for these Chocolate Peanut Butter Brownies, it actually hinders the rise of the eggs, making them too dense.
Storage and Zero Waste
Storage Guidelines: Store these in an airtight container at room temperature for 3 days. For a fudgier experience, keep them in the fridge for up to 5 days. They stay remarkably fresh when wrapped individually in parchment paper.
Freezing: These freeze beautifully. Slice them first, wrap them in foil, and place them in a freezer bag for up to 3 months. Thaw in the fridge overnight or microwave for 15 seconds for a warm treat.
Zero Waste Tips: If you have leftover peanut butter that isn't enough for a full swirl, stir it into your morning oatmeal or use it as a dip for apple slices. If you have a few crumbs left in the pan, toss them over vanilla ice cream for a homemade crumble.
Dietary Adaptations
You can easily tweak this recipe to fit different needs without losing the core flavor.
Gluten-free Version: Replace the all purpose flour with a 1:1 gluten-free flour blend. Since GF flours can be grittier, let the batter rest for 10 minutes before baking to allow the flour to hydrate.
Vegan Option: Use a flax egg (1 tbsp ground flax + 3 tbsp water) for each egg. Replace the butter with coconut oil (melted). Use a dairy-free chocolate chip brand. The texture will be slightly more moist and less "chewy" than the original.
Low Sugar Swap: You can use a monk fruit sweetener for the granulated sugar. Note that the top may not get as crackly, as the crystallization of real sugar is what creates that thin crust.
Serving Suggestions
While these are great on their own, a few additions make them feel like a restaurant dessert.
The Classic Pairing: Serve a warm brownie with a scoop of vanilla bean ice cream. The cold cream cuts through the intensity of the peanut butter.
The Coffee House Style: Dust the top with a tiny bit of cocoa powder and serve with a shot of espresso. The bitterness of the coffee highlights the sweetness of the chocolate.
Salty Crunch: Sprinkle a pinch of flaky sea salt over the peanut butter swirls right before they go into the oven. It makes the peanut flavor pop.
Recipe FAQs
Can I just mix peanut butter directly into the brownie batter?
No, it will blend in completely. To achieve the signature swirl, you must stir the peanut butter with powdered sugar and melted butter separately and dollop it on top before baking.
How to make the peanut butter swirl?
Stir together the peanut butter, powdered sugar, and melted butter until smooth. Drop dollops of this mixture onto the raw chocolate batter and swirl with a toothpick in a figure eight motion.
Is there a trick to keep the peanut butter from sinking?
Mix in the powdered sugar as specified. This increases the viscosity of the peanut butter mixture, ensuring it stays on the surface rather than disappearing into the chocolate.
What is the best way to serve these peanut butter brownies?
Serve them warm with a scoop of vanilla ice cream. If you enjoy this flavor pairing, you can apply the same logic to a brownie sundae for a more decadent dessert.
Are these peanut butter brownies beginner friendly?
Yes, they are very accessible. The recipe relies on basic whisking and folding techniques, making it an ideal project for home bakers with minimal experience.
Why are my peanut butter brownies cakey instead of fudgy?
You likely over whisked the flour. Fold the cocoa powder, flour, and salt gently with a spatula until just combined to avoid incorporating too much air into the batter.
How to store these brownies to keep them fresh?
Place them in an airtight container at room temperature for 3 days. For a fudgier experience, keep them in the refrigerator for up to 5 days.
Chocolate Peanut Butter Brownies

