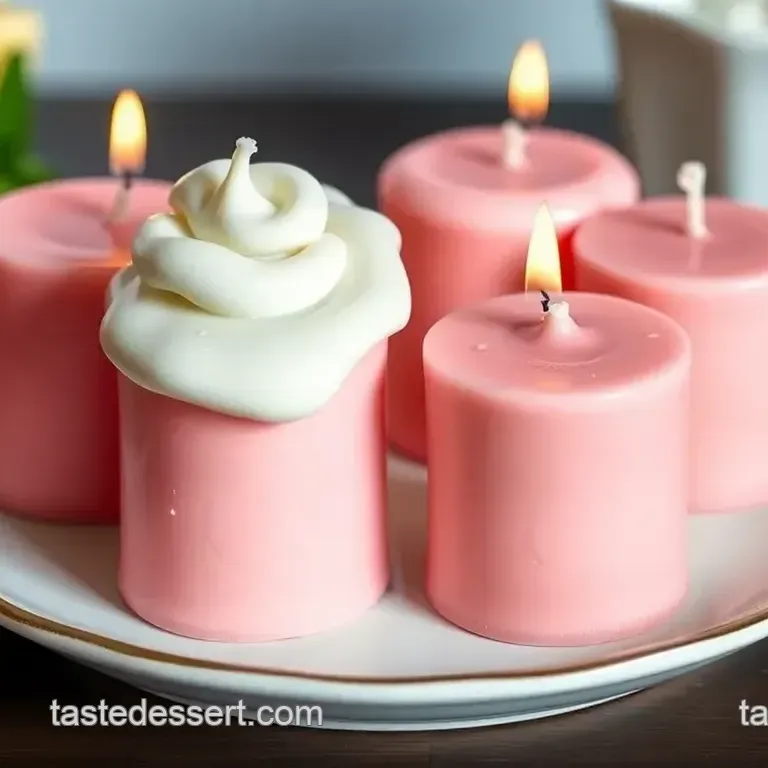
Dessert Shaped Candles
- Secrets Behind Perfect Dessert-Shaped Candles
- Why You'll Love This Version
- Health and Nutrition Highlights
- Recipe at a Glance
- Perfect Ingredients Selection
- Whimsical Dessert-Shaped Candles: Scented Sweet Treats for the Home
- Professional Secrets
- Perfect Presentation
- Storage and Make-Ahead
- Creative Variations
- Complete Nutrition Guide
- Expert FAQ Solutions
- 📝 Recipe Card
Have you ever walked into a room filled with the scent of freshly baked cookies, only to find out it’s just a candle? honestly, it’s a vibe, right? dessert shaped candles are not just another crafty project; they’re a fun fusion of creativity and indulgence that adds a dash of joy to your space.
These candles not only look charmingly edible but they also fill your home with fragrant delights that might even make you crave the real thing!
What makes this recipe special? well, it’s perfect for both beginners and seasoned crafters. with a medium difficulty level and just over an hour of your time (that’s mostly cooling time, by the way), you can transform your kitchen into a whimsical candy land.
Plus, who wouldn’t want dessert that doesn’t involve the calories? now, go on, keep reading to find out how to create these mouthwatering masterpieces!
Let’s talk a little history, shall we? candle making is an age-old art, dating back thousands of years. ancient egyptians used rushlights made of reeds soaked in animal fat, while romans got a bit fancier with candle molds.
Fast forward to today, and candle making has blossomed into a creative outlet where you can make scented candles of all shapes and sizes, from decorative ones that add ambiance to your home, to those irresistible dessert shaped candles that make you smile.
What’s the unique selling point of this recipe? these candles are not just about aesthetics; they’re a multi sensory experience. they bring the warmth of home baked goodies into your living room without the fuss of flour flying everywhere.
They also make delightful gifting options and stunning additions to your party decorations. imagine setting your dining table with sweet scented candles that look good enough to eat!
Secrets Behind Perfect Dessert Shaped Candles
Did you know that every candle you make tells a story? dessert shaped candles are no exception. drawing inspiration from rich culinary heritage and the colorful world of confectionery, these candles blend art and pleasure.
You can think of candle crafting as a kind of magic, turning wax into something whimsical that sparks joy and nostalgia alike.
The origin story of these charming creations is fascinating! while candles typically invoke thoughts of soft light and cozy environments, dessert shaped varieties draw visitors into a world of sweets, where cupcakes, cookies, and even donuts live merrily side by side.
They're not just candles; they’re a celebration of flavors and kitchen creativity! nowadays, their popularity has skyrocketed, with crafters and diy ensoiasts embracing a new trend in home decor and gifting.
Why You'll Love This Version
What really stands this recipe out is the bold and fun flavor combinations . these candles can smell like vanilla, cake batter, or strawberry the options are endless! with foolproof techniques, even those new to the craft can achieve beautiful results without the stress.
Plus, the method has been expertly tested, meaning you won't end up with a waxy fail on your first try.
And here’s a juicy tidbit: you’ll save time too! With efficient candle pouring techniques, you can whip up a batch without feeling overwhelmed, allowing you to embrace your inner artisan. Amazing, right?
Health and Nutrition Highlights
While technically non-toxic and delightful to the senses, let’s face it: these candles are not for eating. however, they do come with several benefits.
Using essential oils allows you to skip chemical fragrances often found in traditional candles; you can enjoy your aromatic space with peace of mind.
Plus, making your own candles means you can tailor scents to your likes or even seasonal themes. how about pumpkin spice candle for fall or lavender for a calming effect? also, keep in mind that the wax choices are vast from soy wax to natural alternatives so you’re not only crafting aesthetically but also contributing to a more eco-friendly world.
Recipe at a Glance
- Preparation Time: 20 minutes of active prep, 1 hour to cool and set
- Skill Level: Medium
- Serving Size: Yields approximately 6 candles
- Cost Efficiency: Quite budget friendly when you compare homemade with store-bought custom candles!
And there you have it! now that you're armed with all the juicy details about crafting spectacular dessert shaped candles , let’s dive into the next section and uncover the list of ingredients you’ll need to make these delightful creations.
You’re going to love this! happy crafting!
Perfect Ingredients Selection
Oh my gosh, let’s get right into the magic of crafting those whimsical dessert shaped candles ! honestly, the fun really starts with the ingredients ! it’s like building blocks for your cozy home environment, and trust me, you want to choose the creamiest and sweetest combinations to make every corner smell like a warm hug.
Premium Core Ingredients
First off, let’s talk about the premium core ingredients you’ll be needing. you’re gonna kick things off with 2 cups of soy wax flakes this is where the magic begins! when you’re standing in the craft store, look for those lovely non-toxic candle ingredients .
They should be relatively soft and have a light sheen, like your favorite buttery frosting. you want to avoid anything overly hard, as that could mean it has additives that could mess with your scented bliss.
When you scoop your wax, a tipped cup or a kitchen scale works wonders for accuracy don’t skimp on those 2 cups; we want maximum candle delight here! just a heads up: the way you store your wax can really make a difference, too.
Keep it in a cool, dry place, away from bright lights, kind of like hidden treasure.
Next up, you’ll need fragrant essential oil a whole ounce will do the trick. think about lush scents like vanilla or even something fruity like strawberry.
Seriously, it’s invigorating. when selecting your essential oils, look for oils that indicate they’re suitable for candle making. if it just smells good but doesn’t say it’s for candles, it could burn funny (yikes!).
Store them away from heat to preserve their goodness.
Signature Seasoning Blend
Now, the magic truly happens when we mix our signature seasoning blend ! for candles, this is all about combining our essential oils.
If you’re feeling adventurous, you might want to experiment with sweet combinations like cake batter and vanilla for that classic dessert vibe or even peppermint for a fresh touch.
Don’t forget about candle dye techniques ! you can use dye chips to tint your wax to match your theme pastels for spring, bold colors for summer, and darker shades for those cozy winter evenings.
Just remember to start with a small amount; you can always add more, but it’s hard to tone down a flaming hot pink, am i right?
Smart Substitutions
Here’s the thing: life happens, and sometimes you’re like, “oh no, i’m out of soy wax!” never fear! you can make a quick switch to beeswax or even paraffin if you want to keep it classic.
And let’s not forget dietary swaps if you know someone who loves candles but has a soy allergy, beeswax is a great non-toxic alternative.
Kitchen Equipment Essentials
Let’s chat about kitchen equipment essentials . first things first, grab a double boiler . if you’re like me and don’t have one, just use a microwave safe bowl instead whatever gets that wax melting process going.
And trust me, the thermometer? it’s optional, but having one can help you hit that sweet spot of around 180°f for pouring golden ground for excellent results.
You will also want some candle molds that make your dessert candles pop, and silicone molds are hands down the most forgiving. Plus, they come in incredibly fun shapes think cookies and cupcakes!
Pro Ingredient Tips
Now, let's end this ingredient section with some pro ingredient tips ! To make your candle really stand out, look for quality markers on your labels if it says “100% pure,” that’s your golden ticket!
And of course, for all you money saving gurus out there , when it comes to essential oils, buying in bulk can cut costs significantly.
Who doesn’t love saving a few quid while getting crafty? just make sure you use them up within a year no one likes stale scents!
Phew! We’ve covered the foundations of crafting these magical candles. Next up, let's dive into the fun part the step-by-step instructions ! Trust me, you’re going to love the process of creating these beautiful, aromatic delights!
Whimsical Dessert Shaped Candles: Scented Sweet Treats for the Home
Hey there, friend! so, let me take you on a little journey into the world of candle making particularly, crafting those super cute dessert shaped candles that look good enough to eat.
Honestly, there's something magical about filling your space with pleasant scents and delightful shapes that bring whimsy into our everyday lives.
These candles are perfect for gifts, parties, or just pampering yourself on a cozy night in.
Essential Preparation Steps
Alright, before we dive into melting wax, let's get our ducks in a row! Having everything prepared makes a world of difference.
Mise en place: gather the following supplies: soy wax flakes, essential oils (think vanilla or cake batter yum!), candle molds (silicone shapes are the best), candle wicks, and some dye if you want to add a splash of color.
Prep techniques: Prepping your wicks is key! Dip them in melted wax to anchor them before pouring. This little step goes a long way in keeping everything neat and tidy.
Time management: You’ll want to budget about 20 minutes of active prep time . It sounds manageable, right? Plus, after that, you get to do the waiting game, which we’ll cover.
Organization tips: Cover your work surface with butcher paper. Seriously, wax spills happen, and you don’t want to be scrubbing wax off your counter later!
Professional Cooking Method
Now, let's get to the real fun!
Prepare Workspace: You’ve got your butcher paper down, right? Let’s team up with it now.
Melt the wax: fill your double boiler with water and bring it to a nice simmer just like the gentle heat you'd use when making an old-school stew.
Toss in about 2 cups of soy wax flakes and stir until it's fully melted at least 180°f . using a thermometer is great for this; too hot can affect your scent and too cool means those flakes might not melt properly.
Add color and scent: this part is where the magic happens! add some candle dye to get that dreamy pastel or rich color you crave.
Then, remove it from the heat and mix in 1 oz of essential oil . i love vanilla for a cozy vibe, but you do you!
Set Up Molds: Position your wicks in the molds. You can use chopsticks to keep them centered.
Pour the Wax: Carefully pour the wax into the molds. This is where you want to take your time; the key is pouring gently to avoid air bubbles.
Cool and Set: Leave those sweet treats to cool at room temp for at least 1 hour . You’ll see them solidify, which is so satisfying!
Unmold and Trim: Once they’re set, pop them out of their molds, and trim the wicks to about ¼ inch .
Expert Techniques
Let’s level up our candle game.
- Professional methods: Use decorative and themed molds to really wow your guests.
- Critical steps: Always ensure your workspace is clean and dry; any moisture can mess with the wax.
- Precision points: Get familiar with pouring techniques! Aim for a smooth pour without splashing.
- Quality checks: Check the scent throw once they’re cooled. If it smells amazing, you nailed it!
Success Strategies
So, what if something goes wrong? No worries don't panic!
- If your candles don’t smell strong enough, try adding a bit more essential oil next time.
- For aesthetics, keep experimenting with colors and shapes think seasonal designs or themed candles for parties.
And oh, if you’re ever unsure about the wax melting process , don’t hesitate to melt at a low temperature. Consistency is key!
Wrapping this up, i can't tell you how much fun this journey of crafting with wax can be. you’ll find yourself wanting to try all sorts of creative candle ideas .
Next up, i’ll sprinkle in some additional details on safety tips for candle making and some other fun projects, like diy candle making for unique gifts!
Think scented candles , fragrant candles , and yes, those dessert shaped candles are just the beginning. So stay tuned for more inspirations!
Let’s dive into the delightful world of creating “whimsical dessert shaped candles: scented sweet treats for the home.” oh my gosh, where do i even start? these candles are not just a feast for the nose, but they also look like little confections that could charm anyone.
Imagine walking into your living room and being greeted by the scent of fresh baked goods, only to find it’s actually a candle! i swear, it’s like a candle wonderland in your home.
Professional Secrets
When making these adorable dessert shaped candles , there are a few pro tips that will elevate your crafting game. The whole process may look simple, but trust me, it's all about the details!
Expert Techniques
For starters, work with soy wax candles . it’s eco-friendly and burns cleaner than paraffin. plus, it’s super easy to handle! when you’re melting the wax, use a double boiler.
This is a lifesaver to prevent the wax from overheating and losing its fragrant powers.
Kitchen Wisdom
Make sure to prep your workspace. Cover your table with butcher paper. Candles and mess go hand in hand, and we don't want wax stuck to our favorite wood surface, right?
Success Guarantees
Want your candles to be fantastic? Keep your wick centered. You can use chopsticks for this. Simple but oh-so-effective!
Perfect Presentation
Now, let’s talk about how to make these candles not just smell good, but look good, too.
Plating Techniques
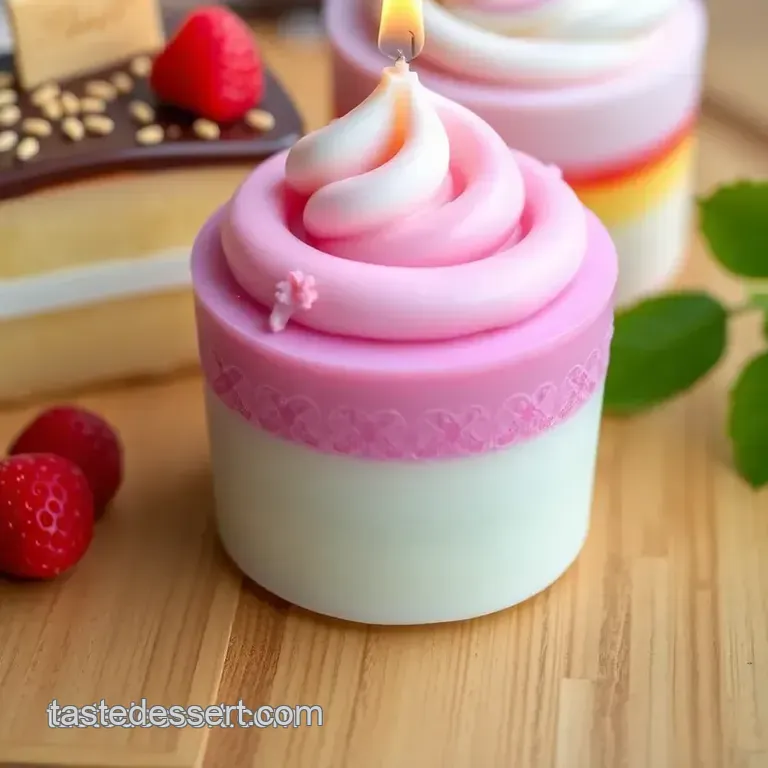
Since these are dessert themed, think about using candy molds that resemble cupcakes and lollipops. The visual appeal will get everyone’s attention!
Garnish Ideas
For a finishing touch, consider using some craft glitter or even tiny sprinkles (non-toxic, of course!) on top of your candles for an extra pop, making them look like real treats.
Serving Suggestions
Place them in cute little holders or on a nice platter as a centerpiece at your next get-together. They’ll be sure to spark some conversation.
Storage and make-ahead
Storage Guidelines
Store your candles in a cool, dry place. The fridge isn’t the best option, though; it can mess up the wax structure. Use a candle storage box, if possible.
Reheating Instructions
If you ever need to re-set a wax mishap, melt it down just a tad, then re-pour it.
Freshness Tips
Avoid direct sunlight as it can fade the color and affect the scent. Think of your fragrant candles as delicate sweets: they need love and care!
Creative Variations
Flavor Adaptations
Feel free to get creative with your aromatic candles ! Want a pumpkin spice? Go for it! Feeling fruity? Strawberry lemon cake it is!
Seasonal Twists
For seasonal candle making , experiment with seasonal scents like cinnamon for autumn or peppermint in the winter. How cozy would that be?
Regional Variations
You could even lean into fragrance trends from different places. How about a chai flavored candle inspired by your favorite coffee shop?
Complete Nutrition Guide
While we’re not eating these lovely candles, there are still health benefits to using natural ingredients.
Dietary Information
Using natural wax alternatives , like soy or beeswax, ensures you’re making something that’s non-toxic. Just like with food, go for quality ingredients!
Portion Guidance
Well, technically, you can’t eat these, but they’re perfect for gifting! Think of them as handmade gifts that last longer than baked goods.
Expert FAQ Solutions
Common Concerns
Got questions about DIY candle making? I get it! A common one is how to avoid uneven burning.
Troubleshooting Guide
If your candles don’t burn evenly, your wick might be too short. Don’t worry; you can always trim and adjust!
Making dessert shaped candles is such a fantastic way to combine creativity with a touch of warmth in your home. honestly, they make great custom candles for any occasion, transform your space into a cozy haven with scented candles , and even serve as that unique gift idea for your besties!
With the right techniques and a pinch of patience, you can have your own mini candle factory.
So gather your candle making supplies , grab your molds, and let the fun begin. happy crafting!
Dessert Shaped Candles

