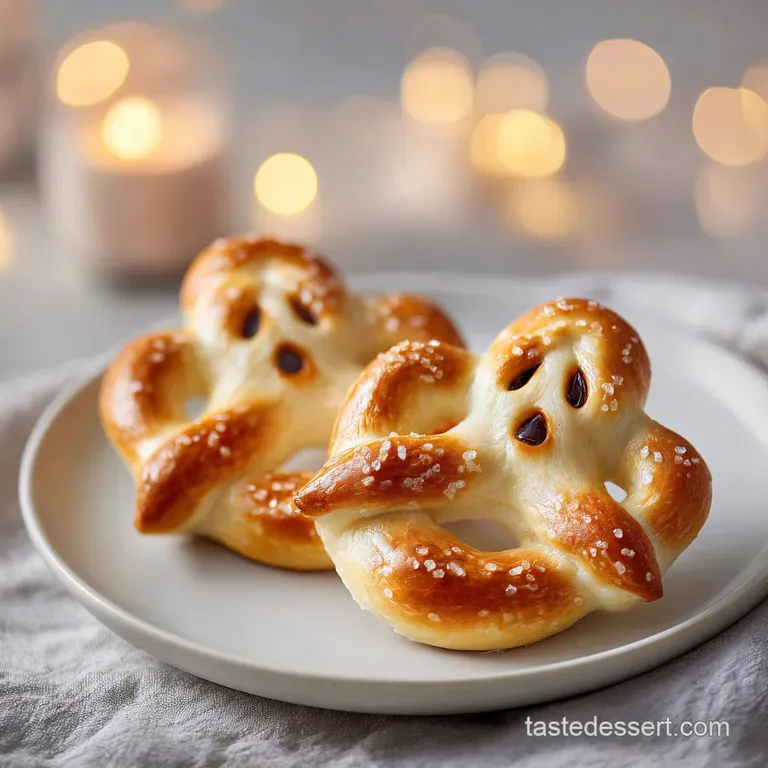
Ghost Pretzels: Spooky Chocolate Dipped Treats
- Time: Active 15 minutes, Passive 10 minutes, Total 25 minutes
- Flavor/Texture Hook: Velvety sweet coating meeting a salty, shatter crisp center
- Perfect for: Last minute Halloween parties, classroom treats, or beginner friendly holiday crafting
- Master the Spooky Ghost Pretzels
- Flavor Profiles and Textural Snap
- Component Analysis and Ingredient Roles
- Essential Goods to Grab
- The Transformation Process
- Fixing Dipping and Set Errors
- Adjusting the Batch Size
- Kitchen Myths Debunked
- Keeping the Crunch Fresh
- Party Plating and Display
- Recipe FAQs
- 📝 Recipe Card
Master the Spooky Ghost Pretzels
The kitchen currently smells like a dream a heavy, swirling mix of toasted flour from the oven and that unmistakable, buttery vanilla scent of melting white chocolate. I remember the first time I attempted these for a neighborhood potluck; I was convinced I’d end up with a clumped mess.
Instead, the first time I pulled a tray of these little specters out of the fridge, the way the white coating had snapped into a smooth, porcelain like shell against the dark pretzel was a total win.
Honestly, don't even bother with the cheap almond bark you find in the back of the pantry. We've all been there, trying to save a buck, only to have the coating seize into a grainy sludge. This recipe is all about that specific "click" when you bite through the sweet exterior to reach the salty crunch.
It’s a texture game, and we’re playing to win. Right then, let’s get into the specifics of why this works so well.
You'll find that once you get the rhythm of the dip and the tap, you’ll be flying through the batch. It’s almost rhythmic. If you find yourself enjoying the process of dipping and decorating, you might also love the technique used in the The Beer Garden recipe which explores a completely different side of the pretzel world. But for now, we’re focusing on these tiny, sugary phantoms.
Flavor Profiles and Textural Snap
- Surface Tension Management: Adding vegetable shortening lowers the surface tension of the melted wafers, allowing it to flow into the pretzel holes without clogging them.
- Latent Heat Control: By using melting wafers instead of pure white chocolate bars, we bypass the need for precise tempering while still achieving a firm, room temperature set.
- Sodium Contrast: The salt crystals on the pretzels act as flavor enhancers, cutting through the high sugar content of the white coating to prevent a cloying aftertaste.
- Retrogradation Delay: The fats in the coating create a moisture barrier, which keeps the pretzel inside from absorbing humidity and losing its signature shatter crisp texture.
| Method | Total Time | Texture | Best For |
|---|---|---|---|
| Fast (Wafers) | 25 minutes | Snappy shell, very smooth | Quick parties, high volume batches |
| Classic (Tempering) | 1 hours 10 mins | Richer mouthfeel, delicate | Gourmet gifting, chocolate enthusiasts |
| Air Dry (Icing) | 4 hours 0 mins | Hard crunch, matte finish | Shipping long distances in heat |
Choosing the right method depends on your schedule, but for most of us, the wafer method provides the best balance of speed and professional aesthetics. It's the most reliable way to ensure your ghosts don't end up looking like lumpy clouds.
Component Analysis and Ingredient Roles
| Ingredient | Science Role | Pro Secret |
|---|---|---|
| White Wafers | Provides the structural "ghost body" and sweet base. | Use wafers containing palm oil for a higher melting point and better shine. |
| Vegetable Shortening | Acts as an emulsifier to thin the coating for easier dipping. | Never use butter; the water content in butter will cause the chocolate to seize instantly. |
| Mini Pretzels | The structural skeleton that provides the salty, crunchy contrast. | Freshness is key; an old pretzel will taste stale even under a pound of chocolate. |
Essential Goods to Grab
- 24 mini pretzel twists (approx. 110g): These are our skeletons. Ensure they aren't broken in the bag.
- 12 oz high-quality white melting wafers: Why this? Wafers melt more evenly than chips and set firmer without tempering.
- 48 mini candy eyes: These give our ghosts their personality.
- 1 tsp vegetable shortening: Why this? It thins the coating to a velvety, dippable consistency.
- 2 oz black decorating gel: Used for the tiny, screaming ghost mouths.
For the coating, I usually reach for brands like Ghirardelli or Wilton. If you're looking for a similar salt sweet balance but with a more festive twist, you can always check out the Peppermint Bark Pretzels recipe for your next holiday baking session.
The Transformation Process
1. The Gentle Melt Phase
Place 12 oz high-quality white melting wafers and 1 tsp vegetable shortening in a microwave safe bowl. Microwave in 30 second intervals, stirring vigorously between each, until the mixture is velvety and flows like heavy cream.Note: Stirring distributes the heat and prevents the bottom from scorching while the top stays solid.
2. The Full Dip Immersion
Line a large baking sheet with parchment paper. Submerge one of the 24 mini pretzel twists into the melted coating using a fork. Lift it out and tap the fork against the side of the bowl until the excess coating drips away and the pretzel holes are clear.
3. Setting the Base
Slide the coated pretzel onto the parchment paper. If the coating is pooling too much at the bottom, your mixture might be too warm; let it sit for 2 minutes to thicken slightly.
4. Animating the Ghosts
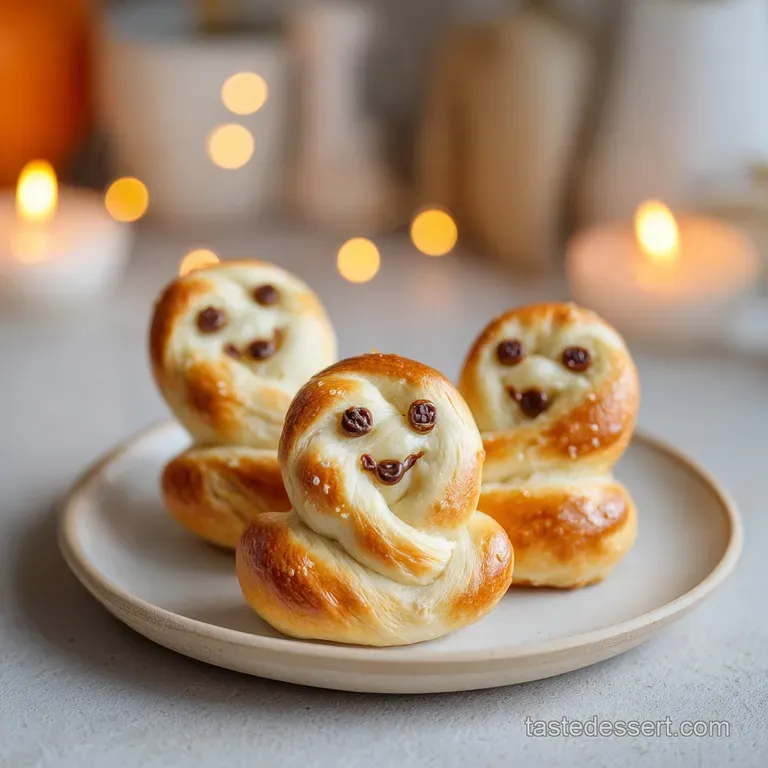
While the coating is still wet, carefully place 2 mini candy eyes in the two top loops of the pretzel. Do this quickly until the eyes sit flush against the white surface without sliding.
5. Creating the Expression
Repeat the process for all 24 servings. Let the pretzels sit at room temperature for about 15 minutes until the surface is dull and firm to the touch.
6. The Final Scream
Take the 2 oz black decorating gel and pipe a small "O" or a teardrop shape in the bottom hole of the pretzel. This creates the mouth of the ghost.
7. Cold Set
Transfer the tray to the refrigerator for 10 minutes. This ensures the shortening and fats fully solidify, giving you that satisfying "snap" when you take a bite.
8. Quality Check
Peel a ghost off the parchment. It should come away cleanly until you hear a light "pop" as it releases from the paper.
Chef's Tip: Freeze your pretzels for 10 minutes before you start dipping. The cold surface causes the white coating to grab onto the pretzel instantly, preventing those annoying "feet" of excess chocolate from forming at the base.
Fixing Dipping and Set Errors
Why Your Coating is Clumpy
If your white coating looks like wet sand rather than a smooth liquid, it has likely "seized." This happens if even a tiny drop of water gets into the bowl or if the heat was too high. White chocolate is notorious for being finicky.
Why the Eyes are Sliding
If you place the eyes and they slowly migrate toward the bottom of the tray, your coating is too thin or too hot. Wait about 30 to 60 seconds after dipping before applying the eyes to allow the "grab" to increase.
| Problem | Root Cause | Solution |
|---|---|---|
| Streaky Coating | Shortening wasn't fully incorporated | Stir for a full minute after the final microwave burst |
| Soft Shell | Too much shortening or humid room | Increase fridge time to 20 minutes to set the fats |
| Cracked Ghosts | Temperature shock (freezer to room) | Let them set in the fridge, not the freezer, to avoid rapid expansion |
Common Mistakes Checklist
- ✓ Never cover the bowl while melting (condensation will ruin the batch).
- ✓ Avoid using a plastic bowl if possible; glass or ceramic retains heat more evenly.
- ✓ Don't skip the "tap" step; too much coating makes the ghost look like a blob.
- ✓ Ensure your hands are completely dry when handling the pretzels.
- ✓ Use a toothpick to pop any tiny air bubbles that appear after dipping.
Adjusting the Batch Size
Downscaling (12 servings): Use 6 oz of wafers and a scant half teaspoon of shortening. Use a smaller, deeper bowl for melting to ensure you have enough depth to fully submerge the pretzels.
Upscaling (48+ servings): Work in batches of 12 oz of wafers at a time. If you melt 24 oz at once, the coating often begins to set and thicken before you can finish dipping the last few pretzels, leading to an uneven look. For a different bulk snack approach, you might compare this method to the one in The 5Minute Pretzels recipe, which handles high volumes brilliantly.
Decision Shortcut If you want a whiter, more opaque look, double dip the pretzels after the first layer has set for 5 minutes. If you want extra sparkle, sprinkle a tiny bit of clear sanding sugar over the wet coating before adding the eyes.
If you want naturally flavored ghosts, add 1/4 tsp of clear vanilla extract (brown extract will tint the ghosts tan).
Kitchen Myths Debunked
Many people believe that white chocolate and white melting wafers are the same thing. They aren't! Real white chocolate contains cocoa butter, which requires tempering to stay shiny and firm.
Wafers use vegetable fats (like palm kernel oil), which makes them much more stable for "Ghost Pretzels" and beginner friendly projects.
Another common myth is that you can "fix" seized chocolate by adding more water. Absolutely not. Adding water will only make it clump harder. If it seizes, you can sometimes save it by adding a tablespoon of neutral oil and stirring vigorously, but it will never be thin enough for dipping again it's better used for brownie mix ins at that point.
Keeping the Crunch Fresh
Storage: Keep your finished treats in an airtight container at cool room temperature. They will stay fresh for up to 7 days. If your house is particularly warm, the fridge is fine, but be aware that sugar bloom (white dusty spots) can occur if they move from cold to hot too quickly.
Freezing: You can freeze these for up to 2 months. Place them in a single layer on a tray to freeze solid first, then transfer to a freezer bag. To thaw, move them to the fridge for 24 hours. Don't thaw them on the counter, or the condensation will make the coating sticky.
Zero Waste: Don't throw away the leftover melted coating! Stir in some crushed pretzel bits, a few leftover candy eyes, and maybe some dried cranberries. Spread it out on parchment, let it set, and you’ve got "Ghost Bark." It’s a great way to use up every bit of those 12 oz of wafers.
Party Plating and Display
When it comes to serving, these little guys look best against a dark background. Use a black slate board or a purple platter to make the white "bodies" pop. I like to scatter a few chocolate cookie crumbs around them to look like "dirt."
Chef's Tip: If you want to take the presentation up a notch, use a toothpick to drag the wet coating at the bottom of the pretzel into a "tail" shape before it sets. It gives the ghost a sense of motion like it's actually floating away!
For a full dessert spread, these pair beautifully with darker treats. The high sugar content is balanced perfectly by something bitter, like a dark chocolate dip or even a strong cup of coffee.
The "shatter" of the coating is the star here, so make sure you serve them at room temperature for the best textural experience. Everyone will be asking how you got them so smooth just tell them it's a little bit of kitchen magic and a lot of stirring. Enjoy the spooky snacking!

Recipe FAQs
What is the healthiest pretzel to eat?
Likely the plain, unsalted baked variety. While Ghost Pretzels are a treat due to the sugar coating, traditional baked pretzels generally contain less fat than fried snacks. The health factor largely depends on sodium and whether they are baked or fried.
What does the pretzel symbolize in the Bible?
The pretzel shape is traditionally thought to symbolize arms crossed in prayer. This association dates back to early European bakers who made them as religious treats during Lent. It’s a beautiful visual metaphor rooted in devotion.
What is a dark pretzel?
A dark pretzel typically means it has been baked longer or contains molasses/dark malt in the dough. This results in a deeper color and a slightly earthier, less sweet flavor profile compared to standard light pretzels. This darker base provides amazing contrast for white coatings like these ghosts.
Who makes the best flavored pretzels?
This is entirely subjective, but high-quality small batch makers excel at complex flavor profiles. For spicy, savory twists, look into artisanal brands that use real pepper blends, much like the sharp flavor balance we achieve in the Hot and Spicy recipe.
How do I prevent my white coating from seizing when melting?
Use 30-second bursts at 50% power and stir thoroughly between each one. Seizing occurs when the mixture overheats or moisture is introduced; the low and slow approach prevents localized scorching. Mastering temperature control here is key to getting that smooth flow.
Should I use pure white chocolate instead of melting wafers?
No, pure white chocolate requires precise tempering for a shiny, hard finish at room temperature. Melting wafers contain vegetable fats designed to set smoothly without tempering, making them far more reliable for coatings and quick projects like this.
If you wanted a richer, tempered result, you would need to extend the total time significantly.
How do I make the ghost coating extra thin so the pretzel holes don't clog?
Add 1 teaspoon of vegetable shortening per 12 ounces of wafers while melting. The shortening lowers the overall viscosity of the coating, allowing it to flow easily around the pretzel curves and drip out of the center holes quickly. If you enjoyed mastering this coating consistency, look at our guide on How to Make recipe for balancing fats in sauces.
Easy Ghost Pretzels Recipe

Ingredients:
Instructions:
Nutrition Facts:
| Calories | 106 kcal |
|---|---|
| Protein | 0.9 g |
| Fat | 4.9 g |
| Carbs | 14.9 g |
| Fiber | 0.1 g |
| Sugar | 11.0 g |
| Sodium | 66 mg |
