Magic Oreo Layer Bars Recipe
- Time: Active 15 minutes, Passive 25 minutes, Total 40 minutes
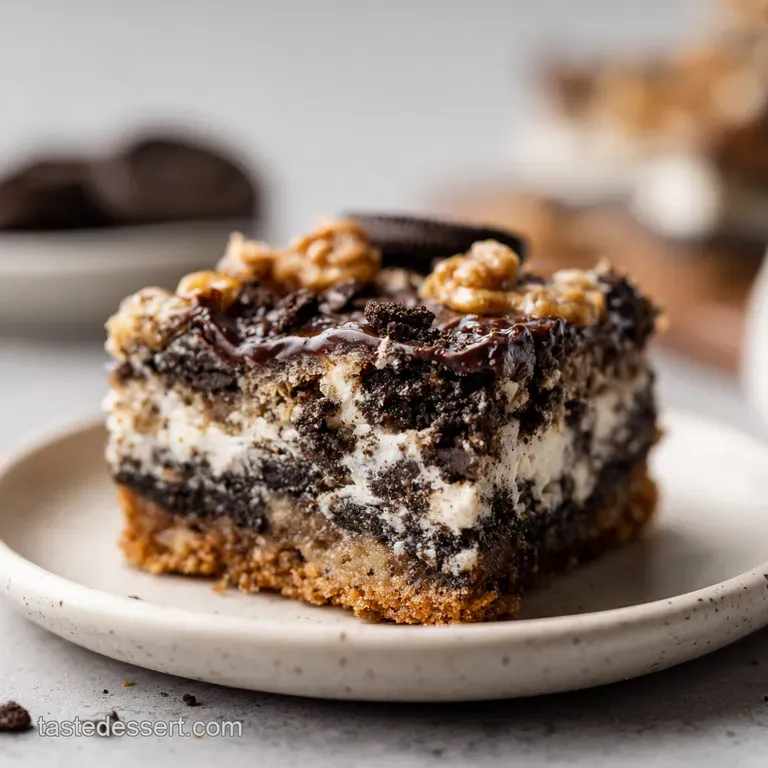
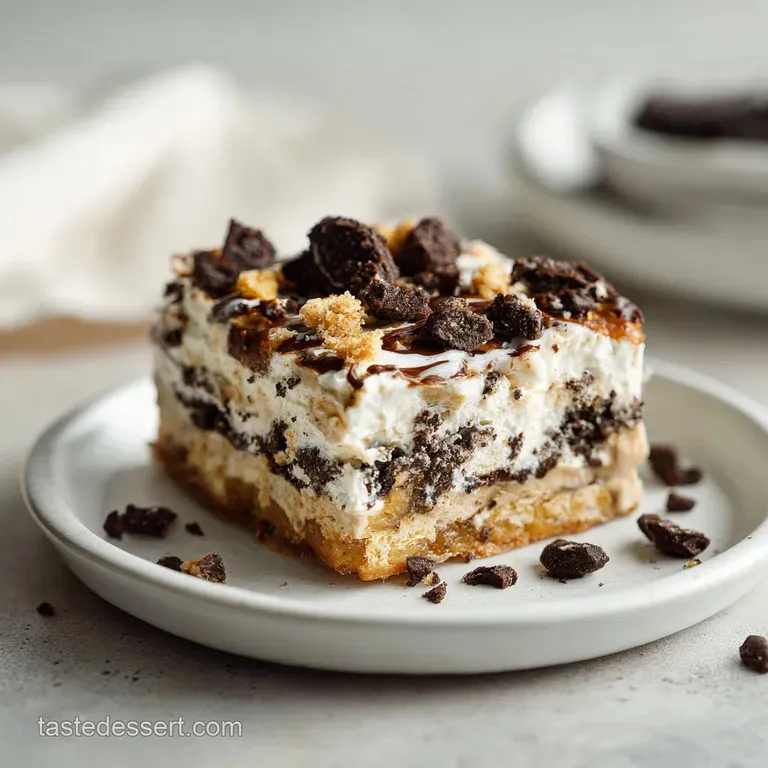
- Flavor/Texture Hook: Velvety chocolate melts into a shatter crisp Oreo crust.
- Perfect for: Bake sales, weekend treats, or any gathering where you want a crowd pleaser.
Master the Ultimate Oreo Layer Bars
The first time I pulled a tray of these from the oven, the aroma was so intense it actually stopped me in my tracks. It’s that deep, dark cocoa scent from the cookies mixing with the sweet, nutty fragrance of toasted coconut.
I remember standing in my kitchen, waiting impatiently for the pan to cool, watching the edges of the sweetened condensed milk bubble and turn into a golden, chewy caramel.
It’s a sensory experience that starts the moment you crush that first cookie and ends with the satisfying snap of the chocolate layers.
But let's be honest, I've had my share of kitchen disasters with layered treats. I once tried to rush the cooling process and ended up with a pile of delicious, chocolatey mush instead of clean, sharp squares.
I've also made the mistake of not pressing the crust firmly enough, leading to a base that crumbled before it even reached a plate. This recipe is the result of those messy trials, designed to give you that velvety texture and solid structure every single time.
It's brilliant, simple, and honestly, a bit dangerous to have sitting on your counter.
Key Specs for Success
Thermal Binding: The melted butter acts as a lipid bridge, coating the Oreo particles and hardening as it cools to create a solid, stable foundation.
Sugar Suspension: Sweetened condensed milk is the secret driver here; its high sugar content allows it to dehydrate into a fudgy binder that locks the loose chips and coconut in place.
| Servings | Ingredient Adjustments | Pan Size | Cook Time |
|---|---|---|---|
| 8 people | Half all ingredients, use 1 egg yolk in crust | 20x20 cm pan | 20 minutes |
| 16 people | Use quantities in Schema | 23x33 cm pan | 25 minutes |
| 32 people | Double ingredients, two pans | Two 23x33 cm pans | 28 minutes |
This serving size calculator helps you plan for everything from a quiet night in to a full blown neighborhood block party. Since these bars are incredibly rich, a standard 23x33 cm pan easily yields 16 generous portions, but you can slice them even smaller if you're serving a large crowd.
Component Analysis
| Ingredient | Science Role | Pro Secret |
|---|---|---|
| 36 Standard Oreos | Structural Base | Pulse until fine; big chunks cause the crust to shatter. |
| 115g Unsalted Butter | Moisture & Binding | Use melted butter to ensure every crumb is hydrated. |
| 396g Condensed Milk | Adhesive & Caramel | Pour evenly to prevent "dry spots" that won't set. |
| 130g Sweetened Coconut | Texture & Browning | The sugars in the coconut undergo the Maillard reaction for flavor. |
Selecting the Best Ingredients
Right then, let's talk about what's going into the pan. This isn't the time for low-fat swaps or "lite" versions we want the full fat, full sugar experience for that signature gooey finish. Using high-quality chocolate chips makes a massive difference in how the bars set. I prefer using a mix of semi sweet, white, and milk chocolate to create a complex flavor profile that isn't just one dimensionally sweet. It’s a trick I learned from making my Homemade Chocolate Chip recipe, where mixing chocolate types adds so much depth.
- 36 Standard Oreo Cookies (430g): The dark cocoa base. Why this? Provides a bitter contrast to the sweet toppings.
- 115g Unsalted Butter: Melted and ready to bind. Why this? Controls the saltiness and creates a firm crust.
- 0.25 tsp Sea Salt: To balance the sugar. Why this? Brightens the chocolate and coconut notes.
- 170g Semi sweet Chocolate Chips: For a deep cocoa hit. Why this? Balances the sweeter white and milk chocolates.
- 170g White Chocolate Chips: Adds creaminess. Why this? Provides a velvety mouthfeel when melted.
- 170g Milk Chocolate Chips: The classic choice. Why this? Adds a familiar, nostalgic sweetness.
- 130g Shredded Sweetened Coconut: For crunch and aroma. Why this? Toasts beautifully and adds structural fiber.
- 10 Oreo Cookies: Coarsely chopped for the top. Why this? Adds visual appeal and extra crunch.
- 396g Sweetened Condensed Milk: The glue. Why this? Transforms into a chewy caramel binder.
| Element | Fresh/Homemade | Shortcut/store-bought | Impact |
|---|---|---|---|
| Cookie Base | Freshly crushed Oreos | Pre made crumb crust | Fresh crumbs have better moisture and texture. |
| Coconut | Hand toasted coconut | Raw shredded coconut | Toasting during the bake adds a nuttier, deeper flavor. |
Essential Tools and Gear
You don't need a professional kitchen to pull off these Oreo Layer Bars, but a few specific tools will make your life much easier. First and foremost, a 23x33 cm baking pan is the standard size for this recipe.
If you use a pan that's too large, the bars will be thin and prone to burning; too small, and the center will stay raw while the edges overcook.
I always recommend using parchment paper with a bit of "overhang" on the sides. This creates a sling that allows you to lift the entire block of bars out of the pan once they've cooled. Trust me, trying to dig a gooey bar out of a corner with a spatula is a recipe for frustration.
A food processor is great for getting the Oreo crumbs perfectly fine, but a rolling pin and a sturdy zip top bag work just as well if you need to vent some steam.
step-by-step Layering Guide
- Preheat the oven to 180°C and line a 23x33 cm pan with parchment paper. Note: Leaving an overhang makes removal effortless.
- Pulse 36 Oreo cookies in a food processor until they reach a fine, sandy texture.
- Combine the crumbs with 115g melted butter and 0.25 tsp sea salt in a medium bowl.
- Press the mixture firmly into the bottom of the prepared pan until a solid, even layer forms.
- Scatter 170g semi sweet, 170g white, and 170g milk chocolate chips evenly over the crust.
- Sprinkle 130g shredded coconut across the chocolate layer until the chips are mostly covered.
- Distribute 10 coarsely chopped Oreo cookies over the top of the coconut.
- Drizzle 396g sweetened condensed milk over everything until the entire surface is coated.
- Bake for 25 minutes until the edges are golden and the coconut is toasted.
- Cool the pan completely on a wire rack for at least 2 hours before slicing. Note: This is vital for the bars to set properly.
Avoiding Common Baking Mistakes
The biggest hurdle with this recipe is usually impatience. I know, it smells like a dream, but if you cut into these while they're still warm, the condensed milk will still be in its liquid state. You’ll end up with a delicious mess instead of clean layers. Another common issue is uneven drizzling.
If you just pour the condensed milk in the center, the edges of your Oreo Layer Bars will be dry and crumbly, while the middle will be overly soft.
Why Your Crust Is Crumbly
If your base falls apart the moment you lift it, it usually comes down to one of two things: the crumbs weren't fine enough or you didn't press hard enough. You want that base to be a compacted sheet, almost like a piece of dark chocolate plywood.
Use the bottom of a flat measuring cup to really pack those crumbs into the corners.
Why Your Coconut Is Burnt
Coconut has a high sugar content and can go from golden to burnt in a matter of seconds. If you notice it browning too quickly at the 15 minute mark, simply tent the pan loosely with aluminum foil. This allows the heat to continue cooking the center without scorching the top.
| Problem | Root Cause | Solution |
|---|---|---|
| Bars are falling apart | Cut while still warm | Chill in the fridge for 1 hour before slicing. |
| Greasy bottom crust | Butter wasn't fully mixed | Ensure crumbs look like wet sand before pressing. |
| Dry, loose toppings | Uneven condensed milk | Use a spatula to spread the milk to the very edges. |
Common Mistakes Checklist
- ✓ Pulse Oreos into a fine powder to ensure the crust binds effectively.
- ✓ Press the base with significant force using a flat bottomed tool.
- ✓ Pour the condensed milk in a slow zig zag pattern for total coverage.
- ✓ Don't skip the salt; it’s essential to cut through the richness.
- ✓ Let the bars reach room temperature before putting them in the fridge.
Smart Swaps and Variations
One of the things I love about these bars is how adaptable they are. If you aren't a fan of white chocolate, swap it out for peanut butter chips or even butterscotch. If you want to lean into the Oreo theme even more, you could try the technique used in The Heavenly Oreo Dessert recipe, which uses layers of cream to soften the cookies. For these baked bars, however, we want to keep things textured and stable.
- If you want more crunch, add 1/2 cup of chopped pecans or walnuts over the chocolate layer.
- If you want a salty sweet vibe, swap the milk chocolate chips for chopped pretzels.
- If you want a festive look, use seasonal Oreos with colored fillings for the crust.
| Original Ingredient | Substitute | Why It Works |
|---|---|---|
| Oreo Cookies (36) | Graham Crackers (approx. 250g) | Similar crumb structure. Note: Less cocoa flavor, more honey/cinnamon notes. |
| Sweetened Coconut | Rolled Oats | Provides chew and structure. Note: Won't have the same sweetness or aroma. |
| Condensed Milk | Coconut Condensed Milk | dairy-free alternative. Note: Slightly thinner consistency, may need 5 extra mins bake time. |
Chef's Tip: If you really want to deepen the chocolate flavor, add a teaspoon of espresso powder to the Oreo crumbs. It won't make the bars taste like coffee, but it will make the cocoa taste "more like itself."
Storage and Freshness Tips
Because of the high sugar and fat content, these bars stay fresh for a surprisingly long time. You can keep them in an airtight container at room temperature for up to 4 days, or in the refrigerator for about a week.
I actually prefer them cold from the fridge the chocolate chips get a little snap to them, and the base becomes incredibly dense and fudgy.
For long term storage, these bars freeze beautifully. Wrap individual squares in plastic wrap and then place them in a freezer bag. They’ll stay perfect for up to 3 months. When you're ready to eat one, just let it thaw on the counter for 20 minutes.
If you have any leftover crumbs or broken bits, don't throw them away! I love tossing them over vanilla ice cream or folding them into a milkshake for a zero waste dessert hack.
Serving and Presentation Ideas
When it comes to serving, less is often more. These bars are so rich that a small square goes a long way. I like to cut mine into 16 even rectangles using a sharp, warmed knife (run it under hot water and wipe dry between cuts for those perfect bakery style edges).
If you’re feeling extra, a drizzle of melted dark chocolate or a tiny pinch of flaky sea salt on top right after they come out of the oven looks stunning.
If you’re looking for a warm dessert experience similar to Warm Gooey The recipe, you can pop a single bar in the microwave for 10 seconds. It will soften the chocolate just enough to be messy and wonderful. Serve it alongside a glass of cold milk or a scoop of tart raspberry sorbet to cut through the decadence. No matter how you serve them, these Oreo Layer Bars are always the first thing to disappear from the dessert table. Trust me, you might want to make a double batch just in case.

Recipe FAQs
Can I substitute butter with oil for the Oreo crust?
No, stick with melted butter. Oil will not properly bind the crumbs when it cools, leading to a very crumbly base.
How do I ensure the bars cut cleanly after baking?
Cool the bars completely, then chill them for at least one hour. Warm bars will release the melted sugars, resulting in a sticky, messy slice.
Is it necessary to use three types of chocolate chips?
No, but it is highly recommended for flavor complexity. Using just one type is fine, but blending semi sweet, white, and milk adds necessary balance to the rich base.
What is the proper way to create a stable, compact Oreo crust?
Pulse the Oreos until they are a fine, sandy powder before mixing in the butter. Then, use the bottom of a flat measuring cup to press the mixture down very firmly into the pan.
How long can I bake these bars if I want a firmer, more brittle topping?
Bake for 5 to 7 minutes longer than specified, watching carefully. Increasing the bake time allows the condensed milk to caramelize more aggressively, which improves texture stability if you enjoy that snap, similar to our Oreo Chunk Cookie Pie recipe.
Why are my toppings sinking into the condensed milk layer?
This occurs if the chocolate chips are too cold or if the milk is poured too quickly. Ensure the chocolate chips are close to room temperature, and drizzle the condensed milk slowly in a steady back and-forth motion.
Can I use reduced fat sweetened condensed milk instead?
No, avoid low-fat substitutes for the binder. The lower fat content prevents the milk from setting into the signature chewy caramel texture.
Magic Oreo Layer Bars

Ingredients:
Instructions:
Nutrition Facts:
| Calories | 498 kcal |
|---|---|
| Protein | 5.7 g |
| Fat | 26.8 g |
| Carbs | 61.1 g |
| Fiber | 2.1 g |
| Sugar | 44.6 g |
| Sodium | 213 mg |
