Snow Day Delight: Homemade Snow Ice Cream
Recipe Introduction
Quick Hook
Remember building snow forts as a kid? honestly, the best part was always coming inside for a treat! and what could be more perfect than snow ice cream ? this recipe gives that winter magic a delicious twist.
It's creamy, sweet, and perfect for a snow day.
Brief Overview
This recipe is as old as sleds, or maybe older. snow cream is a fun way to use a winter gift.
It is super easy. it takes like, 20 minutes. it makes about 4 servings, perfect for a small family.
Main Benefits
One of the biggest benefits? it is pure snow much fun ! it makes any snow day special. plus, you get a little dose of dairy, which is always good, right? this recipe is unique because it's all about adapting to what you have on hand.
I’ve made it with almond milk before. i’ve even used flavored coffee creamer when i was feeling crazy!
Wanna Get Started with Ice Cream Ingredients ?
Snow ice cream , snow cream - it goes by many names. what matters is the fresh, powdery ice . i remember the first time i tried it.
My grandma made it. it tasted like magic. let me tell you the recipe:
Snow Day Delight: Homemade Snow Ice Cream
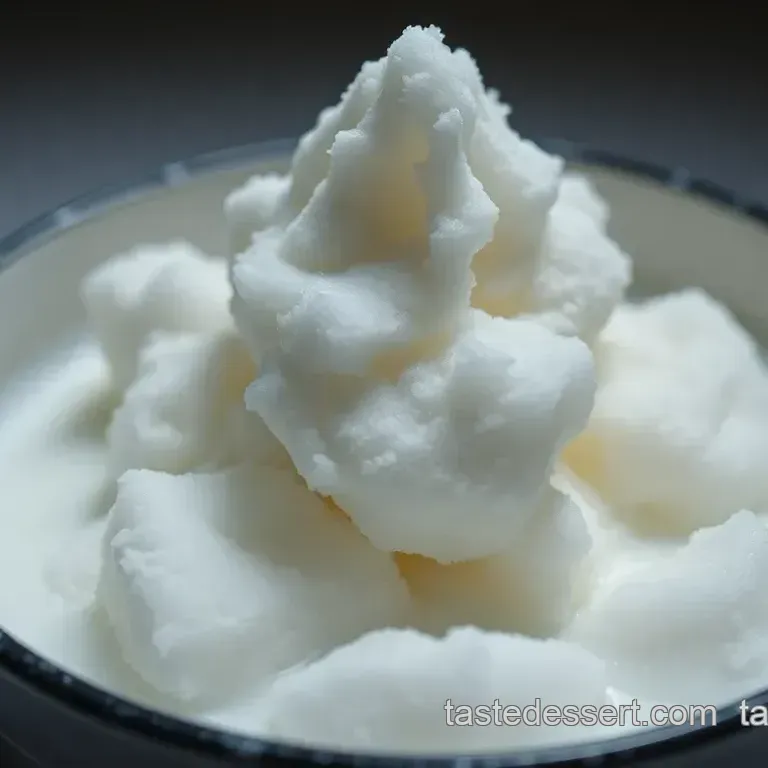
Embrace the magic of winter with this simple, surprisingly delicious snow ice cream ! this transforms freshly fallen snow into a creamy, sweet treat that's perfect for a snow day activity with the kids.
It uses common pantry staples for a safe and tasty experience.
Grab 8 cups of snow. then get 1 cup of whole milk, ½ cup of sugar, and 1 teaspoon of vanilla.
A pinch of salt is also a good idea. you'll need a large bowl and something to mix it with.
Remember what Gimme Some Oven says! Before you get started make sure you only use clean Types Of Ice .
Mix the milk, sugar, vanilla, and salt together. then, gently add the mixture to the snow. combine it until it looks like soft ice cream.
Is it too thin? add more snow. too thick? a splash of milk. taste it! maybe it needs a little more sugar.
I like to freeze it a little bit before eating ice . it can also be a nice winter treat .
This recipe is all about making memories and enjoying the moment. So gather your ingredients. Head out to collect some Snow Fun , and let’s make some snow ice cream !
Alright, let's dive into what you'll need for some snow ice cream ! It's kinda like a limited edition winter treat. Honestly, snow cream is just pure magic. Think Powdery Ice heaven!
Ingredients & Equipment
Main Ingredients
Okay, here's the lowdown on what you'll need for your snow ice cream adventure. Remember, quality snow is key , so snow much fun !
- 8 cups (approximately 1.89 liters ) freshly fallen snow, collected from a clean area. Quality indicators: The snow should be bright white, fluffy, and free from any visible debris. We need Snow Fun , not snow yuck!
- 1 cup ( 240 ml ) whole milk. For extra richness, use half and-half.
- 1/2 cup ( 100 g ) granulated sugar.
- 1 teaspoon ( 5 ml ) pure vanilla extract.
- Pinch of salt.
Think of finding that perfect Ice Aesthetic , pristine and untouched. Trust me, it makes all the difference.
Seasoning Notes
Let's talk flavors!
- Essential spice combo: Vanilla extract and a pinch of salt it enhances the sweetness.
- Flavor enhancers: A little almond extract or maple syrup adds a delicious twist. You could even add a splash of bourbon (wink, wink)!
- Quick substitution options: No vanilla? No problem! Use almond extract or just leave it out. Honestly, you can adapt it as you see fit to create that perfect flavor ice .
I remember once trying to make this with slightly old snow. huge mistake . it tasted…earthy. learn from my mistakes. the best recipes will have the best ice cream ingredients .
I would love a ice video to show you what i'm talking about. i almost felt like a ice witch trying to conjure up the perfect batch of snow icecream .
Equipment Needed
Keep it simple, folks!
- Large mixing bowl
- Whisk. Or use an electric mixer if you're feeling fancy.
- Measuring cups and spoons
- Essential tools only
I once tried using a fork to mix it. let me tell you, it's not fun. save yourself the hassle and grab a whisk.
I could have ended up becoming the ice eater . think of this as your gateway to winter treats ! i was even thinking to create icee recipe .
Common household alternatives: No whisk? Use a large spoon. Get creative, it's all about the Gimme Some Oven magic, innit?
So, there you have it! with these ingredients and tools, you're all set to whip up a batch of snow ice cream .
Get ready for some snow much fun ! don't forget, clean snow is key . types of ice matters, my friend!
Alright, let's dive into making some snow ice cream ! it's like capturing winter magic in a bowl. a fleeting, yummy treat, you know? like chasing rainbows.
This is something that needs to be consumed immediately; it's so good.
The Art of Snow Ice Cream
I'm gonna walk you through it. We're making snow cream ! I wanna share my own little tips and tricks. It's snow much fun , I swear.
Prep Steps: Laying the Groundwork
First, mise en place , baby! Get everything ready. This makes it so much smoother. We need the ice cream ingredients ready.
- Essential Mise en Place: Milk, sugar, vanilla extract, salt all measured out. Put them near your mixing bowl. Trust me on this one.
- Time Saving Organization Tips: Chill the bowl beforehand. This slows down melting. Like prepping for a marathon!
- Safety Reminders: Okay, this is crucial. Only use clean, fresh snow. No yellow snow, okay? I mean, seriously. The top layer is usually your best bet. Also, make sure it's from a safe place. Away from cars and doggos.
Step-by-step: From Flakes to Flavor Ice
Ready to turn powdery ice into a dreamy dessert? Let's go!
- Gather 8 cups of Snow: Grab your freshest, cleanest snow. The ice aesthetic is important, don't take it from a place that looks dirty.
- Mix the Base: Combine 1 cup of milk, 1/2 cup of sugar, 1 teaspoon vanilla, and a pinch of salt. Whisk until the sugar is dissolved.
- Combine Gently: Add the milk mixture to the snow. Mix gently until you get that snow ice cream consistency.
- Adjust: Too thin? Add more snow. Too thick? Add a splash of milk. Easy peasy.
- Chill: Pop it in the freezer for 15- 30 minutes . Totally optional, but it firms it up.
Pro Tips: Snow Cream Secrets
These will take your snow icecream to the next level!
- Expert Techniques: Chill the bowl first! Makes a huge difference. A stainless steel bowl is your best bet.
- Common Mistakes: Don't overmix! You'll end up with ice eater style watery soup.
- make-ahead: It isn't great for making ahead because it melts super fast, but you can prep the milk mixture in advance!
Honestly, this snow ice cream recipe is one of those things that makes winter bearable. i mean, who doesn't love winter treats ? it brings some serious snow fun .
Think about a movie night watching ice video with a sweet treat, or dressing up like the ice witch ! plus, it is super fun to make flavor ice .
Seriously. gimme some oven style recipe like this is always a win! it's a simple pleasure. i've messed it up before (too much milk, ew!), but now i've got it down.
Enjoy!
Alright, let's talk recipe notes for our snow day delight: homemade snow ice cream . this snow ice cream recipe is seriously easy, but a few pointers can make it even better.
It is just snow much fun !
Recipe Notes
Serving the Winter Treats
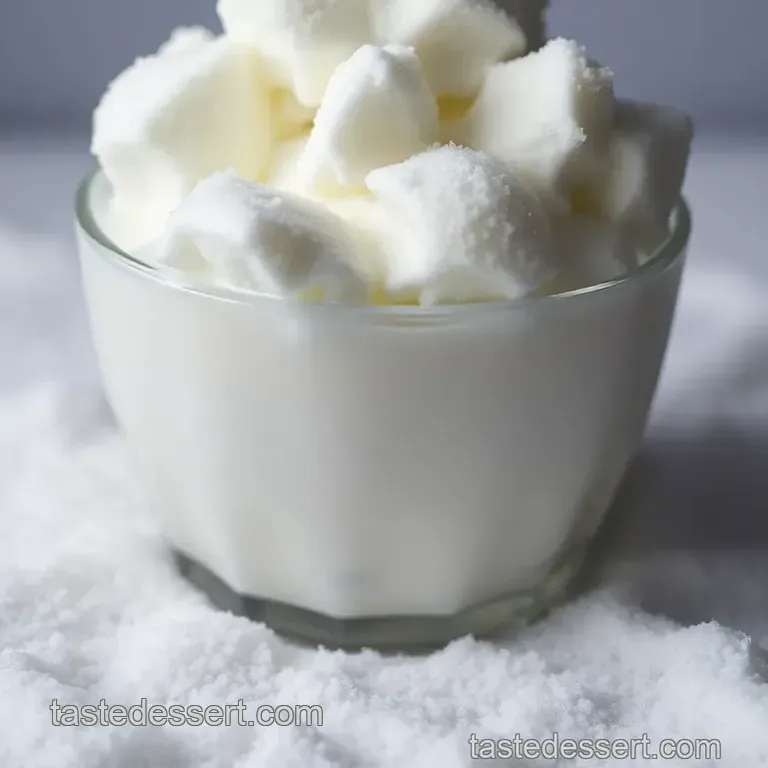
Okay, so presentation! don't just chuck it in a bowl. think cute! grab some festive bowls. top your powdery ice with sprinkles.
I'm telling you, a little effort goes a long way! how about a cute ice aesthetic ?
Complementary sides? hot chocolate. hands down. maybe some gingersnap cookies for dipping. and for the adults? a little kahlua in your coffee goes great with the snow cream .
The key is snow fun .
Storage Basics
Honestly, this is best eaten immediately . snow ice cream doesn’t last. but, if you absolutely have to, you can try freezing it.
But i gotta warn you, it will get icy. i’ve tried it. it wasn't great. put it in an airtight container.
Reheating isn't really an option. It'll just melt! Trust me, just make a fresh batch. It's so quick!
Flavor Ice Variations
Let's get creative! Wanna be dairy-free? Use almond milk. Boom, done. Want to make it extra chocolatey? Add some cocoa powder. Maybe peppermint extract for a holiday vibe?
And if it's summer? Okay, no snow ice cream then. But you can totally adapt this idea to shaved ice. Just saying!
Nutritional Nitty Gritty
Okay, i am no scientist! but roughly, you're looking at around 150-200 calories per serving. it's got sugar. let's be real! but it's also a fun treat.
And a little bit of joy is good for your health, right? don't be an ice eater , enjoy your tasty winter treats .
So there you have it! Your guide to making amazing snow ice cream . Go make some memories! And if you get a good Ice Video , send it my way!
Frequently Asked Questions
Is it safe to eat snow ice cream? What precautions should I take?
That's the million dollar question, isn't it? Eating snow ice cream depends entirely on the snow. Only use freshly fallen snow from a safe location far away from roads, buildings, factories (think less 'industrial estate' and more 'chocolate box village'!). The top layer of snow is generally cleaner.
When in doubt, err on the side of caution, like a good cuppa of tea is always a good plan.
What kind of snow is best for making snow ice cream?
You want the light, fluffy stuff think "powder snow," like you'd see on the slopes of the Alps. The drier the snow, the better, as it'll incorporate the liquid ingredients without becoming too watery. Avoid icy or crusty snow, as it won't blend well and might have picked up debris.
So, basically, Channel your inner Goldilocks and aim for snow that's just right!
My snow ice cream turned out watery. What did I do wrong?
Watery snow ice cream usually happens when the snow melts too quickly. Make sure your milk is very cold, and work quickly when combining the ingredients. Also, avoid overmixing! Overmixing melts the snow even faster. A quick, gentle hand is your best bet for achieving that lovely, creamy texture.
Perhaps even chilling the bowl beforehand may help?
Can I store snow ice cream? For how long?
Snow ice cream is best enjoyed immediately! Because it's made with snow, it melts relatively quickly. While you can freeze it for a short time (no more than an hour or two), the texture will likely change, becoming icy and less pleasant.
Treat it as a special, fleeting treat, like spotting a robin redbreast in the winter.
What variations can I try to make my snow ice cream even more exciting?
The possibilities are endless! Chocolate snow ice cream is always a winner - just add cocoa powder. Try different extracts like peppermint or almond. Get creative with toppings sprinkles, chocolate shavings, fresh berries, or even a drizzle of maple syrup.
You can also adapt it for different diets: try using plant based milk (oat or almond) for a vegan version. Remember, this is a culinary adventure, so get as experimental as you like.
How can I make snow ice cream healthier, or at least a bit less of a sugar rush?
Good on ya for thinking about that! You can reduce the sugar content by using a sugar substitute like stevia or monk fruit sweetener. Using whole milk or half and-half (though tastier!) will naturally add some fat and therefore increase the nutritional value slightly, compared to using skim milk.
Adding healthy toppings like fresh berries also helps balance the sweetness and provides some added vitamins. It's still a treat, of course, so enjoy it in moderation like a piece of battenburg cake.
Snow Day Delight Homemade Snow Ice Cream

