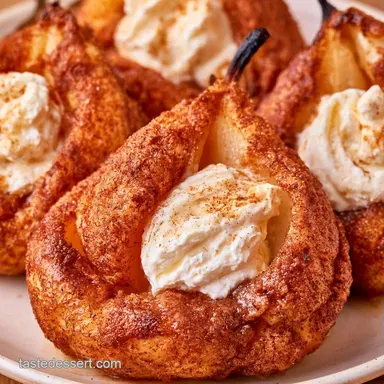
Healthy Stuffed Baked Pears
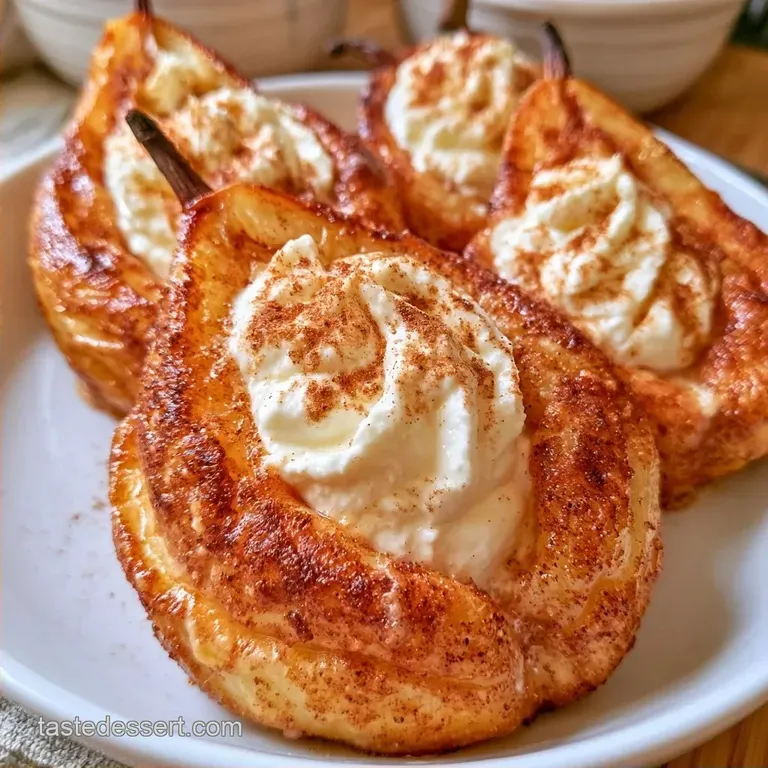
- Time: 10 min prep + 30 min roasting
- Flavor/Texture Hook: Warm cinnamon fruit with a zesty, smooth ricotta center
- Perfect for: An elegant dessert that requires very little effort
The scent of roasting fruit and warm cinnamon drifting through the house is just wonderful. It captures the essence of chilly October evenings when you want something soothing without a marathon session in the kitchen.
I used to make the mistake of grabbing whatever pears were on sale, often Bartletts. At 375°F, they would quickly turn into a watery, shapeless mess, and the stuffing would just slide away. I didn't find the solution until I tried Bosc pears.
These Stuffed Baked Pears are now my preferred option for hosting. They have the sophisticated look of a high-end bistro plate but are remarkably simple to assemble. You get that rich caramelization on the outside and a refreshing, tangy center.
The Trick Behind the Texture
The Bosc Advantage: These pears have a denser cell structure than other varieties. This keeps them from turning into pudding when they roast.
The Two Stage Bake: Roasting the pear before stuffing it sets the structure. This prevents the filling from leaking out and keeps the fruit from getting soggy.
| Method | Time | Texture | Best For |
|---|---|---|---|
| Quick Microwave | 5 mins | Soft/Mushy | Late night cravings |
| Oven Roast | 40 mins | Firm/Caramelized | Dinner parties |
The Building Blocks
| Component | Purpose | Substitute Notes |
|---|---|---|
| Bosc Pears | Holds the shape | Anjou works, but softens faster |
| Ricotta | Creamy contrast | Greek yogurt adds more tang |
| Maple Syrup | Glaze & sweetness | Honey is a great swap |
For the Pear Base
- 6 medium Bosc pears Why this? They stay firm under high heat
- 3 tbsp melted coconut oil Why this? Adds a subtle richness
- 2 tbsp maple syrup Why this? Caramelizes the skin
- 1 tsp ground cinnamon Why this? Classic warmth
- 1/4 tsp sea salt Why this? Balances the sugar
For the Healthy Creamy Stuffing
- 1/2 cup low-fat ricotta cheese Why this? Light but creamy
- 1 tbsp lemon juice Why this? Cuts through the richness
- 1 tsp vanilla extract Why this? Adds depth
- 1 tbsp maple syrup Why this? Ties the filling to the fruit
- 1/4 cup crushed walnuts Why this? Essential crunch
Equipment Needed
No specialized equipment is required here. A 9-inch glass or ceramic baking dish is ideal for ensuring the heat is distributed evenly. I typically use a small paring knife to core the fruit, but a melon baller is perfect if you're after a completely round hole.
A basic pastry brush is helpful for coating every inch of the pear with the cinnamon glaze.
The Cooking Process
1. Preparing the Pear Vessels
Set your oven to 375°F (190°C). Slice a small piece off the bottom of each pear to ensure they sit steadily in your baking dish. Use a knife or melon baller to carve out the core and roughly 1 tablespoon of the fruit to create a hollow. Be careful not to cut through the base, otherwise the filling will leak.
2. The Seasoning & Initial Roast
In a small bowl, combine the melted coconut oil, 2 tablespoons of maple syrup, cinnamon, and salt. Use a pastry brush to coat both the exterior and the inner well of each pear. Arrange them upright in the dish and roast for 20 minutes until they are fragrant and just starting to soften.
3. The Stuffing & Final Set
While the pears roast, whisk the ricotta, lemon juice, vanilla, and the final tablespoon of maple syrup until smooth and velvety. Take the pears out of the oven and fill the centers with the ricotta mixture. Garnish each pear with a sprinkle of crushed walnuts.
4. The Final Bake
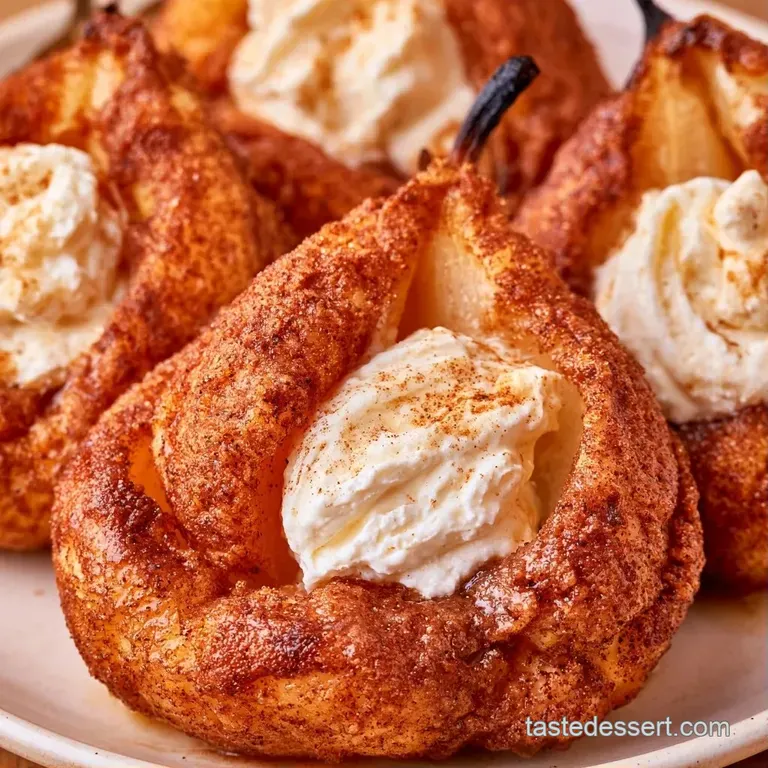
Return the pan to the oven for another 10 minutes. The stuffing should be set and the pear edges should be a deep mahogany color. Let them cool for 5 minutes before serving to ensure the filling stays put.
Pro Tips & Pitfalls
Preventing the Pear Slump
If your pears are sagging or losing their shape, they have likely been overbaked. This happens when the pectin breaks down too much, causing the fruit to lose its firmness. To prevent this, test them at the 20 minute mark and remove them from the oven the moment they offer just a slight resistance to a fork.
Fixing a Watery Base
Occasionally, you might find excess liquid gathering in the pan. This usually occurs if the pears were overly ripe or if the oven temperature was too low. To fix this, carefully transfer the juices into a small saucepan and simmer for 3 minutes to create a thick syrup to drizzle back over the top.
Avoiding Grainy Stuffing
Ricotta can sometimes have a lumpy texture. I've found that whisking it thoroughly or pulsing it briefly in a food processor makes a significant difference. This ensures the filling is silky and mixes seamlessly with the lemon and vanilla.
Make It Your Own
For a savory twist, skip the maple syrup and cinnamon. Instead, use a mix of Gorgonzola or Blue cheese with a bit of honey and thyme. This turns the dish into a great appetizer. If you're craving something with a different creamy base, Brie stuffed baked pears are a decadent choice.
For those who prefer a different type of cheese, stuffed pears with cream cheese and a dash of orange zest feel like a fancy cheesecake. If you love that creamy, baked profile, you might also enjoy these cheesecake cookies for a different kind of treat.
Diet Specific Swaps
- Vegan: Swap the ricotta for a cashew based cream cheese and use coconut oil.
- Nut Free: Replace the walnuts with toasted pumpkin seeds or pomegranate arils for a pop of color.
Storage & Reheating
Store these in an airtight container in the refrigerator for a maximum of 3 days. While they taste great chilled, most people prefer them served warm. If you want more tips on managing desserts with fillings, feel free to browse my guide on filled cupcakes.
How to Reheat
To keep the pear from getting too soft, steer clear of the microwave. Instead, return them to the oven at 300°F (150°C) for roughly 10 minutes. This heats the ricotta filling and restores that deep mahogany color to the fruit.
Sustainable Kitchen Tips
Rather than discarding the pear cores and scooped-out flesh, put them to use. Simmer them in a pot with some sugar, cinnamon, and a splash of water to create a fast poached pear compote. Serve this alongside your Stuffed Baked Pears for a truly decadent treat.
Presentation Tips
To make these look professional, I like to add a final touch of freshness. A small sprig of fresh mint or a few raspberries on top provides a color contrast against the brown pears.
You can also drizzle a little extra maple syrup or a spoonful of Greek yogurt over the top right before serving. If you're serving these for a holiday, a light dusting of powdered sugar makes them look like they've been frosted with snow.
The Trick Behind the Texture
Chef's Tip: Stick to Bosc pears. I know Bartletts are easier to find, but the firmness of Bosc is what makes this recipe successful. If you use a softer variety, the fruit will lose its shape and the dessert will feel more like a stew than a stuffed fruit.
As for ripeness, don't wait for the pears to become soft. Use them when they are just barely yielding to pressure. This ensures they maintain their structure through the 30 minutes of total cook time.
Serious Eats' research suggests that a firmer fruit is the only way to avoid the "collapse" effect in roasted desserts.
When it comes to the ricotta, the lemon juice provides more than just flavor. It helps stabilize the cheese so it doesn't release moisture into the pear, keeping the base of your Stuffed Baked Pears clean and crisp.
And that is how you bring a bistro-style dessert into your own kitchen. These Stuffed Baked Pears serve as a reminder that you don't need twenty ingredients to create something special. Grab some Bosc pears and get roasting, your home will smell wonderful.
Recipe FAQs
What is the total baking time for these pears?
It takes 30 minutes of oven time. Roast the pears for 20 minutes, then add the stuffing and bake for another 10.
How do you make dessert baked pears?
Preheat the oven to 375°F and slice the bottoms so they stand upright. Coat them in a maple cinnamon mixture, roast, and finish with a ricotta filling and walnuts.
Do you have suggestions for using a large quantity of pears?
Try making multiple batches of these stuffed pears or a fresh fruit tart. If you enjoy mastering fruit fillings, see how the same logic applies to our flaky pie.
Is it true that any pear variety works for baking?
No, this is a common misconception. Bosc pears are the best choice because they maintain their structure and do not turn to mush in the oven.
Which toppings best complement the baked fruit?
Combine ricotta, lemon juice, and vanilla for a creamy, tart center. Crushed walnuts added at the end provide a necessary textural contrast.
When are these pears best served?
Serve them warm immediately after baking for the most fragrant experience. They also taste delicious cold if you prefer a refreshing dessert.
Why slice a sliver off the bottom of the pear?
Create a flat surface so the fruit does not tip over in the baking dish. This keeps the center well open and easy to fill with the ricotta mixture.
Stuffed Baked Pears for 6 Servings