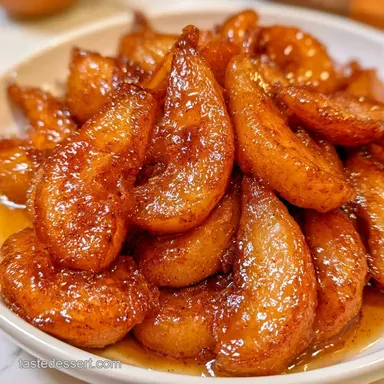
Baked Pears with Honey and Brown Sugar
- Time: 10 min active + 50 min cooking
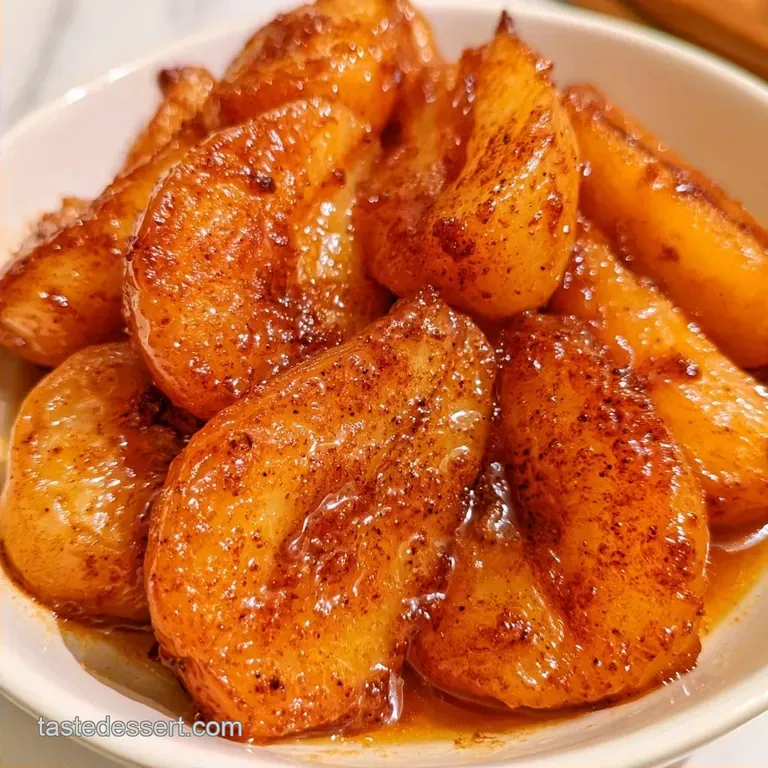
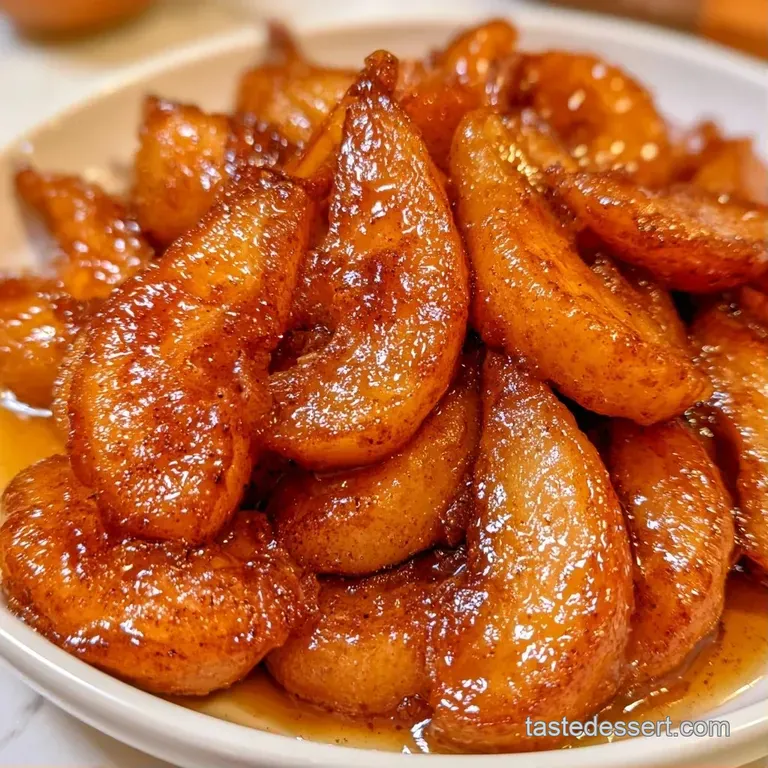
- Flavor/Texture Hook: Mahogany colored skin with a rich, buttery syrup
- Perfect for: A relaxing Sunday night or a sophisticated dinner party finale
The aroma of cinnamon and bubbling honey hitting a hot pan is one of those scents that instantly feels like home. I once worried these would simply collapse into a soggy mess, having had bad luck with overcooked fruit in the past, but the secret lies in the temperature and the flip.
You can achieve bistro level results without spending hours in the kitchen. This method for Pears Baked ensures the fruit remains firm yet succulent, coated in a syrup that thickens as it roasts. It is a simple win that looks incredibly sophisticated.
Expect a dessert that balances the pear's natural tartness with a deep, caramelized sweetness. We are aiming for a mahogany finish on the skin and a center that gives way to a fork with zero resistance.
How Pears Baked Get Tender
Pectin Breakdown: Pears have a lot of pectin, which keeps them firm. Baking them at 350°F (175°C) gently breaks these walls down so the fruit softens without collapsing into a heap.
Sugar Caramelization: The honey and brown sugar create a concentrated syrup. As the water evaporates, the sugars brown, which is what gives Pears Baked that deep color and rich flavor.
The Basting Effect: Flipping the fruit halfway through ensures the syrup coats every inch. This prevents the tops from drying out and ensures the Pears Baked stay moist throughout the process.
| Fresh Pears | Canned Pears | Texture Result | Best Use |
|---|---|---|---|
| Bosc or Anjou | Syrupy Pears | Firm yet tender | Elegant dinner |
| Canned Pears | Pre softened | Mushy/Very soft | Quick pudding |
Right then, let's look at the gear. You don't need anything fancy here, just a few basics that most of us already have in the drawer.
Gear for the Job
Use a 9 inch baking pan. Ceramic or glass options are ideal for consistent heat distribution. Be cautious with metal pans, as the bottoms tend to brown more quickly.
A small melon baller or paring knife is necessary. Use it to remove the core, creating a spot for the glaze. If you don't create this hollow, the sugar won't soak into the fruit and will simply stay on the surface.
For the glaze, a small bowl and whisk are all you need. Because this mixture contains melted butter and honey, a heat safe bowl is recommended.
Gathering Your Essentials
For these baked pears, select either Bosc or Anjou varieties. Bosc is a top choice because it maintains its structure perfectly when heated, while Anjou offers a softer texture and a touch more sweetness.
The brown sugar introduces a deep molasses quality, complemented by honey's floral essence, which helps the glaze cling to the fruit. Cinnamon and vanilla combine to create a cozy, fragrant aroma that fills your home.
Using unsalted butter allows for precise control over the seasoning. A small pinch of salt is essential to make the sugars pop without making the dessert taste savory.
For Pears Baked, you'll need: - 4 medium Bosc or Anjou pears Why this? They maintain their structure when baked - 1 tbsp unsalted butter, melted Why this? Stops the fruit from sticking to the pan - 1/4 cup packed brown sugar Why
This? Provides caramel color and molasses notes - 2 tbsp honey Why this? Gives the pears a sticky, shiny finish - 2 tbsp unsalted butter, cubed Why this? Slowly liquefies in the pear centers - 1 tsp ground cinnamon Why
This? A timeless warm spice pairing - 1/2 tsp vanilla extract Why this? Enhances the sugar with a fragrant touch - 1/4 tsp salt Why this? Offsets the sweetness of the honey
If you lack honey, maple syrup is a suitable replacement, though it introduces a more distinct woody taste. For the sugar, coconut sugar is a good alternative if you prefer a different kind of richness.
Recipe Specs
This recipe is designed for a small group, making 4 servings. It's a straightforward process that doesn't require constant hovering.
The prep time is just 10 minutes. Most of that is spent coring the fruit and whisking the glaze. The actual cooking time is 50 minutes, which gives you plenty of time to relax while the aroma builds.
In total, you're looking at 60 minutes from start to finish. It's a low stress way to get Pears Baked on the table.
Key Steps
Phase 1: Preparation
Preheat the oven to 350°F (175°C). Coat a 9 inch baking pan with 1 tbsp of melted butter. Halve the pears lengthwise. Using a melon baller or paring knife, scoop out the core and seeds. Be sure to carve a small hollow in the center of each half to hold the glaze.
Phase 2: The Glazing Process
Whisk the brown sugar, honey, salt, vanilla, and cinnamon together in a small bowl. The aroma of the cinnamon will be immediate. Arrange the pears in the baking dish, cut side up. Fill each pear cavity evenly with the sugar mixture, then top each piece with a cube of butter.
Phase 3: The Precision Bake
Roast for 30 minutes. You should detect the scent of caramelizing sugar around the 20 minute mark. Carefully flip the fruit using tongs. Spoon the syrup from the bottom of the dish back over the pears.
Bake for an additional 20 minutes until the skins are mahogany colored and a fork slides in with zero resistance.
Chef's Note: Don't skip the flip. Basting the fruit in its own juices is what creates that rich, glossy exterior.
Troubleshooting Guide
Pears are still hard
This usually happens if you used under ripe fruit. Bosc pears can take longer to soften than Anjou. If the time is up but the center is still firm, cover the dish with foil. Bake for another 10-15 minutes to trap the steam.
Syrup is too thin
A watery sauce usually means the pears released too much juice or the oven temperature was too low. To fix this, remove the Pears Baked from the pan and place the syrup in a small saucepan. Simmer on medium heat for 5 minutes until it thickens into a pourable glaze.
Fruit turned mushy
This is often a sign of over ripeness. If your pears were already very soft before they went in, they will collapse. Use pears that are just barely ripe to the touch for the best structure in Pears Baked.
| Original Ingredient | Substitute | Why It Works |
|---|---|---|
| Honey (2 tbsp) | Maple Syrup (2 tbsp) | Similar viscosity. Note: Adds maple flavor, best with pecans |
| Brown Sugar (1/4 cup) | Coconut Sugar (1/4 cup) | Similar color. Note: Slightly grainier texture |
| Bosc Pears | Anjou Pears | Both are firm. Note: Anjou is slightly sweeter |
Adjusting the Batch Size
For smaller portions, a 6 inch dish is ideal. Halve the ingredients, but maintain the original oven temperature. Since there is less volume to heat, cut the total baking time by approximately 20%.
To serve more people, use two 9 inch dishes or prepare the recipe in batches. Avoid overcrowding a single pan to ensure the Baked Pears caramelize instead of steaming. If doubling the yield, use 1.5x the salt and cinnamon instead of a full 2x to keep the flavor profile balanced.
When baking a very large quantity in one roasting pan, reduce the temperature by 25°F and increase the bake time. This prevents the outer edges from scorching before the pears in the center become tender.
Common Fruit Myths
Some people think you need to peel pears before baking. This is false. The skin holds the fruit together and provides a beautiful color contrast. Peeling them often leads to a mushy mess.
Another myth is that adding sugar to fruit "draws out" all the moisture and ruins the texture. While sugar does pull moisture, in the case of Pears Baked, that moisture combines with the butter and honey to create the sauce.
Finally, there's a belief that only certain "dessert pears" work. While Bosc is great, almost any firm pear will work if you adjust the cook time.
Freezing and Reheating Guide
Keep these in a sealed glass jar in the cooler for three days. The syrup will thicken as it cools, which makes it even richer.
You can freeze Pears Baked, but the texture will change slightly. Place them in a freezer safe container with plenty of syrup. They'll stay good for two months. When you're ready to eat them, thaw them in the fridge overnight.
The best way to reheat is in the oven. Place them in a small dish, add a splash of water or apple juice to loosen the glaze, and warm at 300°F (150°C) for 10 minutes. This brings back the mahogany glow without overcooking the fruit.
Make It Your Own
For a more sophisticated vibe, try Pears Baked in red wine. Replace the honey with a reduction of red wine and a bit of extra sugar. This is a classic French style that pairs wonderfully with blue cheese.
If you want something heartier, wrap the fruit in puff pastry. Place the halved, cored pear on a square of pastry, brush with egg wash, and bake. If you love this kind of fruit treat, you might also like a homemade fruit tart for a different texture.
For a healthy version, skip the brown sugar and use date syrup or a bit of maple syrup. Serve these with a dollop of Greek yogurt and a sprinkle of toasted walnuts. It has a similar comforting feel to a classic apple pie but fewer refined sugars.
You can also add a pinch of ground cardamom or ginger to the glaze. This gives Pears Baked a bit more zing and a modern twist.
How to Serve and Enjoy
Serve these warm, straight from the oven. The contrast between the hot fruit and a cold topping is what makes it. A scoop of vanilla bean ice cream or a dollop of mascarpone cheese works best.
For a bit of crunch, sprinkle some toasted sliced almonds or crushed pistachios on top. This adds a necessary texture break to the softness of the Pears Baked.
If you're serving these at a party, place each half in a small ramekin and pour the remaining pan syrup over the top. This ensures everyone gets plenty of that gold liquid.
Pears Baked are a wonderful way to use up seasonal fruit. They're simple, aromatic, and always feel a bit special. Right then, get your pears ready and let's get baking.
Recipe FAQs
Can you cook pears in the oven?
Yes, baking is an excellent method. It concentrates the sugars and softens the fruit without making it mushy.
Should pears be peeled before baking?
No, leave the skins on. The peel helps the pear maintain its shape and prevents it from collapsing during the cook time.
What should I serve these with?
A scoop of vanilla ice cream is best. The cold cream balances the warm cinnamon, a flavor pairing I also use in my Peach Crisp.
How do you achieve a mahogany finish?
Flip the halves halfway through. Spoon the syrup from the bottom of the dish over the tops for the final 20 minutes of baking.
Is it true that only soft pears work for baking?
False. Firmer varieties like Bosc or Anjou are preferred because they hold their structure through the heat.
Baked Pears With Honey