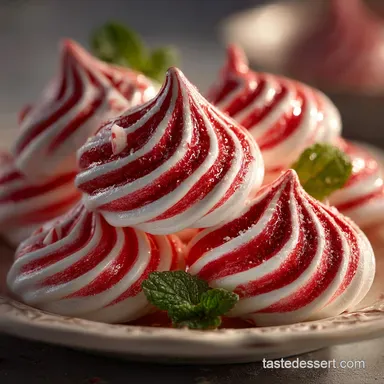
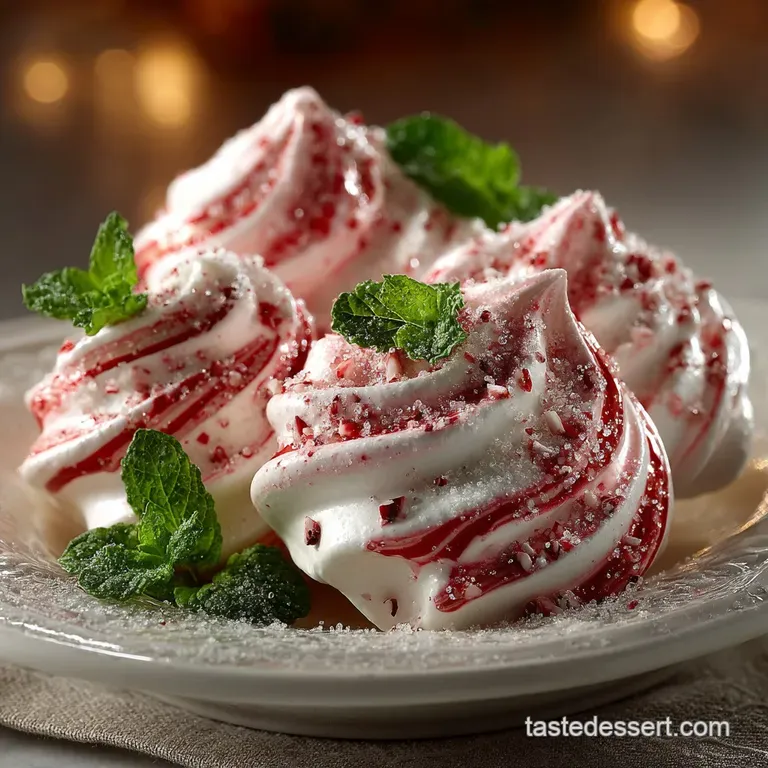
Festive Peppermint Swirl Meringue Kisses
Capturing the Crisp Magic of Peppermint Meringues
The holiday season is incomplete without treats that are as dazzling visually as they are delicious. Enter the world of Peppermint Meringues —airy, crunchy clouds that deliver a sharp, refreshing hit of winter mint, making them an indispensable feature among cherished Christmas Candy Recipes .
These delightful kisses are simplicity perfected. We harness the power of just a few basic kitchen staples, transforming them through careful technique into structured, glossy peaks that hold their shape and flavor beautifully.
The resulting cookie is not heavy or chewy; instead, it offers a dramatic textural contrast, dissolving cleanly on the tongue in a shower of refreshing sweetness.
Why French Meringue is Perfect for Festive Baking
For this particular confection, we rely on the French Meringue method. Unlike the Swiss or Italian methods, which require heating the egg whites and sugar, the French technique involves simply whipping room temperature egg whites until stiff before gradually introducing the sugar.
This approach yields the lightest and most voluminous result possible. Because these cookies are baked at an extremely low temperature for an extended period, the moisture evaporates completely, leaving behind a bone dry, stable shell.
This inherent stability makes the French Meringue Cookie Recipe ideal for holiday gifting and large batch baking, as the cookies resist collapsing or softening when stored properly.
A Note on Difficulty: Mastering the Medium Level Bake
While the ingredient list is remarkably short, achieving structurally perfect meringues elevates this task to a medium difficulty level. The challenge lies not in complexity but in precision. Successful meringue making demands meticulous attention to detail regarding cleanliness and timing.
Humidity and traces of grease are the ultimate enemies of volume, meaning a successful batch relies heavily on proper preparation. The active time commitment is only about 20 minutes for mixing and piping, but patience is vital during the subsequent 90-minute bake and the essential 60-minute cooling period, ensuring the kisses are perfectly dried out.
Gathering Your Supplies for Flawless Meringue Kisses
The magic of this dessert is that stellar results come from minimal items. Before beginning, ensure all components are ready and measured accurately this is the secret to a stress free process.
The Essential Pantry Checklist (Egg Whites to Cream of Tartar)
You will need four large egg whites, which must be completely free of any yolk contamination and, critically, brought entirely to room temperature to ensure maximum loft when whipped.
The sugar choice is also important; 225 grams (or about 1 cup) of fine caster sugar is recommended because its smaller granules dissolve rapidly into the egg foam, preventing the finished meringue from having a gritty texture or weeping later.
Our secret weapon for structural integrity is the stabilizer: ¼ teaspoon of cream of tartar. While some recipes for peppermint meringues without cream of tartar might substitute with lemon juice or white vinegar (using about ½ teaspoon), the tartar provides the most reliable support, helping the proteins hold that incredible volume and gloss.
Must Have Tools for Achieving Glossy Peaks
A reliable electric stand mixer equipped with a whisk attachment is highly recommended, as whipping meringue to stiff peaks can take significant time. If using a hand mixer, be prepared for a vigorous workout! The mixing bowl should preferably be made of glass or metal, as plastic can sometimes harbor residual fats.
To create those beautiful, sculpted forms that define Cute Meringue Cookies , you will need a piping bag fitted with a large star tip, such as a Wilton 1M. Finally, two large baking sheets lined with quality parchment paper or silicone mats are necessary to accommodate approximately 35 to 40 small kisses.
Choosing the Right Peppermint Extract and Color Swirl
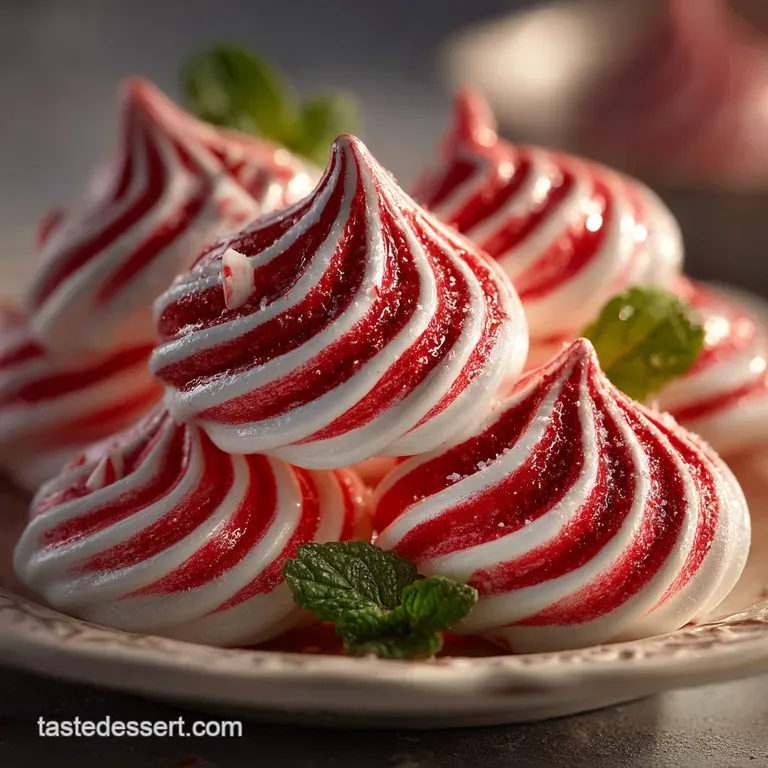
Flavoring these seasonal treats requires one teaspoon of pure peppermint extract, which should be folded in gently right at the end of the whipping process to prevent deflating the air pockets. For the characteristic candy cane swirl, use high-quality gel food coloring, specifically red.
Liquid coloring introduces too much unnecessary moisture, which can destabilize the meringue structure; gel provides rich color without compromising the delicate balance of the batter.
Related Recipes Worth Trying
- Easy NoBake Festive Peppermint Crunch Snack Mix — Whip up this addictively crunchy Festive Peppermint Crunch Snack Mix Its the ultimate Puppy Chow Christmas treat that needs zero oven time Get the recipe
- The Ultimate Peppermint Meltaway Cookies Recipe — Need soft peppermint cookies that truly melt This foolproof recipe delivers buttery shortbread perfection for your Christmas cookies platter Get the glaze...
- Peppermint Bark Pretzels Easy Christmas Treat — Need a quick festive treat These Peppermint Bark Pretzels are the perfect sweet salty bite for the holidays Ready in minutes great for gifting
Whipping Up the Dream: step-by-step Peppermint Meringue Creation
The process of making French meringue follows a clear, rhythmic progression. Adherence to these steps will guarantee success.
The Crucial Prep: Ensuring Grease Free Equipment
The first rule of meringue making is cleanliness. Any trace of fat, whether from residual butter on a spoon or traces of yolk in the egg whites, acts as a protein inhibitor and will prevent the egg whites from whipping up.
Before starting, wipe the mixing bowl and whisk thoroughly with a paper towel dampened with white vinegar or lemon juice, ensuring all surfaces are grease free. Simultaneously, preheat your oven to a low 95° C ( 200° F) and line your baking sheets.
Allowing your segregated egg whites to reach room temperature for about 30 minutes before starting is also key to achieving optimal volume.
Building the Perfect Meringue Base (The Sugar Addition Technique)
Begin whipping the room temperature egg whites on medium low speed until they become frothy and opaque. Once foamy, increase the speed to medium and incorporate the cream of tartar. Continue whipping until soft peaks form the peaks will hold their shape but curl over slightly at the tips.
Now begins the most crucial phase: the slow incorporation of sugar. Increase the speed to medium high and add the caster sugar one tablespoon at a time, allowing 20 to 30 seconds between each addition. This deliberate pace is non-negotiable, providing the sugar ample time to fully dissolve into the foam.
Continue whipping on high speed until the meringue is incredibly stiff, glossy, and shows no signs of grittiness when tested between your fingers. Finally, fold in the peppermint extract gently with a spatula.
Piping, Swirling, and Prepping for the Oven
To create the vibrant holiday swirl, use a fine paintbrush or small offset spatula to paint thin, vertical stripes of red gel coloring along the interior walls of your prepared piping bag, running from the tip upwards. Carefully load the stiff meringue into the striped bag, trying not to scrape the stripes away.
Holding the bag vertically, pipe small, uniform swirls, about one inch in diameter, onto the parchment lined sheets. These perfect little Easy Meringues kisses are now ready for their low-temperature transformation.
The Low-and-Slow Bake for a Dry, Crisp Finish
Place the trays into the preheated oven set to 95° C ( 200° F). Baking the meringues at this low temperature is actually a prolonged drying process, designed to cook them without allowing them to brown.
They need a full 90 minutes of undisturbed baking time; resist the urge to open the oven door. After 90 minutes, test one: it should lift easily from the paper and sound hollow when tapped.
Turn the oven completely off, prop the oven door open slightly with a wooden spoon, and leave the meringues inside for at least 60 minutes, or preferably overnight, to complete the drying process and ensure they are perfectly crisp.
Elevating Your Bake: Common Pitfalls and Troubleshooting
Meringues are often perceived as temperamental, but most difficulties stem from a few easily correctable errors. Understanding why things go wrong is the key to mastering the recipe and achieving consistent, reliable results.
Solving the Weeping Meringue Mystery
The most common frustration is sticky or "weeping" meringues, where tiny beads of syrup appear on the surface. This is almost always caused by either atmospheric humidity (avoid making them on rainy days) or, more frequently, undissolved sugar.
If you rushed the sugar addition during the whipping phase, the crystalline structure can collapse under heat. Always ensure your meringue is smooth and completely non-gritty before piping. If they emerge sticky from the oven, they were not left long enough in the cooling, propped open oven to fully dry out.
Ensure they are bone dry before moving them.
Smart Storage Solutions for Long Lasting Peppermint Meringues
Once the Peppermint Meringues have completely cooled and dried in the oven, proper storage is crucial for maintaining their crisp texture. Store them immediately in a completely airtight container at room temperature.
Because they are highly susceptible to moisture, they should never be refrigerated or frozen, as the condensation will quickly turn them sticky and soft. When stored properly, these airy treats will remain fresh and crunchy for up to two weeks, making them ideal for preparing well ahead of a party.
Quick Look: Nutritional Snapshot (Per Serving)
While decadent in flavor, these meringues are surprisingly light. Based on a yield of 40 small kisses, each serving contains approximately 30 kcal. They are inherently fat-free (0g total fat), deriving their energy primarily from the 7.5 grams of sugar per kiss.
This makes them a wonderfully guilt free indulgence among richer holiday desserts.
Pairing Suggestions: What to Serve With Your Airy Treats
These minty marvels are incredibly versatile. For an elevated presentation, consider making peppermint meringues dipped in chocolate —a quick bath in melted dark chocolate adds a rich counterpoint to the sharp mint flavor.
Alternatively, they serve as the perfect high low pairing with a luxurious homemade hot chocolate; nestle a kiss on the edge of the mug for a lovely garnish. If you want to integrate the classic flavor combination fully, crush up extra peppermint meringues with candy canes and sprinkle the crumbs over vanilla bean ice cream or a simple fruit trifle, adding both color and satisfying crunch.
Recipe FAQs
My egg whites won't stiffen! What went wrong?
This is likely a catastrophe involving a speck of egg yolk or a trace of grease on your equipment the nemesis of meringue! Ensure your mixing bowl and whisk are squeaky clean (a wipe with lemon juice or white vinegar helps tremendously).
Crucially, make sure your egg whites are fully at room temperature; cold whites are sluggish and won't reach that proper, stiff, glossy peak you’re aiming for.
Help! Why are my Peppermint Meringues sticky and chewy inside, not crisp?
This is often a victim of either high kitchen humidity or rushing the critical drying time. Meringues aren't truly "baked" but dried out low and slow, much like a lengthy Sunday afternoon nap.
Always leave them in the turned off oven until they are completely cool and bone dry; if the weather is truly dreadful (a common British problem), consider extending the oven drying time by several hours.
How do I achieve that stunning red swirl effect when piping?
The secret to a perfect festive swirl is using concentrated gel food colouring, as liquid colours add too much moisture. Use a clean, fine paintbrush or a thin offset spatula to paint several thin, vertical lines of colour along the inside walls of your piping bag before you fill it.
As you pipe the kisses, the pressure drags the colour down, creating that lovely striped, barbershop effect.
How long do these meringues keep, and where should I store them?
Provided they are perfectly dried out and crisp, these peppermint kisses are remarkably sturdy! They must be kept in a bone dry, airtight container at room temperature never the fridge, as the moisture will turn them soft and sticky in a flash.
Stored correctly, they will keep happily for up to two weeks, making them a brilliant treat to prep well ahead of the Christmas rush.
Can I use regular granulated sugar instead of caster sugar?
While caster sugar is highly recommended because its fine structure dissolves seamlessly, resulting in a stable meringue, you can use regular granulated sugar in a pinch. If you must substitute, blitz the granulated sugar quickly in a food processor to make the grains finer before you start adding it to the egg whites.
If the final mixture feels grainy when rubbed between your fingers, keep mixing!
Swirled Peppermint Meringue Kisses