Delightful Cookies and Cream Cake Pops
- Recipe Overview
- Key Benefits
- Essential Ingredients Guide: The Heart of Sweet Creations
- Delightful Cookies and Cream Cake Pops: Bake, Chill, and Enjoy!
- Pro Tips & Secrets to Baking Magic
- Perfect Presentation: The Wow Factor
- Storage & Make-Ahead Tips
- Creative Variations for Every Occasion
- Complete Nutrition Guide: The Sweet Truth
- Expert FAQ Solutions
- Encouragement for Your Baking Journey
- 📝 Recipe Card
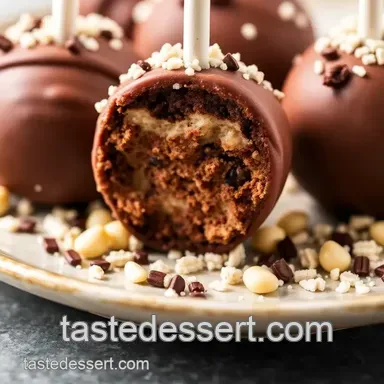
Honestly, there’s just something magical about cake pops. remember those celebrations as a kid where desserts were the highlight of the party? well, that’s the vibe i’m going for with these cookies and cream cake pops .
I remember making them with my mom on rainy afternoons, the kitchen filled with laughter and cookie crumbs! if you're looking to bake cookies cream cake pops in 55 minutes , you've landed in the right place, my friend.
These little bites of joy pack a punch of nostalgia with every bite. cookies and cream isn’t just a flavor; it's a memory a reminder of childhood ice creams and cookie parties.
So, let’s dive right into why these cake pops are a must try!
Recipe Overview
Cake pops have been around for a while now, but their popularity has skyrocketed. they originated from leftover cake scraps yeah, thanks to some creative cake loving souls who couldn’t bear to throw away perfectly good cake!
Fast forward to today, and these fun desserts for kids have taken over birthday parties and celebrations.
What’s great about this recipe is that you’ll need just 55 minutes from start to finish yeah, seriously! prepping takes about 20 minutes , baking another 20 , and a quick chill afterward.
Perfect for those last minute dessert cravings!
When it comes to cost, these treats are wallet friendly, especially if you’ve got some cakes hanging around. with a yield of about 12 cake pops , they’re not just ideal for one-off treats but perfect for gatherings, too! think birthday parties or even bake sales.
Key Benefits
Now, let’s get into the fun stuff. we all love a sweet treat, but these gourmet cake pops are not just about indulgence.
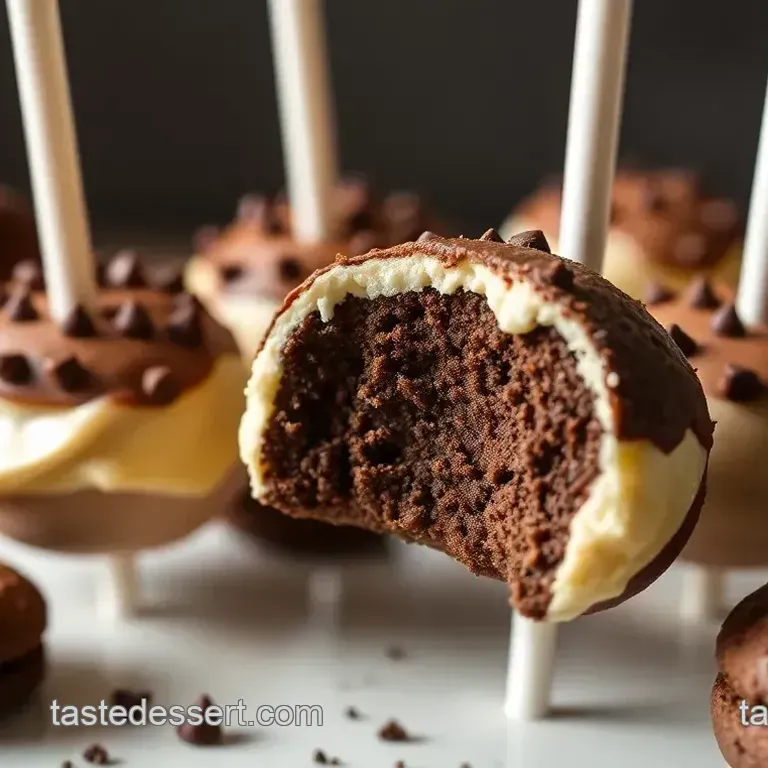
They feature cream cheese frosting and crushed cookies, giving you a bit of joy in each bite. plus, we all need a little sweetness now and then, don’t we?
These cake pops are also a dream when it comes to party dessert ideas . you can whip them up for holidays, birthdays, or just because it’s a tuesday! they stand out on dessert tables, eye-catching with their beautiful chocolate coating.
I mean, who can resist a chocolate dipped treat ?
Another perk? they’re super versatile. don’t have chocolate cookies? no problem! use whatever cookie you have lying around for a great result.
Feeling adventurous? try different flavor combinations. the variations are endless! you can even make no-bake cake pops or mix in some playful add-ins for a twist.
And trust me, these pops are the ultimate kid-friendly desserts . your little ones can help with the decorating, making it a fun family activity.
Get your hands dirty literally! from rolling the cake into ball shapes to dipping them in chocolate, it’s fun from start to finish.
So, whether it's a cozy family night or a big celebration, these cookies and cream cake pops are the way to go!
Now, let’s move to the fun part gathering the ingredients you’ll need to create these delectable little bites. Trust me; they’re worth your time!
Essential Ingredients Guide: The Heart of Sweet Creations
When it comes to whipping up sweet treats like cookies and cream cake pops , having the right ingredients is key.
Think of it as your secret toolkit. here’s an insider's take on what you really need for that delicious cake pop recipe that’ll have everyone saying, “you baked these?!” let’s dive in!
Premium Core Components
To kick things off, let’s break down some premium core ingredients . Here's what you should have on hand.
All-purpose flour : 1 cup (120g) is a must. it provides the base for your cake. look for a fine texture.
Store it in an airtight container, and it'll last up to a year.
Granulated Sugar : 1/2 cup (100g) to sweeten your pops. Aim for pure white sugar. It keeps indefinitely just look for any signs of moisture in packaging.
Baking Powder and Salt : 1/2 tsp and 1/4 tsp, respectively. Baking powder should be fresh check the expiration date. Salt? Grab the kosher kind if you can.
Whole milk and unsalted butter : each need 1/4 cup (60ml for milk and 60g for butter). use full fat milk for that rich flavor.
Keep butter refrigerated and use within a month of opening.
Egg and Vanilla Extract : One large egg and 1/2 tsp of vanilla extract. The egg adds moisture, while vanilla is the fairy dust of baking never skip it!
Signature Seasoning Blend
Now, let’s get into that signature flavor we all love!
Crushed Chocolate Sandwich Cookies : 3/4 cup (about 75g) works magic for flavor. Go for classic Oreos, and you can't go wrong! Store in the cupboard just watch out for cookie monsters!
Cream Cheese : 1/2 cup (120g) is the dreamy filling that ties it all together. Softened, it's a game changer. Keep it in the fridge, and use within two weeks.
Smart Substitutions
Life’s messy, and sometimes you run out of ingredients! No biggie; here are some smart substitutions —
Greek Yogurt can replace cream cheese if you're in a pinch. It provides a nice tang.
dairy-free? Use coconut milk and dairy-free chocolate. It still tastes fabulous!
Emergency Options : Out of sugar? Use honey, but remember to use less since it’s sweeter!
Kitchen Equipment Essentials
Let’s talk tools ! The right equipment makes everything smoother.
Mixing Bowls : You’ll need a few. Honestly, the more the merrier!
Baking Pan : An 8x8 inch pan is perfect. Line it with parchment paper for easy removal!
Microwave Safe Bowl : Ideal for melting that chocolate like a pro. Remember, go slow and stir often to avoid scorching.
Cake Pop Stand : If you don't have one, you can use a Styrofoam block it works just as well!
Pro Tips and Tricks
Quality over Quantity : Invest in good chocolate for melting. The smoother the chocolate, the better your coating will look and taste.
Crumble Right : Make sure your cake is finely crumbled. This is crucial for molding those perfect cake pops.
Don’t Skip Chilling : It seems minor but chilling the pops before dipping keeps them from falling apart.
Decorate While Wet : For that extra flair, sprinkle crushed cookies on top immediately after dipping. Trust me, it’s a game changer.
Time to Get Baking!
Now that you’ve armed yourself with the essentials, you’re ready to bake cookies cream cake pops in 55 minutes ! imagine this: a gathering where the kids are running around, and you present these gorgeous, tasty pops.
They’re not just treats; they’re party hits !
Next up, let’s jump into those step-by-step instructions to whip up these delightful bites that everyone will adore. Who’s ready? Let’s get to baking!
Delightful Cookies and Cream Cake Pops: Bake, Chill, and Enjoy!
Hey there! if you’re in the mood for some sweet treats that’ll brighten up any party or family gathering, i’ve got just the thing: cookies and cream cake pops! trust me, these little bites of joy are perfect for birthdays, holidays, or even a random tuesday afternoon when you just need something yummy.
Best part? you can bake cookies cream cake pops in 55 minutes ! yup, quick and satisfying, just like a good netflix binge between episodes!
Prepping Your Bake Space
Before we even think about mixing, let’s chat about mise en place . fancy french term, huh? it just means getting all your ingredients ready.
Measure everything out before you start. you’ll feel like a pro!
Keep your workspace organized grab some bowls, spatulas, and the biggest mixing bowl you can find. trust me, you don't want to be struggling to find things while a cake batter is potentially going rogue.
Keeping time in check is also key. try focusing on one step at a time and don’t fret! it feels like a cooking show challenge but way more fun, and there’s no creepiest judge yelling at you.
And hey, always think safety first! Make sure your hands and surfaces are clean to avoid any oops moments. No one wants a surprise in their sweet moment!
Step-by-step Recipe Breakdown
Alright, let’s dive in! Here’s how to whip up these delectable cake pops:
Preheat That Oven: Start by cranking the oven to 350° F ( 175° C) .
Mix the Dry Stuff: In a bowl, whisk 1 cup of flour, 1/2 cup of sugar, 1/2 teaspoon of baking powder , and 1/4 teaspoon of salt . So simple!
Get Wet: In another bowl, stir together 1/4 cup of milk, 1/4 cup melted butter, 1 egg, and 1/2 teaspoon of vanilla extract .
Combine and bake: pour the wet mix into your dry mix and stir just until combined. pour it into a greased 8x8 inch pan and bake for 15- 20 minutes .
Check with a toothpick it should come out clean!
Crumble time: once cooled, crumble the cake into a bowl. add 1/2 cup of cream cheese and 3/4 cup of crushed cookies .
Mix it all up until it’s like a cookie dough consistency.
Shape ‘Em Up: Scoop out portions and roll them into balls (about 1 to 1.5 inches in diameter ). Insert lollipop sticks and chill for 15 minutes .
Melt the Goodies: Melt your chocolate wafers until silky smooth. This makes the chocolate dipped treats shine.
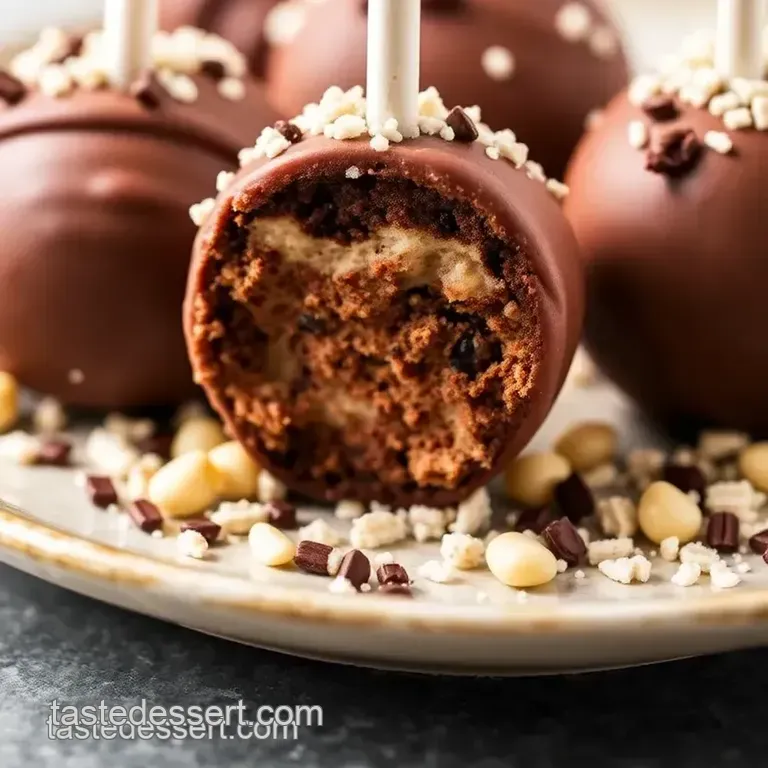
Dip and Decorate: Dip each pop into the chocolate, let excess drip off, and sprinkle with crushed cookies while it's still wet. Boom! You’re a cake pop artist now.
Perfecting Your Cake Pop Game
Let’s be real making cake pops can come with a few hiccups. common mistakes include not crumbling the cake finely enough.
Make sure to get it nice and small; it’ll help with the consistency. you don’t want any chunky bits messing things up!
Also, don’t skip the chill time. if you rush this step, your pops might fall apart in the melted chocolate.
And for the love of all things sweet, don’t forget to have fun with it!
Wrapping It All Up
You know, these cookies and cream cake pops are more than just a dessert; they are experience . think of the joy on your kids’ faces when they see these on the table absolutely priceless! you might want to start a whole cake pop revolution in your home.
So, what’s next? Well, feel free to get creative with flavors and toppings. How about mint cookies or some festive sprinkles? The world of cake pops decoration ideas is your oyster!
And remember, improvising is part of the fun. So, what do you say we dive into some Additional Information about making your cake pops experience even better? Let's keep it rolling!
Pro Tips & Secrets to Baking Magic
When it comes to baking, i’ve picked up a few secret tips over the years. first off, don’t underestimate your oven! every one is different, so give yours a little love and keep an eye on those cookies and cream cake pops .
If they’re smelling extra sweet, check on them a minute or two early. trust me, burnt cake pops make for a sad dessert.
Now, let’s talk time savers . prepping your ingredients in advance keeps things smooth. measure out everything before you start, and you’ll see how cool and collected you can be even when working on this easy cake pop recipe.
Also, if you’re in a bind, use store-bought cake for a quicker option. just crumble it and add your cream cheese; you'll still get that gooey goodness without baking from scratch!
For flavor enhancement, try infusing the melted chocolate with a splash of vanilla extract. it may sound simple, but it adds a huge layer of deliciousness to your cake pops trust me!
Finally, for presentation that screams “i’m the life of the party,” drizzle some melted chocolate over the top and sprinkle with colorful sprinkles or cookie crumbles.
So cute!
Perfect Presentation: The Wow Factor
Now let’s dive into how to make your cake pops instagram worthy. first, plating is everything. i love using a stick and sticking it into a homemade cake pop stand .
If you're short on time, a block of foam or just a simple cup works, too. you want those pops standing tall, proud, and ready for their close-up (think birthday party treats)!
Garnishing is crucial. crushed cookies are a classic, but consider using crushed nuts or coconut flakes for a twist. plus, the color combos matter! use vibrant sprinkles to create contrast against the dark chocolate.
It’s all about making those pops look like chocolate dipped treats you’d find in a gourmet shop.
To really enhance visual appeal, don’t overcrowd your plate. Give each cake pop its moment in the sun!
Storage & make-ahead Tips
Now here’s the fun part: you can totally make these cake pops ahead of time! they store well. just keep them in an airtight container.
They’ll stay fresh for up to a week, but trust me, they probably won’t last that long. if you want to keep them for longer, you can also freeze them just make sure they're well wrapped.
When it comes to reheating , there’s no need. these little delights are best enjoyed cold or at room temperature.
But, if you must re-dip them, just melt a new batch of chocolate and go to town!
Creative Variations for Every Occasion
Feeling adventurous? let’s talk creative variations ! you could swap out your cookies for different flavors maybe oreo mint for a fresh twist, or even gluten-free options for your friends who have dietary restrictions.
The beauty of cake pops is that they’re a blank canvas: you can play with flavors until your heart’s content!
And don’t forget about seasonal twists! imagine pumpkin spice in the fall or berry infused cake pops when summer rolls around.
The fun dessert for kids options are endless, and everyone loves a good twist on tradition!
Complete Nutrition Guide: The Sweet Truth
Now, i know we all want those sweet treats but we should also be aware of the details. these cake pops aren't exactly health food, but they do pack some joy! with about 170 calories per pop, they’re a nice little indulgence.
They won't knock you off your track if you’re careful with portion sizes.
Don’t forget about dietary considerations . You can tweak the recipe to include healthier fats or gluten-free flour. It sounds fancy, but honestly, cake pops are very adaptable!
Expert FAQ Solutions
Got questions? i get it! common questions that pop up for me include, "can i use store-bought cream cheese frosting?" oh, absolutely! while it’s super fun to make your own, don’t hesitate if you’re pinched for time.
And if your cake pops are falling off the sticks, it’s usually because they aren’t chilled enough before dipping. So chill, chill, chill!
Encouragement for Your Baking Journey
At the end of the day, making these bake cookies cream cake pops in 55 minutes is about having fun! so, gather your pals, crank up the tunes, and enjoy every step of the process.
You’ll not only be crafting some great treats but also making sweet memories in the kitchen. happy baking and let your creativity flow! you got this!
Bake Cookies Cream Cake Pops In 55 Minutes