Fudgy Chocolate Sheet Cake with Peanut Butter
- Time: 20 min active + 65 min cooling
- Flavor/Texture Hook: Fudgy, moist crumb with a silky frosting
- Perfect for: Family reunions, potlucks, or birthday parties
- Chocolate Sheet Cake with Peanut Butter
- Fast Facts and Recipe Specs
- Why This Fudgy Cake Works
- Ingredient Deep Dive
- Tools for the Job
- Simple Steps for Success
- Fixing Common Problems
- Troubleshooting Common Issues
- Making Simple Substitutions
- Keeping the Cake Fresh
- Serving Suggestions
- Why You'll Love It
- Recipe FAQs
- 📝 Recipe Card
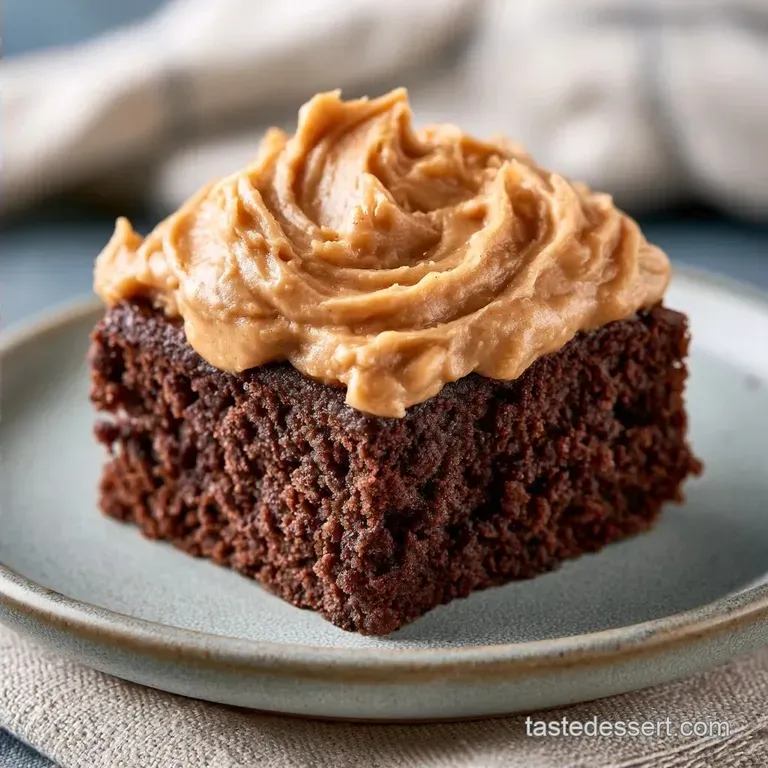
Chocolate Sheet Cake with Peanut Butter
The scent of cocoa and vanilla always takes me back to my grandmother's kitchen. In the South, a sheet cake wasn't just a dessert, it was a way of welcoming people into your home. These cakes lived on the counter at every church social and family reunion I can remember, usually served in a simple 9x13 pan that everyone fought over.
This is the ultimate recipe for a decadent Chocolate Sheet Cake with Peanut Butter Frosting. It has that nostalgic, timeless quality that makes you feel like a kid again, but it uses a few smart budget tricks to ensure it stays moist without costing a fortune in butter.
You can expect a cake that's deeply chocolatey and a frosting that's rich and salty. It's a simple, honest bake that doesn't need fancy decorations to impress, just a thick layer of peanut butter goodness and a lot of love.
Fast Facts and Recipe Specs
Before we get into the mixing, let's look at the numbers. This recipe is designed for efficiency. You spend very little time actually working and most of the time just waiting for the magic to happen in the oven and during the cooling phase.
The total time is 105 minutes, but that's misleading. The active work is only 40 minutes total between the cake and the frosting. The rest is just patience while the cake cools so the frosting doesn't melt into a puddle.
Since we're using a sheet pan, you get 20 generous servings. It's the most budget friendly way to feed a large group without spending all day in the kitchen.
Why This Fudgy Cake Works
I've spent years making these for my family, and I've realized a few things about what actually makes the texture right.
- Boiling Water: Adding boiling water at the end blooms the cocoa powder, which releases a deeper chocolate flavor and thins the batter for a fudgy crumb.
- Oil vs Butter: Using vegetable oil in the base keeps the cake moist at room temperature longer than butter does.
Method Comparison
| Method | Time | Texture | Best For |
|---|---|---|---|
| Oven (Standard) | 20 mins | Even, soft crumb | Large crowds, classic feel |
| Stovetop (Steam) | 45 mins | Extremely moist, dense | Small batches, ultra fudgy |
Ingredient Deep Dive
When you're on a budget, you have to know which ingredients are doing the heavy lifting. You don't need the most expensive chocolate on the shelf to make this work, as long as you have a good quality cocoa powder.
What Each Ingredient Does
| Ingredient | What It Does | Best Swap |
|---|---|---|
| Cocoa Powder | Provides the core chocolate flavor | Dutch process cocoa for darker color |
| Vegetable Oil | Ensures a moist, tender crumb | Melted coconut oil |
| Boiling Water | Blooms cocoa and adjusts consistency | Hot brewed coffee for more depth |
| Creamy PB | Adds saltiness and structure to frosting | Almond butter (adds nuttiness) |
Tools for the Job
You don't need a professional kitchen for this. Most of us have these in our drawers already. A large mixing bowl is the main requirement because the batter is quite thin and can splash if your bowl is too shallow.
For the frosting, a hand mixer is the way to go. You could use a stand mixer such as KitchenAid, but for a single batch of frosting, it's often more trouble to clean the big machine than it's worth.
Finally, grab an offset spatula. If you don't have one, the back of a large spoon works just as well for creating those classic swirls on top of the cake.
Simple Steps for Success
Right then, let's get into the actual baking. Trust me on this, don't skip the cooling time, or your frosting will slide right off the cake.
Phase 1: Preparing the Base
- Preheat oven to 350°F (175°C). Grease a 9x13 inch baking pan or line it with parchment paper. Note: Parchment makes removal much easier.
- In a large bowl, whisk together flour, sugar, cocoa powder, baking soda, and salt until no lumps remain.
- Add eggs, milk, oil, and vanilla to the dry ingredients. Beat on medium speed for about 2 minutes until the batter is smooth and glossy.
- Stir in the boiling water by hand until combined. Note: The batter will be very thin, almost like soup, which is normal.
Phase 2: Baking to Perfection
- Pour the batter into the prepared pan, ensuring it reaches the corners evenly.
- Bake in the center rack for 20 minutes until a toothpick inserted in the center comes out with a few moist crumbs.
- Allow the cake to cool completely in the pan. Note: This usually takes about an hour.
Phase 3: Whipping the Frosting
- Beat softened butter and peanut butter together until pale and fluffy (about 3 minutes).
- Gradually add powdered sugar one cup at a time on low speed.
- Mix in heavy cream, vanilla, and salt. Whip on high for 2 minutes until the frosting is light and airy.
Phase 4: The Final Assembly
- Spread the frosting in a thick, even layer across the cooled cake. Use your spatula to create decorative swirls.
Fixing Common Problems
Baking is mostly just chemistry, and sometimes the chemistry goes wonky. Most of the time, it's a simple fix.
Troubleshooting Common Issues
| Issue | Solution |
|---|---|
| Why Your Cake Sank in the Middle | This usually happens if the oven door is opened too early or if the baking soda is expired. When the structure hasn't set, a rush of cold air can collapse the center. |
| Why Your Frosting is Too Runny | If your butter was too melted before you started, the frosting won't hold its peak. You can fix this by chilling the bowl for 10 minutes and whipping it again. |
| Why the Cake Sticks to the Pan | If you didn't grease the sides well enough, the cake can cling. A warm knife run around the edge of the pan usually releases it. |
Making Simple Substitutions
One of the best things about this recipe is how flexible it is. You can swap a few things based on what's in your pantry without ruining the result.
If you're baking for a crowd and need something different, a Sheet Cake for 20 recipe is another great option for parties. But for this chocolate version, you can use buttermilk instead of whole milk for a slightly tangier, more tender crumb.
For those watching their budget, you can use a generic store brand peanut butter. Just make sure it's the creamy kind, as the chunky bits can make the frosting feel uneven. If you want a darker chocolate flavor, replace half the boiling water with hot coffee.
It doesn't make the cake taste like coffee, but it makes the chocolate taste more intense.
Decision Shortcut
- If you want it fudgier, bake for exactly 18 minutes.
- If you want a fluffier frosting, add an extra tablespoon of heavy cream.
- If you're using a glass pan, lower the oven temp to 325°F.
Keeping the Cake Fresh
This cake stays moist longer than most because of the oil base. I usually store these alongside my chewy peanut butter cookies for a full dessert spread.
Store the cake in the fridge for up to 5 days. Just cover it with plastic wrap or put it in an airtight container. If you're serving it straight from the fridge, let it sit at room temperature for 30 minutes so the frosting softens back up.
For the freezer, cut the cake into squares first. Wrap each square individually in foil and place them in a freezer bag. They'll last for about 3 months. To reheat, just let them thaw in the fridge overnight or leave them on the counter for an hour.
To avoid waste, if you have leftover frosting, freeze it in small dollops on a baking sheet, then move them to a bag. You can pop these onto warm toast or use them as a dip for apple slices.
Serving Suggestions
Because this is a rich cake, you want to balance the sweetness. I love serving a square with a dollop of unsweetened whipped cream or a few fresh raspberries on top. The acidity of the berries cuts right through the heavy peanut butter.
If you're serving this at a party, cut the pieces into small 2x2 inch squares. This makes the dessert less overwhelming and allows people to try other treats. I also recommend serving it with a cold glass of milk or a strong black coffee.
For a bit of a fancy touch, you can sprinkle a little flaky sea salt over the top of the frosting. It highlights the saltiness of the peanut butter and stops the powdered sugar from feeling too sweet.
Why You'll Love It
Honestly, this Chocolate Sheet Cake with Peanut Butter is just a reliable win. It doesn't require fancy techniques or expensive equipment, yet it tastes like something from a professional bakery. It's the kind of recipe that becomes a family tradition because it's so consistent.
I love that it's a budget friendly treat. Using basic staples like flour, oil, and peanut butter means you can make this even on a tight week. It's a timeless comfort food that brings people together, which is really what baking is all about.
Whether you're making this for a birthday or just because it's Tuesday, you're getting a dessert that's deeply satisfying. It's a classic for a reason, and once you try this version, you won't go back to store-bought mixes.
Baking Truths
You might hear that you need to cream butter for 10 minutes to get a good cake. For a sheet cake, that's not true. The oil based method is actually better for moisture and speed.
Some people think you have to use expensive Dutch processed cocoa for this. While it's great, standard unsweetened cocoa works perfectly fine as long as you bloom it with the boiling water.
Another common thought is that adding a lot of flour makes the cake sturdier. Actually, too much flour makes it bready. Stick to the 250g measurement to keep that fudgy, melting texture.
Recipe FAQs
How long should I bake the cake?
Bake for 20 minutes at 350°F (175°C). Insert a toothpick into the center to ensure it comes out with a few moist crumbs.
Why is the batter so thin after adding boiling water?
This is normal for this recipe. The boiling water thins the consistency to produce a softer, more moist crumb after baking.
Is it true that opening the oven door early won't affect the cake's rise?
No, this is a common misconception. A rush of cold air can cause the center to collapse if the structure hasn't fully set.
Why is my peanut butter frosting too runny?
Chill the mixing bowl for 10 minutes. This usually happens if the butter was too melted; chilling and whipping it again will help it hold its peak.
Can I frost the cake while it is still warm?
No, let the cake cool completely in the pan. Frosting a warm cake will cause the butter and peanut butter to melt and slide off.
How to make the frosting light and airy?
Whip on high for 2 minutes. After adding the heavy cream, vanilla, and salt, this final high speed whip creates the desired fluffy texture.
Can I use chunky peanut butter instead of creamy?
Yes, chunky peanut butter works great. It adds a pleasant texture and crunch, similar to the variety found in thumbprint cookies.
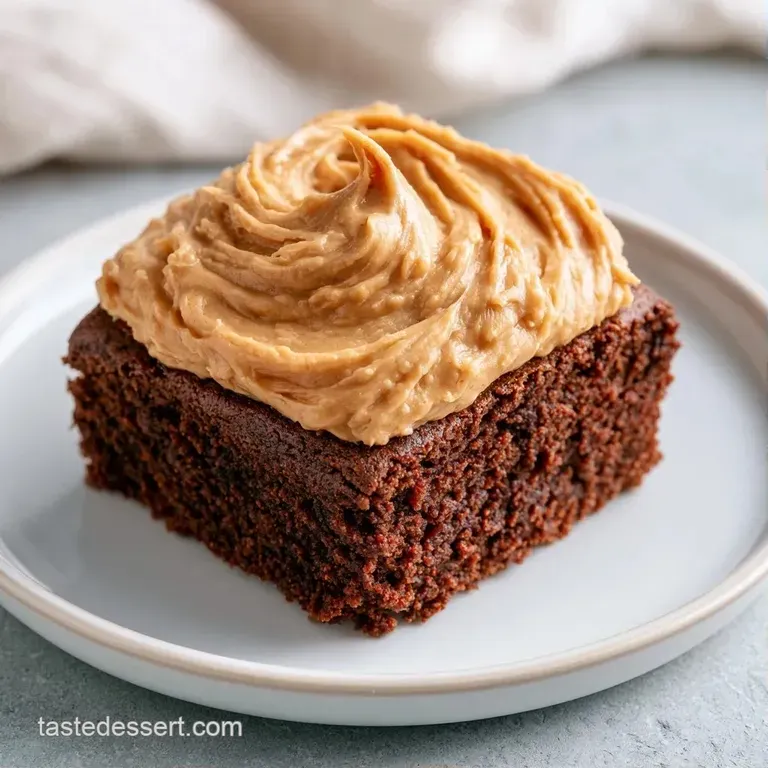
Chocolate Peanut Butter Sheet Cake

