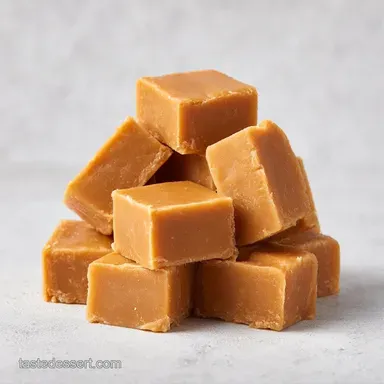
Peanut Butter Fudge: Failure-Proof and Creamy
- Time: 5 min active + 2 hrs 30 mins chilling
- Flavor/Texture Hook: Velvety smooth with a rich, nutty finish
- Perfect for: Holiday gift baskets or an easy dessert fix
Easy Creamy Peanut Butter Fudge
Imagine that smell of toasted peanuts and melted chocolate filling your kitchen, a scent so thick you can almost taste it. There is nothing quite like the moment you lift the parchment paper and see a perfectly smooth, glossy slab of fudge ready to be sliced. It's the kind of treat that makes the whole house feel cozy.
But let's be honest, most home cooks have a horror story about fudge. I remember a batch I made years ago that had the texture of wet sand, all because I tried to boil sugar and butter without a thermometer. It was grainy, gritty, and honestly, pretty disappointing.
I spent way too long trying to "fix" it before realizing that the traditional method is just a headache for most of us.
That's where this version comes in. By using sweetened condensed milk, we bypass the risky boiling stage entirely. You get that decadent, melt in-your mouth feel without the stress. This 3Ingredient Peanut Butter Fudge is the targeted fix for anyone who wants the professional result without the professional equipment.
Why This Texture Actually Works
- Sugar Stability: Sweetened condensed milk provides a pre stabilized sugar structure, which means you don't have to worry about crystallization or that "sandy" feel.
- Fat Emulsion: The oils in the peanut butter blend with the cocoa butter in the chocolate, creating a velvety mouthfeel that stays smooth at room temperature.
- Controlled Heat: Using a microwave allows for fast, targeted heating that melts the fats without scorching the milk proteins.
- Structural Set: The chocolate chips act as the anchor, hardening as the fudge cools to give it a clean break.
| Method | Time | Texture | Best For |
|---|---|---|---|
| Microwave | 10 mins | Silky/Smooth | Speed & Beginners |
| Stovetop | 20 mins | Denser/Fudgy | Large batches |
Right then, before we dive into the components, it's worth noting that the secret is in the "rest." Letting the chocolate sit in the warm base before stirring prevents those annoying little lumps.
The Essential Ingredient Breakdown
| Ingredient | Science Role | Pro Secret |
|---|---|---|
| Peanut Butter | Emulsifier/Fat | Use commercial brands for better stability |
| Condensed Milk | Sweetener/Binder | Use room temperature to avoid clumps |
| Chocolate Chips | Structuring Agent | High cocoa butter content ensures a firmer set |
The Right Tools For Success
You don't need a fancy kitchen for this, but a few specific items make the process a breeze. Use a large glass bowl that is microwave safe, as this allows you to see the mixture as it unifies. A sturdy silicone spatula is non negotiable here, as you'll need it to scrape every bit of that glossy batter into the pan.
For the pan, an 8x8 inch square is standard. I always suggest lining it with parchment paper. Trust me on this, trying to grease a pan with butter often results in the fudge sticking to the corners, which is a nightmare when you're trying to get clean squares.
The step by step Process
- Combine 1 cup creamy peanut butter (255g) and 1 can sweetened condensed milk (14 oz/397g) in a large microwave safe glass bowl.
- Microwave on high for 1 minute, stirring halfway through, until the mixture is a smooth, unified liquid. Note: Stirring prevents the milk from boiling over.
- Add 2 cups semi sweet chocolate chips (340g) to the warm mixture and let them sit undisturbed for 2 minutes to soften.
- Stir slowly from the center outward using a spatula until the chocolate is fully melted and the batter is a glossy, uniform tan.
- Line an 8x8 inch baking pan with parchment paper, leaving an overhang on the sides.
- Pour the mixture into the pan and smooth the top with a spatula.
- Allow the fudge to set at room temperature for 30 minutes.
- Refrigerate for at least 2 hours until the slab is firm to the touch.
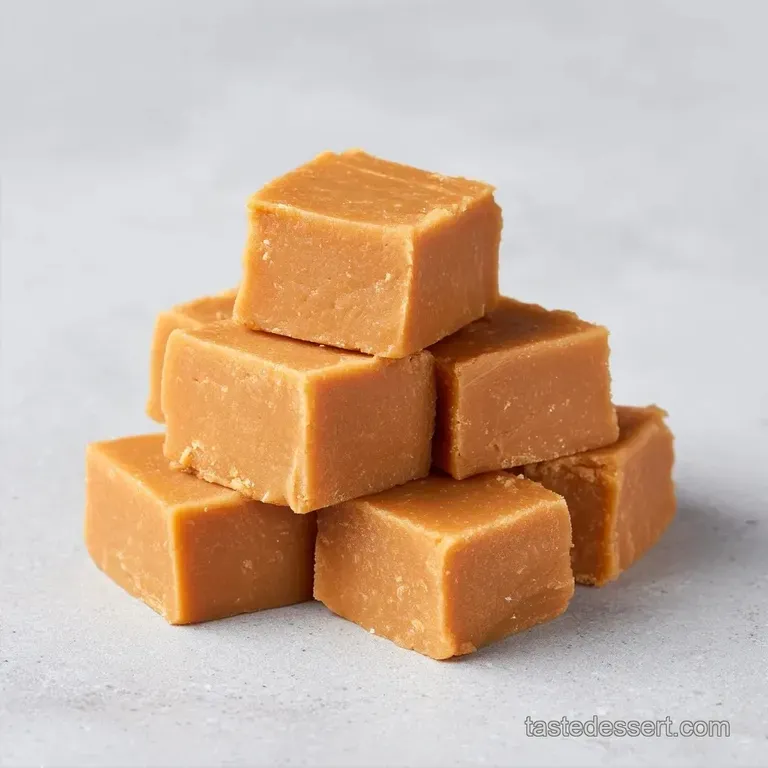
- Lift the parchment paper and slice the fudge into 24 small squares.
Chef's Note: If you want a more professional look, wipe your knife with a warm, damp cloth between every single cut. It prevents the fudge from sticking and keeps the edges sharp.
Fixing Common Fudge Problems
When you're making a 3 ingredient peanut butter fudge recipe, things usually go smoothly, but a few hiccups can happen. Most of the time, it's a temperature or ingredient issue.
Grainy Texture
If your fudge feels like it has tiny crystals, it's usually because you used "natural" peanut butter. Natural versions separate their oil, which can disrupt the emulsion. Stick to the creamy, processed stuff for this specific recipe.
The Too Soft Set
If the fudge doesn't hold its shape, it likely hasn't chilled long enough. The cocoa butter in the chocolate needs a full 2 hours to crystallize. If it's still soft, pop it back in the fridge for another hour.
Chocolate Clumps
This happens when you stir the chocolate too quickly before it has a chance to melt. The heat from the peanut butter needs time to penetrate the chips.
| Problem | Root Cause | Solution |
|---|---|---|
| Grainy feel | Natural PB oil separation | Use commercial creamy peanut butter |
| Too soft | Insufficient chilling time | Refrigerate for an additional 2 hours |
| Clumpy chocolate | Stirring too early | Let chips sit for 2 mins before stirring |
Common Mistakes Checklist
- ✓ Avoid using a metal bowl in the microwave.
- ✓ Don't over stir the chocolate; be gentle.
- ✓ Ensure the condensed milk is not ice cold.
- ✓ Use a lined pan for easy removal.
Exciting Flavor Twists
If you love this 3 ingredient peanut butter fudge recipe easy method, you can easily tweak it. For a salted version, stir in a half teaspoon of flaky sea salt at the very end. It cuts through the sweetness and makes the peanut flavor pop.
You could also try a marble swirl by melting a bit of extra dark chocolate and swirling it in with a toothpick before chilling. If you're looking for other quick treats, my Butterscotch Fudge Recipe uses a similar fast track method that's just as decadent.
For a vegan friendly swap, use a dairy-free condensed coconut milk and vegan chocolate chips. The coconut adds a slight tropical note, but the texture remains just as velvety.
| Original Ingredient | Substitute | Why It Works |
|---|---|---|
| Creamy Peanut Butter | Almond Butter | Similar fat profile. Note: Lighter, nuttier flavor |
| Semi Sweet Chips | Dark Chocolate | More cocoa. Note: Less sweet, firmer set |
| Condensed Milk | Coconut Condensed Milk | Vegan alternative. Note: Adds a coconut aroma |
Storing And Reducing Waste
Keep your fudge in an airtight container in the fridge for up to 1 week. If you've made a giant batch, it freezes wonderfully for up to 3 months. Just wrap the squares individually in wax paper so they don't pick up any freezer smells.
To avoid waste, don't throw away the chocolate residue left in the microwave bowl. Scrape it out and stir it into your morning oatmeal or use it as a topping for some sliced apples. It's a small win, but it's the best part of the cleanup.
Serving And Enjoying
The best way to eat this is straight from the fridge for a firmer snap, or let it sit out for 10 minutes if you prefer a more buttery, melt in-your mouth experience. It's incredibly rich, so a small square is usually plenty.
For a real showstopper, serve these squares alongside a scoop of vanilla bean ice cream. If you're planning a big party, this fudge also makes a wonderful addition to a dessert platter next to a Homemade Ice Cream Cake.
Decision Shortcut If you want it saltier, add 1/2 tsp sea salt. If you want it softer, reduce chocolate chips by 1/4 cup. If you want it firmer, chill for 4 hours instead of 2.
Recipe FAQs
How to make fudge with only three ingredients?
Combine peanut butter and sweetened condensed milk in a microwave safe bowl and heat for 150 minutes. Stir in chocolate chips until the mixture is glossy and refrigerate for 2 hours.
How to make Paula Deen fudge?
Combine peanut butter and sweetened condensed milk in a microwave for a similarly rich, creamy result. Stir in chocolate chips and let the batter set in an 8x8 inch pan.
How do you make 3 ingredient fudge in the microwave with condensed milk?
Microwave peanut butter and sweetened condensed milk on high for 1 minute, stirring halfway through. Fold in chocolate chips and chill in the refrigerator for at least 2 hours.
Why is my 3 ingredient fudge not setting?
It likely hasn't chilled long enough. This recipe requires 30 minutes at room temperature followed by at least 2 hours in the fridge to firm up completely.
How to make a dessert with 3 ingredients?
Mix peanut butter, sweetened condensed milk, and chocolate chips using a microwave to create a smooth batter. Pour the mixture into a lined pan and refrigerate until firm.
Can I make peanut butter fudge without marshmallows?
Yes, this recipe requires no marshmallows. It uses sweetened condensed milk for structure; if you enjoy these simple sweets, see how we handle similar flavors in our homemade Oreos.
Is it true that fudge must be cooked on a stovetop to set correctly?
No, this is a common misconception. Using sweetened condensed milk allows the fudge to set perfectly in the refrigerator without the need for a stovetop or candy thermometer.
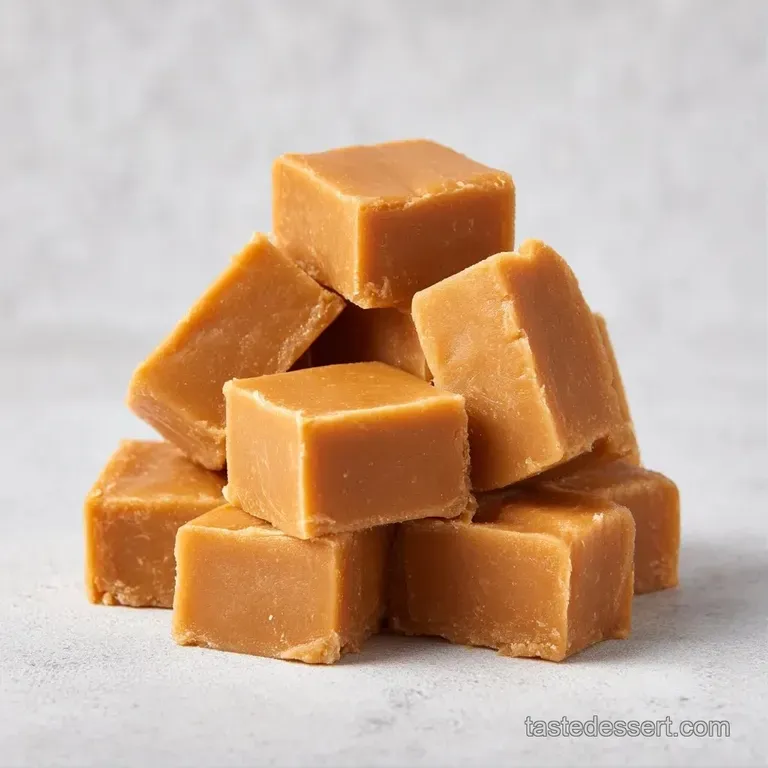
Creamy Peanut Butter Fudge