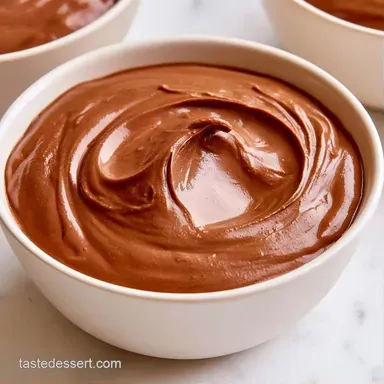
Chocolate Pudding with Cocoa Powder

- Time: 10 min active + 10 min cooking + 4 hr chilling
- Flavor & Texture: Rich, deep cocoa with a velvety finish
- Perfect for: A comforting homemade treat
You don't need a professional mixer to get a smooth result, because a simple whisk and a sieve handle the clumping. Most people worry that homemade versions will be grainy, but that's usually just a result of not sifting the cocoa.
This chocolate pudding relies on a slow-build technique. You start with a thick paste and gradually thin it out, which prevents those annoying little flour pockets from forming.
The result is a chestnut brown treat that smells like a warm chocolate shop. It's dense, creamy, and stays stable in the fridge for days.
Why Chocolate Pudding Stays Smooth
- Gradual Liquid Addition: Adding milk in small splashes creates a smooth paste first, which stops the starch from clumping.
- The Cold Butter Finish: Whisking in chilled butter at the end adds a mirror-like shine and a richer mouthfeel.
| Cocoa Type | Budget Option | Impact | Savings |
|---|---|---|---|
| Dutch-Processed | Natural Cocoa | Lighter color, more acidic taste | Low |
| Premium Valrhona | Generic Store Brand | Less depth in chocolate notes | Medium |
The Building Blocks
| Component | Purpose | Substitute Notes |
|---|---|---|
| Cornstarch | Thickener | Arrowroot: Use 1:1 but texture may be more translucent |
| Whole Milk | Creamy Base | Oat Milk: Similar thickness, adds slight nuttiness |
| Cocoa Powder | Core Flavor | Melted Dark Chocolate: Richer, but requires more butter |
- ½ cup unsweetened cocoa powder Why this? Provides the deep, dark base color
- ¾ cup granulated sugar
- 3 tbsp cornstarch Why this? Essential for the stable, thick set
- ¼ tsp fine sea salt
- 2 cups whole milk
- 2 tbsp unsalted butter, chilled and cubed Why this? Adds the final glossy shine
- 1 tsp pure vanilla extract
Recipe Specs
This recipe makes 4 portions. It's designed for a medium saucepan and requires a full 4-hour chill time to set properly. Total time is 4 hours 20 minutes.
Tools You'll Need
You'll need a heavy-bottomed saucepan to prevent the milk from scorching. A fine-mesh sieve is mandatory for the cocoa, and a sturdy whisk is the best tool for keeping the mixture smooth.
From Prep to Plate
For the Dry Mix
- Use a fine-mesh sieve to sift ½ cup unsweetened cocoa powder into a medium heavy-bottomed saucepan, ensuring no lumps remain.
- Combine with ¾ cup granulated sugar, 3 tbsp cornstarch, and ¼ tsp fine sea salt, whisking until the powder is a consistent, pale brown color.

The Thickening Process
- Slowly whisk in 2 cups whole milk; begin with a small amount to form a smooth paste, then gradually thin it out to keep the mixture clump-free.
- Set the pan over medium heat and whisk steadily, making sure to reach the bottom and corners.
- Let the mixture reach a gentle simmer, whisking until it boils and reaches a dense, creamy consistency. You will smell the scent change from raw cocoa to something rich and toasted.

The Final Finish
- Take the pan off the heat as soon as it has thickened.
- Mix in 2 tbsp chilled, cubed unsalted butter and 1 tsp pure vanilla extract. Whisk until the butter has fully melted and the pudding looks glossy.
- Pour the pudding into 4 ramekins and lay plastic wrap touching the top of the mixture to stop a skin from developing.

- Chill in the refrigerator for 4 hours before serving.
Quick Fixes

If this chocolate pudding doesn't look right, it's usually a temperature or mixing issue. If you see lumps after it has thickened, don't panic. You can push the hot pudding through a strainer to save the texture.
Fixing Grainy Texture
This happens if the cocoa wasn't sifted or the heat was too high. Pass the hot mixture through a sieve immediately.
When It Stays Runny
This usually means it didn't reach a full boil. Return it to medium heat and whisk until it bubbles.
Dealing With Skin
A skin forms when air hits the surface during cooling. Press plastic wrap directly onto the pudding.
| Problem | Root Cause | Solution |
|---|---|---|
| Lumpy texture | Cocoa not sifted | Strain the hot pudding |
| Too thin | Didn't reach simmer | Boil for 1-2 minutes more |
| Rubberiness | Overcooked starch | Avoid boiling for too long |
Storage and Freshness
Store the chocolate pudding in the refrigerator using covered ramekins or a sealed container. It will remain creamy and fresh for up to 5 days.
Freezing is not advised, as the emulsion can separate and leave the texture grainy once thawed. However, if you prefer a frozen treat, use this as a filling for a pie crust and freeze the complete dessert for 2 weeks.
Presentation Tips
I like a dollop of unsweetened whipped cream on top to cut through the richness. A few fresh raspberries or a dusting of cocoa powder makes it look polished. Serve it in glass jars to show off that chestnut brown color.
Flavor Twists
This chocolate pudding base is easy to adapt. For a richer taste, replace 2 tablespoons of the cocoa powder with finely chopped dark chocolate, stirring it in at the end.
If you enjoy warm, cozy desserts, you might like this sticky toffee pudding recipe for another kind of chocolatey comfort. For a dairy-free version, use 2 cups full-fat coconut milk in place of the whole milk and 2 tbsp vegan butter alternative in place of the butter, with the same steps.
Frequently Asked Questions
Does chocolate pudding freeze well?
No, because the emulsion breaks and creates a grainy texture when thawed. You can however use it as a pie crust filling and freeze the whole dessert for 2 weeks.
Where to store the finished pudding?
Keep the pudding in covered ramekins or a sealed container in the refrigerator. It stays fresh and creamy for up to 5 days.
Why does a skin form on the surface?
Exposure to air during cooling can cause a skin to form on the surface. To prevent this, lay plastic wrap flush against the pudding.
Can this be made without butter?
Yes, you can omit it. The pudding will still set, but it will lack the mirror-like shine and rich finish provided by the butter.
How to avoid lumps in the cocoa?
Sift the cocoa powder through a fine-mesh sieve into the saucepan. This removes all clumps before you whisk in the other ingredients.
When is the pudding ready to take off the heat?
Remove the pan once the mixture boils and reaches a thick, smooth consistency. The pudding should also appear glossy at this stage.
Could I use skim milk instead of whole milk?
Yes, other milks will work. Keep in mind that skim milk may result in a thinner consistency compared to using whole milk.
Creamy Chocolate Pudding