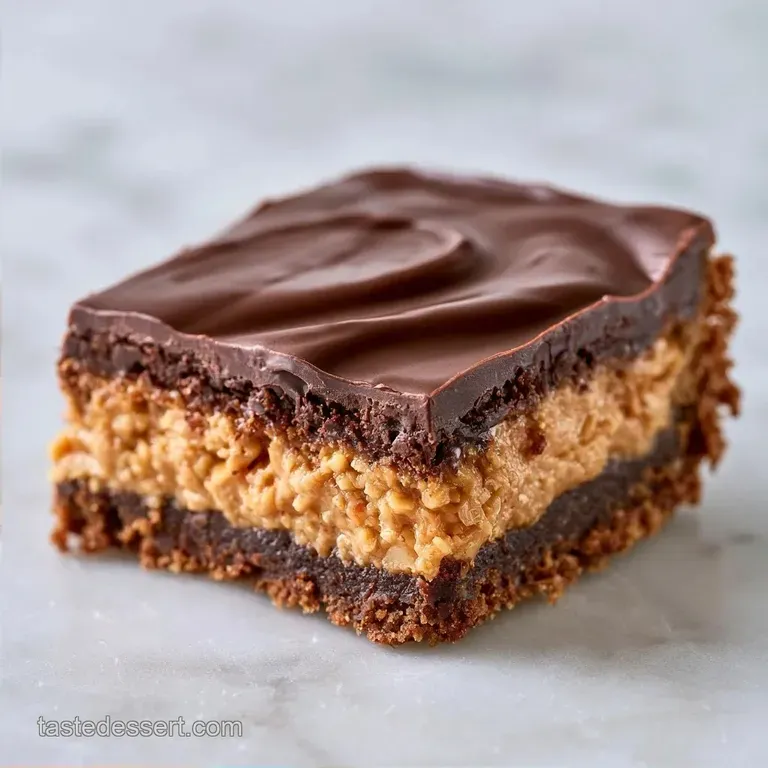
Guilt-Free No Bake Peanut Butter Bars
- Time: 10 min active + 1 hour chilling
- Flavor/Texture Hook: Dense, nutty base with a glossy chocolate snap
- Perfect for: Quick dessert cravings or kid friendly snacks
The smell of toasted peanut butter and melted chocolate is one of those things that just feels like home. In many American households, no bake treats are a tradition passed down through potlucks and school bake sales, where the goal was to make something that tasted rich without needing to heat up the kitchen in July.
I remember my aunt making these in a makeshift "assembly line" with the kids. We'd press the dough into the pan with our palms, laughing as the sticky mixture clung to everything. It's a nostalgic, comforting process that focuses on the joy of mixing rather than the stress of a timer.
You can expect a treat that hits that salty sweet balance perfectly. These No Bake Peanut Butter Bars aren't airy or cakey. They are dense and satisfying, making just one or two squares enough to kill a sugar craving.
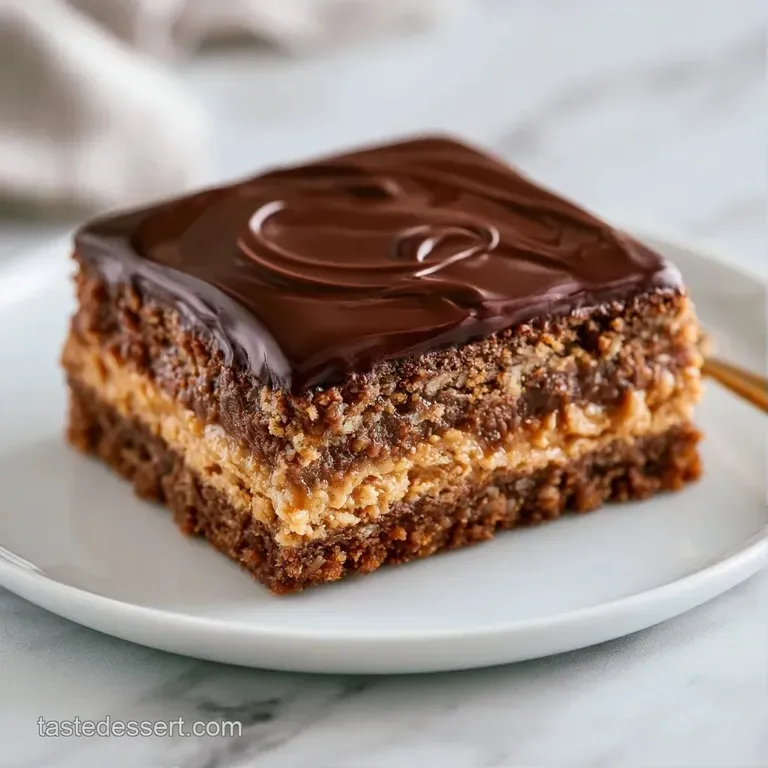
No Bake Peanut Butter Bars
- Maple Syrup
- Acts as a binder and sweetener that firms up when cold.
- Almond Flour
- Adds structure and a subtle nuttiness without requiring a bake.
- Dark Chocolate
- Provides a snap that contrasts with the creamy base.
| Method | Time | Texture | Best For |
|---|---|---|---|
| No Bake | 10 min active | Fudgy/Dense | Fast cravings |
| Baked | 30 min active | Cakey/Soft | Lunchboxes |
Ingredient Deep Dive
Selecting the right base is where this recipe succeeds. I suggest using a natural peanut butter that doesn't separate too much, though a stir will fix most brands. According to King Arthur Baking, almond flour is a great choice here because it absorbs moisture without making the dough gummy.
| Ingredient | What It Does | Best Swap |
|---|---|---|
| Peanut Butter | Provides fat and flavor | Cashew butter (milder taste) |
| Maple Syrup | Sweetens and binds | Honey (thicker, floral notes) |
| Almond Flour | Adds body/structure | Oat flour (chewier texture) |
| Dark Chocolate | Adds a rich topping | Semi sweet chips (sweeter) |
Essential Tools
You don't need much here. An 8x8 inch square pan is the standard. I always use parchment paper with a good overhang. It makes lifting the whole block out so much easier. A microwave safe glass bowl is best for the chocolate, as it distributes heat more evenly than plastic.
Step by step Guide
Phase 1: Creating the Base
- Line your 8x8 inch pan with parchment paper. Note: Leave an overhang for easy removal.
- Stir 1 cup of peanut butter, 1/2 cup maple syrup, and 1 cup almond flour in a bowl.
- Mix until a thick, cohesive dough forms and no dry flour remains.
- Press the dough firmly into the pan. Use the back of a spoon to make the surface smooth.
Phase 2: Melting the Ganache
- Place 1 cup dark chocolate chips and 2 tbsp peanut butter in a bowl.
- Microwave on high in 20 second intervals. Stir vigorously between each session.
- Heat until the chocolate is smooth and glossy. Note: Stop before it looks oily.
- Pour the chocolate over the base. Spread it evenly with a spatula.
Phase 3: The Set and Slice
- Chill the pan in the fridge for at least 1 hour.
- Lift the block out using the paper. Slice into 12 squares with a warm knife.
Chef's Note: To get those clean, sharp edges, dip your knife in hot water and wipe it dry between every single cut.
Fixing Common Issues
If your base feels too soft, it usually means the peanut butter was too oily or the syrup was too thin. You can usually fix this by adding a tablespoon more almond flour. If the chocolate seizes, it's often because a drop of water got into the bowl.
Why Your Base Is Too Soft
This happens when the fat to dry ratio is off. Use a firmer peanut butter next time.
Why Your Chocolate Is Grainy
Overheating chocolate in the microwave causes the cocoa butter to separate.
| Problem | Root Cause | Solution |
|---|---|---|
| Base Crumbles | Not enough syrup | Add 1 tbsp maple syrup |
| Chocolate Cracks | Chilled too fast | Let sit at room temp 5 mins |
| Greasy Top | Over melted chocolate | Stir in 1 tsp coconut oil |
Tasty Flavor Twists
You can easily shift the profile of these bars. For a salty kick, sprinkle flaky sea salt over the chocolate before it sets. If you want a crunchier texture, swap the almond flour for crushed graham crackers or toasted oats.
For those who love a more portable version, you might like these peanut butter energy bites for on the-go snacking. If you're looking for something with a more traditional baked feel, my chocolate chip cookies are a great contrast to these No Bake Peanut Butter Bars.
Decision Shortcut: If you want it saltier, add 1/4 tsp sea salt to the base. If you want it softer, increase maple syrup by 1 tablespoon. If you want it firmer, chill for 2 hours instead of 1.
Scaling Guidelines
Cutting the recipe in half: Use a 4x8 inch loaf pan. Reduce the chilling time by about 20%, but check it at 45 minutes.
Doubling the recipe: Work in batches for the chocolate melting phase. Don't double the salt or vanilla if you add them, as those flavors can become overwhelming. Use two 8x8 pans rather than one deep pan to ensure the bars set evenly.
Truth About No Bake Treats
Some people think no bake desserts lack structure. That's not true. The fat in the peanut butter and the sugars in the syrup create a solid bond when the temperature drops.
Another common thought is that maple syrup is too runny for these. Actually, maple syrup provides a better "snap" than honey, which can remain a bit too tacky at fridge temperatures.
Storage and Freshness
Keep these in an airtight container in the fridge for up to 10 days. They also freeze wonderfully. Wrap them individually in wax paper and toss them in a freezer bag for up to 3 months. To eat them, just let them thaw for 10 minutes on the counter.
To avoid waste, if you have a bit of leftover peanut butter dough that didn't make it into the pan, roll it into a small ball and dip it in the leftover chocolate for a "bonus" truffle.
Plating and Serving
For a professional look, use a bench scraper to get perfectly straight edges. Serve them on a wooden board with some fresh raspberries or sliced strawberries to cut through the richness. If you're gifting them, line a small box with checkered parchment and stack them in two rows of six.
Recipe FAQs
How do you make these no bake peanut butter bars?
Stir peanut butter, maple syrup, and almond flour into a thick dough. Press the mixture into a parchment lined pan, top with melted chocolate and peanut butter, and refrigerate for at least 1 hour.
What is the easiest peanut butter bar recipe?
This no-bake version is the simplest. It requires minimal ingredients and zero oven time, making it significantly faster than traditional baked bars.
How long do no bake peanut butter bars last?
Store them in the fridge for up to 10 days. They also stay fresh in the freezer for up to 3 months if wrapped individually in wax paper.
What desserts can beginners make without an oven?
No-bake treats like these peanut butter bars are ideal. They eliminate the risk of burning and only require basic mixing and chilling.
What should I serve with vanilla ice cream?
Slice a few of these peanut butter bars to serve as a side. If you enjoy the layered textures here, you can apply similar pairing logic to a homemade ice cream cake.
Is it true I can make these bars with only three ingredients?
No, this is a common misconception. While simpler versions exist, combining almond flour and maple syrup ensures a stable structure and balanced sweetness without baking.
How do I get a smooth chocolate topping?
Microwave the chocolate and peanut butter in 20-second intervals. Stir vigorously between each session to ensure a glossy finish without scorching the chocolate.
No Bake Peanut Butter Bars

