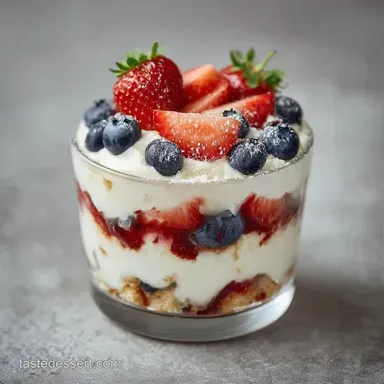
Red White and Blue Dessert Trifle: Creamy and Festive
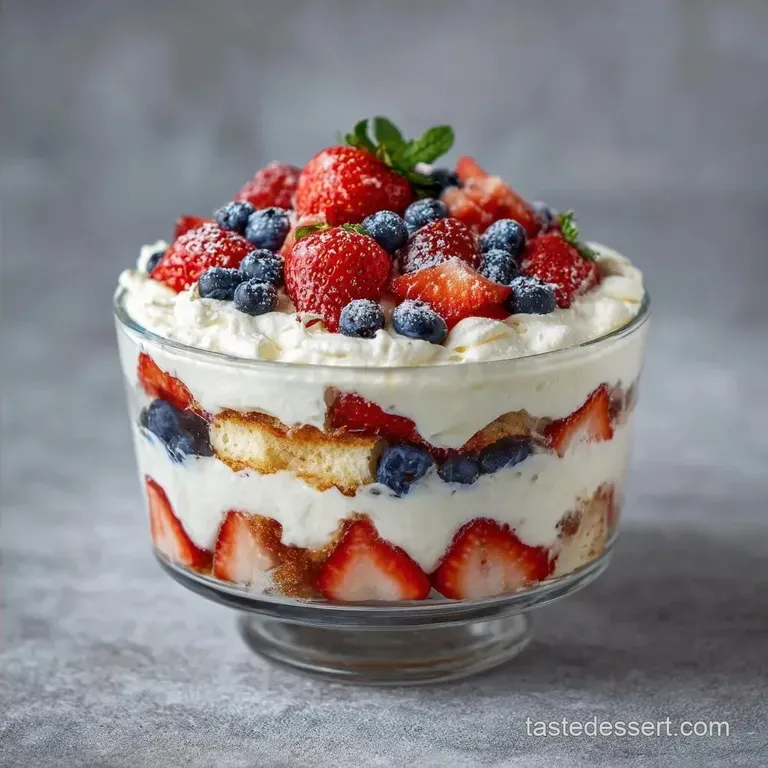
- Time: 20 min active + 2 hrs chilling
- Flavor/Texture Hook: Velvety mousse with airy, citrus kissed cake
- Perfect for: 4th of July parties or Memorial Day brunch
Ever wondered why some berry trifles turn into a soggy, bleeding mess by the time they hit the table? I used to just dump berries in and hope for the best, only to find my beautiful white layers turned a muddy purple. The trick isn't in the ingredients, but in how you treat the fruit and the fat.
Think of this dish as a playful canvas. We aren't just layering food; we're building a visual experience. The contrast between the stark white of the angel food cake and the deep indigo of the blueberries is what makes it pop.
You can expect a treat that feels light as air but has enough structure to hold its shape. This Red White and Blue Dessert focuses on clean lines and bright, fresh flavors that don't overwhelm the palate.
Red White and Blue Dessert Guide
Right then, let's talk about why this actually works. Most people just whip cream, but that collapses. We're using a mixture of cream cheese and butter to create a stable base that acts like a scaffold for the rest of the dessert.
Sugar Draw: Granulated sugar pulls water out of the berries. This creates a syrup we drain away, so the fruit doesn't leak into the cream.
Fat Stability: The cream cheese adds structure. It prevents the whipped cream from weeping or flattening under the weight of the fruit.
Citrus Bridge: Orange juice cuts through the richness of the butter and cream. It wakes up the angel food cake, which can be a bit one dimensional on its own.
Air Integration: Folding the whipped cream instead of beating it keeps the mousse fluffy. If you over mix, you lose those tiny air bubbles that give it that cloud like feel.
| Feature | Fast Version | Classic Version |
|---|---|---|
| Cream Base | store-bought whipped topping | Hand beaten cream cheese mousse |
| Cake | Pre cubed cake bits | Freshly cubed angel food cake |
| Berry Prep | Freshly washed | Macerated and drained |
| Texture | Uniform and soft | Varied, airy, and structured |
Component Analysis
I like to think about the ingredients in terms of their "job" in the bowl. Every part has a purpose, from the acid in the juice to the fat in the butter.
| Ingredient | Science Role | Pro Secret |
|---|---|---|
| Angel Food Cake | Aerated Base | Cube into exact 1 inch pieces for uniform layers |
| Cream Cheese | Structural Anchor | Must be truly softened or you'll get lumps |
| Heavy Cream | Volume/Lightness | Keep it ice cold until the second you whip it |
| Fresh Berries | Color/Acidity | Dry them completely after rinsing to avoid streaks |
Must Have Tools
You don't need a professional kitchen, but a few specific tools make this a lot easier. A glass trifle bowl is the obvious choice since the whole point is seeing those layers. If you don't have one, wide mouthed mason jars work brilliantly for individual portions.
I highly recommend a handheld mixer or a stand mixer such as KitchenAid for the mousse. Trying to beat cream cheese and butter by hand is a workout nobody wants during a holiday party. You'll also need a rubber spatula for folding.
A whisk is great for the berries, but the spatula is what saves the air bubbles in your cream.
Finally,, grab a fine mesh colander. When we treat the berries with sugar, they release a lot of liquid. If you don't drain them properly, that juice will seep down and turn your white mousse a pale pink, ruining the clean look.
Ingredients & Substitutes
Here is everything you need. I've used metric measurements for precision, but the imperial ones are there too.
- 450g (1 lb) store-bought angel food cake, cubed into 1 inch pieces
- 60ml (1/4 cup) orange juice Why this? Adds a bright, citrusy note that balances the sugar
- 225g (8 oz) full fat cream cheese, softened
- 115g (1/2 cup) unsalted butter, softened
- 120g (1 cup) powdered sugar, sifted
- 5ml (1 tsp) pure vanilla extract
- 480ml (2 cups) heavy whipping cream, chilled
- 300g (2 cups) fresh strawberries, hulled and sliced
- 300g (2 cups) fresh blueberries, rinsed and dried
- 30g (2 tbsp) granulated sugar
| Original Ingredient | Substitute | Why It Works |
|---|---|---|
| Angel Food Cake | Pound Cake | Much denser and richer. Note: Use less orange juice as it's heavier |
| Orange Juice | Lemon Juice | More tart, less sweet. Note: Great if your berries are very ripe |
| Heavy Cream | Coconut Cream | Similar fat content. Note: Adds a coconut flavor and is slightly denser |
| Powdered Sugar | Icing Sugar | Identical function. Note: Ensure it's sifted to avoid mousse lumps |
The Assembly Process
Let's get into it. This is where the magic happens. Treat this like an art project, take your time with the layers.
Phase 1: Prepping the Fruit
- Toss your sliced strawberries and blueberries with the granulated sugar in two separate bowls.
- Let them sit for 15 minutes until they look glossy and have released a pool of syrup.
- Drain the berries through a colander. Note: Don't rinse the sugar off, just let the excess liquid drip away.
Phase 2: Creating the Velvet Mousse
- Beat the softened cream cheese and butter together until the mixture is pale and completely smooth.
- Gradually beat in the sifted powdered sugar and vanilla extract.
- In a chilled bowl, whip the heavy cream until stiff peaks form. This means when you lift the beater, the cream stands straight up without drooping.
- Use a spatula to gently fold the whipped cream into the cream cheese mixture. Note: Move in a "figure eight" motion to keep the air inside.
Phase 3: The Precision Assembly
- Place a layer of cubed angel food cake at the bottom of your bowl and lightly drizzle with orange juice.
- Spread a thick layer of the velvet cream mousse over the cake. Smooth it all the way to the edges to create a moisture barrier.
- Add a dense layer of blueberries over the cream.
- Chill the finished Red White and Blue Dessert for 2 hours until the mousse feels firm to the touch.
Fixing Common Messes
Even for experienced cooks, things can go sideways. Usually, it comes down to temperature or over mixing. If you're worried about the stability of your cream, you can check out Serious Eats' guide on whipped cream for more on stabilization.
The Cream is Too Runny
This usually happens if the butter was too melted or the heavy cream wasn't cold enough. If it looks like soup, you can't really "un mix" it, but you can chill the whole bowl for an hour and try to gently fold in a bit more stiffly whipped cream.
The Berries are Sinking
If your berries are diving straight to the bottom, it's because your mousse isn't thick enough or you didn't create that "barrier" layer. Make sure the cream layer is smoothed flat and firm before adding the fruit.
The Cake feels Dry
If the cake feels like a sponge that's been in the sun, you didn't use enough orange juice. Next time, be a bit more generous with the drizzle, but remember not to soak it, or you'll lose the structure.
| Problem | Root Cause | Solution |
|---|---|---|
| Mousse has lumps | Cream cheese wasn't soft | Beat the cheese/butter longer before adding sugar |
| Bleeding colors | Berries weren't drained | Macerate with sugar and drain for 15 mins |
| Cake is mushy | Too much OJ drizzle | Use a spoon to drizzle sparingly |
Common Mistakes Checklist
- ✓ Did you sift the powdered sugar? (Lumps are a nightmare in mousse)
- ✓ Is the heavy cream actually chilled? (Warm cream won't peak)
- ✓ Did you fold, not stir, the cream? (Stirring kills the fluff)
- ✓ Did you wait the full 2 hours to chill? (Cutting too early causes collapses)
Customizing Your Canvas
Once you've nailed the basic Red White and Blue Dessert, you can start playing with the flavors. If you want something more sophisticated, try adding a thin layer of lemon curd between the cake and the mousse. It adds a sharp zing that makes the blueberries taste even fresher.
For those who want a different base, you could try using a Sheet Cake for 20 recipe instead of angel food cake. It'll be heavier and sweeter, so I'd suggest cutting back on the powdered sugar in the mousse to keep it balanced.
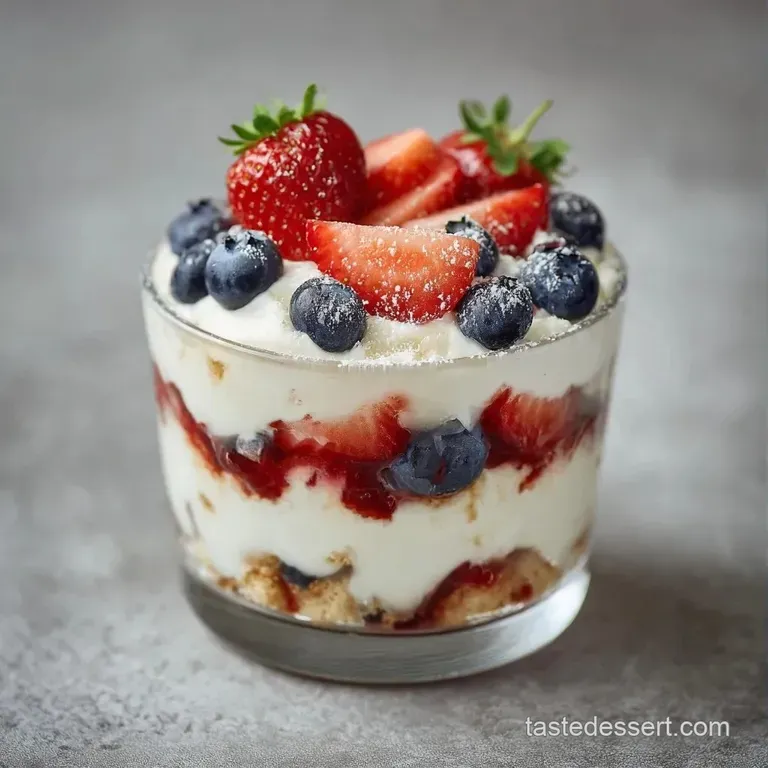
If you're serving this for a crowd and don't have a giant bowl, try "mini desserts." Use clear plastic shooters and layer the ingredients. It looks whimsical and makes it much easier for people to grab a portion without you having to scoop and ruin the layers.
Decision Shortcut:
- If you want more tang → Use lemon juice instead of orange.
- If you want a richer taste → Swap angel food for pound cake.
- If you want a lighter feel → Double the whipped cream and halve the butter.
Scaling Your Treat
When you're making this for a massive party, you can't just blindly double everything.
Scaling Down (Half Batch): Use a smaller 4 cup bowl. Reduce the chilling time to about 90 minutes since there's less mass to cool. If the recipe calls for an egg (not in this one, but for others), beat one egg and use half.
Scaling Up (2x or 4x): Work in batches for the mousse. If you try to whip 4 cups of cream in a small bowl, you'll end up with a mess on your counter. Liquids should be reduced by about 10% when scaling up, so if you're quadrupling, don't use 4x the orange juice, or the cake will turn into porridge.
For a truly massive event, you might consider a classic white flag cake alongside this trifle to provide different textures for your guests.
Plating Levels
Since this is all about the visual, how you present it changes the whole vibe.
Simple: Serve it directly from the glass trifle bowl. Use a large serving spoon and just scoop deeply to get all three layers in one go. It's rustic and communal.
Polished: Use individual glass jars. Use a piping bag to put the mousse in, this gives you perfectly clean edges with no smears on the glass. Top with one single, perfect strawberry slice and three blueberries.
Restaurant: Deconstruct it. Place a neat cube of orange drizzled cake on a white plate. Pipe three dots of mousse of varying sizes next to it. Arrange the berries around the mousse and garnish with a tiny leaf of fresh mint for a pop of green.
| Level | Vessel | Technique | Vibe |
|---|---|---|---|
| Simple | Trifle Bowl | Big Scoop | Family Style |
| Polished | Mason Jar | Piping Bag | Trendy Brunch |
| Restaurant | White Plate | Plating Dots | Fine Dining |
Truths About Trifles
There are a few things people always say about these desserts that just aren't true. Let's clear the air.
"You have to use homemade cake for it to be good." Honestly, store-bought angel food cake is often better for this. It's more consistent in texture and has the right amount of "spring" to hold up the mousse without compressing.
"Adding gelatin is the only way to make it stable." Nope. The combination of cream cheese and butter provides plenty of stability. Gelatin can sometimes give the mousse a "rubbery" texture that ruins the airy feel.
Keeping It Fresh
This dessert is best eaten within 2-3 days. Keep it in the fridge, covered tightly with plastic wrap to prevent the mousse from absorbing other fridge smells (nobody wants a strawberry onion dessert).
Freezing: You can freeze this, but the texture of the mousse changes slightly. It becomes more like a frozen cheesecake. If you do freeze it, do it in individual portions. Thaw in the fridge for 4 hours before serving.
Zero Waste Tips: Don't toss the berry syrup left in the colander! Mix it into some Greek yogurt or drizzle it over pancakes the next morning. If you have leftover angel food cake, you can toast the cubes in a pan with a bit of butter for a quick breakfast treat.
Taste Pairing Tips
To really make the Red White and Blue Dessert shine, you need the right accompaniments. Since it's quite sweet and creamy, you want things that offer contrast.
A crisp prosecco or a cold sparkling cider works wonders here. The bubbles cut through the fat of the cream cheese and refresh the palate between bites. If you're serving it as part of a larger spread, pair it with some salty appetizers, like a sharp cheddar platter or smoked almonds, to balance the sugar.
For a non alcoholic option, a chilled hibiscus tea is a great choice. The deep red color matches the theme, and the tartness of the hibiscus complements the blueberries perfectly. According to USDA FoodData, blueberries are rich in antioxidants, and pairing them with a tart tea keeps the overall flavor profile light and refreshing.
Recipe FAQs
How to prepare strawberries so they don't bleed?
Toss sliced strawberries with granulated sugar and drain the excess liquid. Let them sit for 15 minutes first to draw out moisture, which prevents the red juices from leaking into the white cream.
Why use cream cheese and butter instead of just whipped cream?
They provide essential structural stability. The fats create a stable scaffold that prevents the whipped cream from weeping or collapsing under the weight of the berries.
How to assemble the layers for a professional look?
Layer cubed angel food cake, drizzle with orange juice, then spread the mousse to the edges. Smoothing the mousse against the glass creates a moisture barrier that keeps the colors sharp and distinct.
Can this dessert be made a day in advance?
Yes, it can be assembled up to 24 hours before serving. Just keep it refrigerated to ensure the mousse maintains its structural set.
Is it true I must bake the angel food cake from scratch for the best results?
No, this is a common misconception. store-bought angel food cake is ideal for this recipe as it provides the consistent airy texture needed for layering.
How to ensure the mousse stays airy and doesn't deflate?
Gently fold the whipped cream into the cream cheese mixture using a spatula. Avoid vigorous stirring to preserve the air bubbles for a light, uniform texture.
What makes this a 4th of July trifle?
The patriotic layering of red strawberries, white cream mousse, and blue blueberries. It creates a visual tribute to the American flag using fresh summer ingredients. For another party favorite, try our pecan crunch topping on a side of vanilla ice cream.
Red White and Blue Dessert in 20 Minutes