How to Make Rose Gold Strawberries
- Time: Active 15 minutes, Passive 10 minutes, Total 25 minutes
- Flavor/Texture Hook: Shatter crisp metallic shell with a velvety chocolate finish
- Perfect for: Wedding showers, anniversary celebrations, or a luxurious weekend treat
- The Science of Why it Works
- Success Metrics for Best Results
- Selecting Ingredients for Shimmering Finish
- Essential Tools for Dipping Success
- Transforming Simple Fruit into Edible Gems
- Fixing Common Dipping and Painting Errors
- Modifying Recipes for Specific Diets
- Strategies for Maintaining a Crisp Shell
- Creative Styling for Dessert Displays
- Making Strategic Decisions for Treats
- Debunking Dipping Myths
- Recipe FAQs
- 📝 Recipe Card
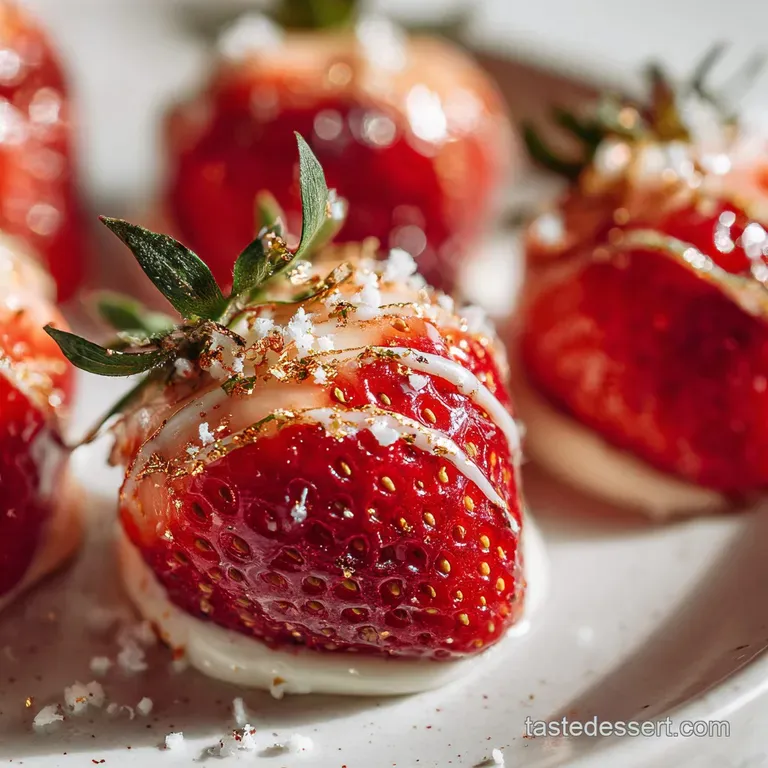
Imagine the soft scent of vanilla hitting the air as you melt down a bowl of creamy white chocolate. There is something truly special about the moment you lift a bright red berry from a silky pool of coating, watching the excess drip off in a smooth, satisfying ribbon.
But we aren't stopping at just white chocolate; we are turning these into a metallic masterpiece.
I remember the first time I tried to make these for a friend's engagement party. I made the classic mistake of using wet berries, and the chocolate slid right off like a sad raincoat. It was a disaster.
Since then, I have learned that the secret isn't just in the chocolate, it is in the preparation and the specific way you handle the rose gold finish.
We're going to dive into the art of the "wet paint" method versus the "dry brush" technique. You'll see how a tiny bit of clear extract can turn a pile of dust into a shimmering glaze that dries with a professional, smudge proof shine.
Trust me, once you see that first berry go from matte white to glowing rose gold, you’ll be hooked on the process.
The Science of Why it Works
Suspension Stability: The alcohol in the vanilla extract acts as a temporary carrier for the mica based luster dust, allowing it to spread evenly before the liquid evaporates and leaves the pigment bonded to the fat heavy chocolate surface.
Lipid Bonding: Melting wafers contain specific vegetable fats that create a stable, non tempered crystalline structure, providing a smooth canvas that won't bloom or streak when the metallic paint is applied.
Component Deep Dive
| Ingredient | Science Role | Pro Secret |
|---|---|---|
| White Melting Wafers | Provides a high fat, smooth surface for pigment adhesion | Melt in 30 second bursts to avoid burning the milk solids |
| Rose Gold Luster Dust | Reflects light through microscopic mica particles | Use "super fine" grade to avoid a gritty texture on the tongue |
| Clear Vanilla Extract | Serves as a fast evaporating solvent for the dust | Ensure it is at least 35% alcohol to prevent chocolate from seizing |
Every single element in this recipe serves a purpose in building that final look. The strawberries provide the structural integrity and the bright acidity that cuts through the richness of the chocolate.
The contrast between the bright, tart fruit and the rich, sweet coating is what makes this so addictive. While we are talking about that beautiful strawberry flavor, you might find that the same profile works beautifully in my Seriously Fruity Homemade recipe, which uses similar fruit preparation techniques to maximize natural sweetness.
Success Metrics for Best Results
| Feature | Stovetop (Double Boiler) | Microwave Method |
|---|---|---|
| Control | High; constant gentle heat prevents seizing | Medium; requires frequent stirring and monitoring |
| Speed | Slower; takes time for water to simmer | Rapid; usually ready in under 2 minutes |
| Risk | Steam can introduce moisture (the enemy!) | Hot spots can scorch the bottom easily |
When choosing your method, consider your comfort level. The microwave is great for a quick batch, but the double boiler gives you that consistent, velvety texture that makes dipping much easier for beginners.
Selecting Ingredients for Shimmering Finish
- 1 lb Fresh Strawberries: Choose firm, medium sized berries with bright green hulls. Why this? Overripe berries leak juice, which destroys the chocolate shell's integrity.
- 10 oz White Chocolate Melting Wafers: Use high-quality wafers like Ghirardelli or Wilton. Why this? Unlike chips, wafers contain enough oil to flow smoothly without thinning.
- 1 tsp Edible Rose Gold Luster Dust: Ensure the label specifically states "Edible" and not just "Non toxic." Why this? Edible versions use food grade mica and pigments safe for consumption.
- 0.5 tsp Clear Vanilla Extract or Vodka: A clear, high proof liquid is essential. Why this? Brown extract will muddy the rose gold color; alcohol evaporates quickly to prevent sogginess.
Substitution Table
| Original Ingredient | Substitute | Why It Works |
|---|---|---|
| White Melting Wafers | Almond Bark | Similar fat structure that doesn't require tempering. Note: Slightly less creamy flavor |
| Clear Vanilla Extract | Lemon Extract | High alcohol content works as a solvent. Note: Adds a subtle citrus note to the shell |
| Rose Gold Luster Dust | Gold Luster Dust | Same mineral properties, just a different color profile for a classic look |
Using the right liquid to mix your dust is a critical step. If you use water, the chocolate will seize instantly into a grainy, clumpy mess. The alcohol in the extract or vodka is the "secret sauce" because it disappears into the air almost the moment it touches the berry, leaving only the shimmer behind. This is a similar concept to the flavor concentration used in my Sunshine in a recipe, where the right balance of liquid and solids creates a smooth, professional finish.
Essential Tools for Dipping Success
You don't need a professional kitchen, but a few specific tools make the difference between a messy kitchen and a gourmet result. First, a narrow, deep microwave safe bowl is better than a wide, shallow one.
This allows you to submerge the entire strawberry in one go, ensuring an even coat without having to roll it around and create lumps.
A piece of parchment paper or a silicone baking mat is your best friend here. If you place dipped berries on a regular plate, they will stick and the bottom of your beautiful chocolate shell will stay behind when you try to lift them. I also highly recommend a small, soft bristled food safe paintbrush.
A cheap synthetic brush from the craft store works perfectly as long as it's never been used for actual paint!
Chef's Tip: Freeze your parchment paper for 5 minutes before placing the dipped berries on it. The cold surface helps the chocolate set instantly at the base, preventing that "puddle" or "foot" of chocolate from spreading out too far.
Transforming Simple Fruit into Edible Gems
- Wash and dry. Rinse your 1 lb Fresh Strawberries under cold water, then pat them with paper towels until they are bone dry. Note: Any lingering water will cause the chocolate to seize or slide off.
- Prep the station. Line a flat tray with parchment paper and clear a space in your fridge for the tray to sit level.
- Melt the base. Place 10 oz White Chocolate Melting Wafers in a deep bowl and microwave in 30 second intervals. Note: Stir vigorously between each burst until the texture is silky and fluid.
- Dip the fruit. Hold a strawberry by the green leaves and plunge it into the white chocolate, swirling gently to cover the sides.
- Remove the excess. Lift the berry and gently shake it over the bowl, then tap your wrist to help the extra chocolate drip off.
- Set the shell. Place the berry on the parchment and repeat with the rest; let them sit for 10 minutes until the surface is matte and firm.
- Mix the paint. In a tiny bowl, combine 1 tsp Edible Rose Gold Luster Dust with 0.5 tsp Clear Vanilla Extract until it looks like liquid metal.
- Apply the luster. Dip your brush into the rose gold mixture and use long, sweeping strokes to coat the white chocolate.
- Fine tune the shine. If the color is too sheer, let the first layer dry for 2 minutes before applying a second coat.
- Final rest. Let the painted berries sit at room temperature for 5 minutes until the alcohol evaporates and the finish is touch dry.
Fixing Common Dipping and Painting Errors
One of the most frustrating things that can happen is "sweating." This usually occurs when you move the berries from a very cold fridge to a warm kitchen. Tiny beads of moisture form on the surface, which can dissolve your beautiful rose gold paint and turn it into a streaky mess.
Chocolate Clumping Solutions
If your chocolate starts to feel thick or grainy while you are dipping, it has likely started to cool down too much. Don't just keep dipping! Pop it back in the microwave for exactly 10 seconds and stir. If it's still thick, you can add a half teaspoon of coconut oil or vegetable shortening to thin it out.
This keeps the shell thin and snappy rather than thick and chewy.
Troubleshooting Guide
| Problem | Root Cause | Solution |
|---|---|---|
| Chocolate is sliding off | Berries were damp or too cold | Dry fruit thoroughly and let them reach room temperature before dipping |
| Rose gold paint is streaky | Too much extract in the mix | Add a pinch more luster dust to thicken the "paint" to a heavy cream consistency |
| Shell is cracking | Chocolate was applied too thickly | Tap your wrist more firmly during the dipping phase to shed excess chocolate |
The thickness of your "paint" is everything. If it's too thin, it will run into the crevices of the strawberry and look uneven. If it's too thick, it will look clumpy. Aim for a consistency that looks like melted metallic wax. If you find yourself with leftover strawberries and want a different way to use them up, try the reduction technique found in my Simply Spectacular Strawberry recipe for a completely different flavor profile.
Modifying Recipes for Specific Diets
While we are focusing on the joy of sweets, I know many people have specific needs. If you want a dairy-free version, you can find vegan white chocolate wafers (brands like Enjoy Life or King David). These tend to melt a bit differently, so I usually add a teaspoon of coconut oil to help the flow.
For a lower sugar approach, there are keto friendly white chocolate chips available. Just be aware that these often contain sugar alcohols which can change the "snap" of the chocolate shell.
The luster dust itself is usually sugar-free and calorie neutral, as it is mineral based, so you don't need to worry about the gold part affecting your macros.
Strategies for Maintaining a Crisp Shell
Storage is the biggest challenge with chocolate covered fruit. Strawberries are mostly water, and as soon as they are picked and dipped, that water wants to come out.
- Fridge vs. Counter: These are best kept in a cool, dry place on the counter if you're eating them within 4 hours. If it's longer than that, they must go in the fridge.
- The Paper Towel Trick: Place a paper towel at the bottom of an airtight container, lay the berries in a single layer, and do not let them touch each other. The towel absorbs any emerging moisture.
- Freezing Limitations: Honestly, don't even bother freezing these. When a strawberry freezes and then thaws, the cell walls collapse, leaving you with a mushy berry inside a cracked chocolate shell. It’s not a good experience!
For zero waste, if you have berries that are too bruised to dip, hull them and toss them into a blender for a smoothie, or simmer them down with a bit of sugar to make a quick jam. Don't throw away the leftover rose gold paint either! You can drizzle it over popcorn or use it to paint the edges of sugar cookies.
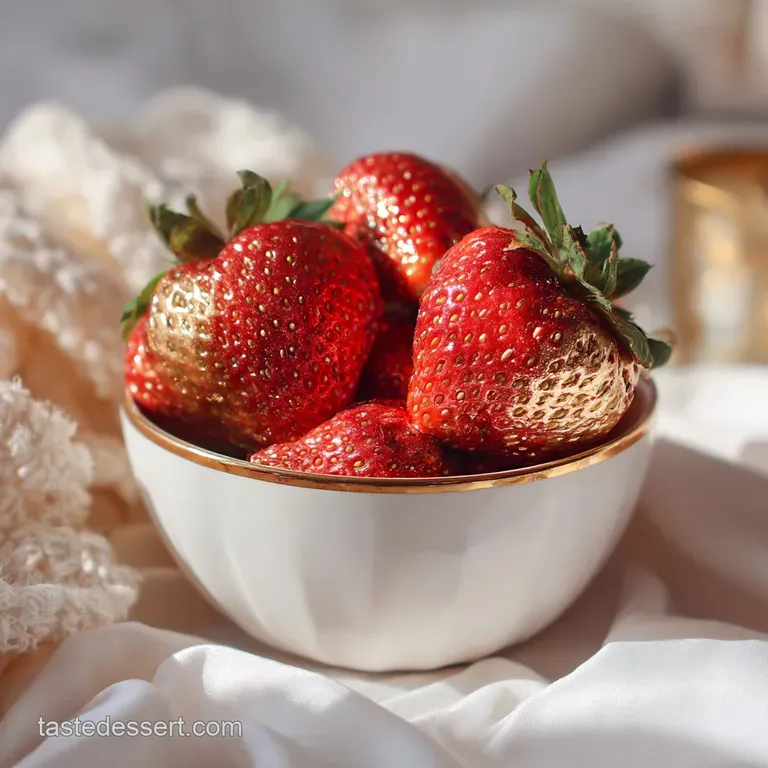
Creative Styling for Dessert Displays
Rose gold strawberries look most elegant when they are clustered together to catch the light. I love placing them on a dark marble slab or a navy blue plate; the dark background really makes the metallic pink "pop."
Party Table Styling Ideas
For a wedding shower, try placing each berry in a rose gold foil cupcake liner. It makes them easy for guests to grab without getting shimmer on their fingers. You can also alternate the rose gold berries with plain white dipped berries that have been drizzled with dark chocolate for a high contrast, modern look.
Ideal Serving Pairings
These berries are quite rich, so they pair beautifully with something crisp and light. Think about serving them alongside a glass of dry sparkling wine or a platter of sharp, aged white cheddar.
The acidity in the wine cuts right through the white chocolate, while the saltiness of the cheese plays off the sweetness of the fruit.
Making Strategic Decisions for Treats
Choosing Dry Brush or Wet Mist
If you want a subtle, "antique" look, use a dry brush to buff the dust onto the set chocolate. It gives a soft, pearlescent glow. For a "liquid metal" look that is bold and opaque, the wet paint method we described in the instructions is the way to go.
Room temperature fruit necessity
I cannot stress this enough: your berries should not be cold when they hit the chocolate. If they are, the chocolate sets too fast, creating a thick, uneven shell that is likely to crack as the berry expands slightly when it warms up. Take them out of the fridge at least 30 minutes before you start.
high-quality wafers versus chips
Standard chocolate chips are designed to hold their shape in the oven, which means they contain stabilizers that make them very thick when melted. For the smoothest, most "shatter like" shell, always opt for melting wafers.
They are formulated for this exact purpose and will give you that professional "snap" when you bite into them.
- Top Notes
- Creamy vanilla, sweet milk.
- Heart Notes
- Bright strawberry acid, floral berry aromatics.
- Base Notes
- Deep earthiness from the mica dust, rich cocoa butter.
- Texture Contrast
- The "crunch" of the shell followed by the "soft" give of the fruit.
Debunking Dipping Myths
One common myth is that adding water to thick chocolate will thin it out. This is the fastest way to ruin your batch. Chocolate is an emulsion of fat and solids; water causes the solids to clump together and "seize," turning your silky chocolate into a gritty paste.
Always use oil based products or high proof alcohol to adjust consistency.
Another misconception is that you need a specialized "gold leaf" to get a metallic finish. While gold leaf is beautiful, it is incredibly difficult to work with and often tears. Luster dust mixed with extract gives you a much more uniform, durable, and cost effective rose gold finish that looks just as gourmet.
Finally, some people think you have to temper white chocolate to get a shine. While that's true for pure cocoa butter bars, melting wafers are pre processed to be "stable," meaning you get that beautiful glossy finish just by melting them correctly. It saves you a ton of time and stress!

Recipe FAQs
What food colors make rose gold?
Edible rose gold luster dust is the key. This is a food grade powder made from mica pigments, not traditional food coloring. You mix it with a clear extract to create a paintable consistency.
How do they make rose gold strawberries?
Dip strawberries in melted white chocolate, then paint them with rose gold luster dust mixed with clear extract. The chocolate creates a smooth, solid base, and the luster dust provides the metallic shimmer.
Why is my chocolate not sticking to my strawberries?
Your strawberries are likely too wet or too cold. Ensure they are thoroughly dried with paper towels, and let them come to room temperature before dipping. Cold fruit causes the chocolate to set too fast, leading to poor adhesion.
Which colors make rose gold?
Rose gold is achieved with specific edible luster dusts that blend pink and gold pigments. You can't mix traditional food colors to get this metallic effect; it requires specialized edible shimmer powders.
Can I use regular food coloring for rose gold?
No, regular food coloring won't create a metallic rose gold finish. You need edible luster dusts, which are made from mica pigments, and these need to be mixed with a high proof clear extract like vodka or vanilla extract to create a paintable consistency.
Do I need to temper white chocolate for rose gold strawberries?
No, for this recipe, melting wafers are best. Unlike pure chocolate bars, white chocolate melting wafers are formulated with stable fats that don't require tempering to achieve a glossy finish, simplifying the process.
What's the best way to store rose gold strawberries?
Store them in a single layer at room temperature for up to 4 hours, or in an airtight container in the fridge with a paper towel for longer. Avoid freezing, as it ruins the strawberry's texture and cracks the chocolate shell.
Rose Gold Strawberries

Ingredients:
Instructions:
Nutrition Facts:
| Calories | 140 kcal |
|---|---|
| Protein | 1.7 g |
| Fat | 7.7 g |
| Carbs | 16.6 g |
| Fiber | 0.8 g |
| Sugar | 15.5 g |
| Sodium | 19 mg |
