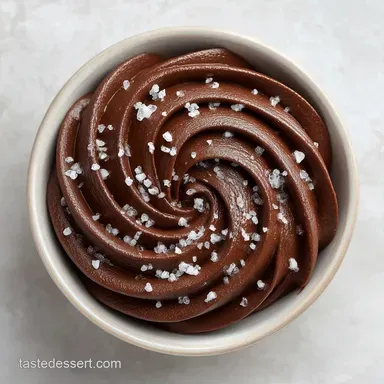
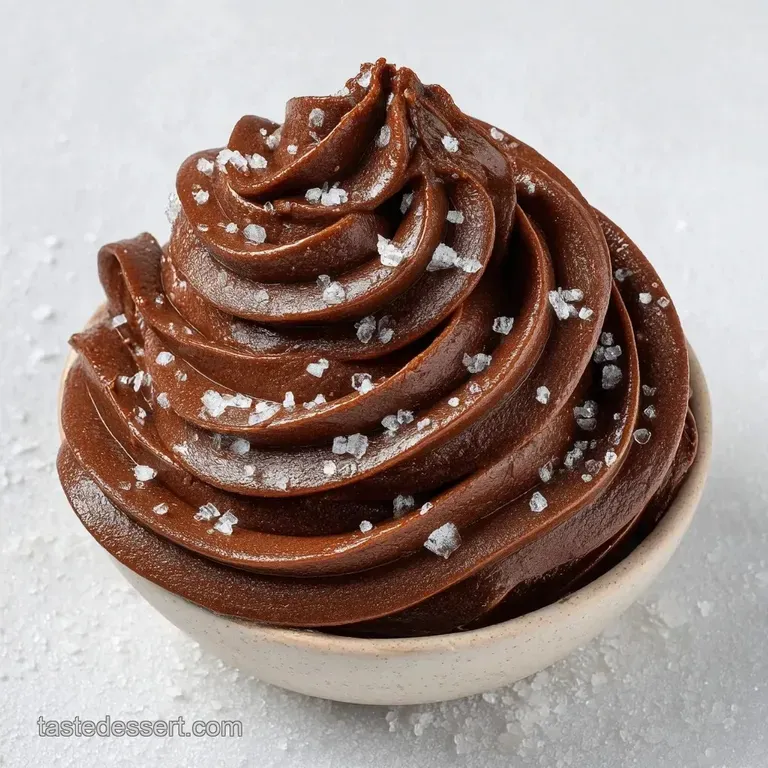
Velvety 3-Ingredient Chocolate Mousse
- Time: 10 min active + 1 hour 5 min chilling
- Flavor/Texture Hook: Silky, decadent, and airy
- Perfect for: Quick dinner party desserts or late night cravings
Airy Homemade Chocolate Mousse
That deep, heady scent of melting cocoa hitting a warm bowl is, for me, the smell of a weekend treat. I remember trying a traditional French version years ago, spending an hour whisking egg whites until my arm shook, only to have the whole thing collapse into a puddle.
It was a total heartbreak of a dessert, and it left me convinced that "airy" was just a word used in fancy cookbooks to trick home cooks.
But then I discovered the magic of a heavy cream base. By ditching the eggs and focusing on the fat content of the cream, I found a way to get that same decadent lift without the stress. This version of Chocolate Mousse is what I make when I want something that feels fancy but takes almost no effort.
It's the kind of dessert that makes people think you spent all afternoon in the kitchen when you actually just used a microwave and a whisk.
You can expect a texture that is velvety and light, almost like a cloud that tastes like a truffle. It's not overly sweet, thanks to the semi sweet chips, and it has just enough salt to make the chocolate pop.
Whether you're hosting a crowd or just treating yourself, this is the one that actually works every single time.
What Makes It Work
Instead of using egg foams, we're relying on the natural properties of dairy and cocoa butter. Here is the breakdown:
- Air Traps: Whipping the cream creates tiny bubbles that hold the structure of the dessert.
- Fat Solidification: The cocoa butter in the chocolate hardens as it chills, locking those air bubbles in place.
- Emulsion Balance: Adding a small amount of cream to the chocolate first prevents the heavier mixture from deflating the rest of the whipped cream.
- Salt Contrast: A tiny pinch of salt suppresses bitterness and enhances the natural aromatic notes of the cocoa.
| Method | Prep Time | Texture | Best For |
|---|---|---|---|
| Fresh Whip | 15 mins | Silky, Light | Dinner Parties |
| Shortcut Mix | 5 mins | Dense, Creamy | Quick Cravings |
| Egg Based | 40 mins | Frothy, Airy | Traditionalists |
The Ingredient Breakdown
The magic here is in the simplicity. Because there are so few components, the quality of your chocolate really matters.
| Ingredient | Science Role | Pro Secret |
|---|---|---|
| Semi Sweet Chips | Structural Base | Use a brand with cocoa butter for a better set |
| Heavy Cream | Aeration Agent | Must be chilled to hold air bubbles |
| Sea Salt | Flavor Enhancer | Use fine grain so it dissolves instantly |
The Gear You Need
You don't need a professional kitchen, but a few specific tools make the process way smoother. Trust me, using a fork to whip cream is a path to madness.
- Electric Hand Mixer: Essential for getting those stiff peaks quickly.
- Microwave safe Glass Bowl: Great for melting chocolate without scorching it.
- Rubber Spatula: The only tool you should use for folding to keep the air in.
- Cold Metal Bowl: If you have one, chill it in the freezer for 10 mins first.
Bringing It Together

Right then, let's get into the actual process. The key here is temperature. If the chocolate is too hot, it'll melt your cream. If it's too cold, it'll clump.
Phase 1: Melting the Chocolate
Gently melt the chocolate and salt using 30 second intervals in the microwave, stirring in between, or using a double boiler. Stir until the mixture is smooth and glossy, until it smells rich and warm. Set it aside to cool slightly until it's just warm to the touch.
Phase 2: Whipping the Cream
Pour the chilled heavy cream into a cold bowl and beat on medium high speed. Continue until stiff peaks form, meaning when you lift the beaters, the cream stands straight up without drooping. According to the USDA FoodData, the high fat content in heavy cream is exactly what allows it to hold these air bubbles.
Phase 3: The Fold and Set
Gently dollop one third of the whipped cream into the melted chocolate and whisk briskly. This lightens the base so it doesn't crush the rest of the cream. Using a rubber spatula, gently fold the remaining whipped cream into the chocolate using a figure eight motion until no white streaks remain.
Spoon the Chocolate Mousse into ramekins and refrigerate for at least 1 hour. This allows the cocoa butter to set, creating that velvety finish. For the best folding technique, I always recommend following the guides at Serious Eats, as it's the secret to a non collapsed dessert.
Chef's Note: If you want a truly decadent touch, freeze your serving glasses for 15 minutes before filling them. It keeps the mousse chilled longer while you're chatting with guests.
Fixing Common Mousse Issues
The most common struggle with Chocolate Mousse is texture. If it's too runny or too grainy, it's usually a temperature or mixing issue.
Troubleshooting Common Issues
| Issue | Solution |
|---|---|
| Why Your Mousse Is Runny | This usually happens if the chocolate was too hot when the cream was added, or if you didn't let it chill long enough. The fats haven't had time to solidify. |
| Why Your Mousse Is Grainy | If the chocolate was overheated, it can seize or separate. This creates tiny clumps of cocoa solids that feel like grit on the tongue. |
| Why Your Mousse Collapsed | Over mixing is the enemy. If you stir too aggressively instead of folding, you pop all those precious air bubbles you worked so hard to create. |
Common Mistakes Checklist
- ✓ Chilled the cream and bowl before whipping.
- ✓ Melted chocolate in short intervals to avoid burning.
- ✓ Used a rubber spatula, not a whisk, for the final fold.
- ✓ Waited the full hour for the set.
Flavor Twists to Try
While the 3 ingredient chocolate mousse recipe is a classic, you can easily change the vibe. For something more intense, try adding a teaspoon of espresso powder to the melted chocolate. It doesn't make it taste like coffee; it just makes the chocolate taste "darker".
If you want to go the a bit more fancy, you could fold in some crushed raspberries or a swirl of salted caramel. For another decadent treat, try a Chocolate Souffle recipe, which uses similar flavors but a completely different, baked technique.
The Diet Swaps
| Original Ingredient | Substitute | Why It Works |
|---|---|---|
| Semi Sweet Chips | Dark Chocolate (70%) | Higher cocoa content. Note: Result is less sweet and firmer |
| Heavy Cream | Coconut Cream (Chilled) | Similar fat content. Note: Adds a slight tropical flavor |
Keep It Fresh Longer
This dessert stays wonderful in the fridge for up to 3 days. Keep them in airtight containers or cover the ramekins with plastic wrap to prevent them from absorbing "fridge smells" like leftover onions.
As for freezing, you can actually freeze this for up to 2 months. It becomes almost like a frozen truffle. Just thaw it in the fridge for 2 hours before serving to regain that airy texture.
To avoid waste, if you have a bit of chocolate left in the melting bowl, stir in a splash of cream and use it as a dip for strawberries.
Ways to Serve It
Presentation is everything. I love topping this with a single fresh raspberry and a sprig of mint for a pop of color. A dusting of cocoa powder or some shaved chocolate curls adds a professional look with zero effort.
If you're serving this as part of a larger spread, it pairs beautifully with shortbread cookies or fresh sliced pears. If you're in the mood for more no bake treats, my peanut butter cream pie is another velvety classic that doesn't require an oven.
Decision Shortcut If you want it richer → Use 70% dark chocolate. If you want it lighter → Fold in a bit of whipped coconut cream. If you're in a rush → Use smaller ramekins for a faster chill time.
Recipe FAQs
How to make quick and easy chocolate mousse?
Melt chocolate with salt, whip heavy cream to stiff peaks, and fold them together. Spoon the mixture into ramekins and refrigerate for at least one hour to let the cocoa butter set.
What is the secret to a good mousse?
Precise temperature control and gentle handling. Ensure the chocolate is only warm to the touch before adding cream to prevent the air bubbles from collapsing.
How to make chocolate mousse easy with 2 ingredients?
Whip heavy cream to stiff peaks and fold it into melted semi sweet chocolate chips. Adding a pinch of sea salt, as listed in the recipe, further balances the sweetness.
What's the secret to fluffy mousse?
Beat the cream until stiff peaks form and fold using a figure eight motion. If you enjoyed mastering this aeration technique, see how similar principles create a velvety indulgence in another dark chocolate treat.
How to make a dessert with 3 ingredients?
Combine semi sweet chocolate chips, sea salt, and heavy whipping cream. Melt the chocolate, whip the cream, and fold them together for a rich, simple treat.
Why is my chocolate mousse runny?
The chocolate was likely too hot when mixed or it hasn't chilled long enough. The fats require at least one hour in the refrigerator to solidify and hold their shape.
Is it true that chocolate mousse must be made with a double boiler?
No, this is a common misconception. You can melt chocolate in the microwave using 30-second intervals and stirring in between to prevent scorching.
Velvety Chocolate Mousse