The Golden Standard Perfectly Crispy Chicken Katsu Curry
- Unveiling the Comfort of True Japanese Chicken Katsu Curry
- Why This Homemade Katsu Outshines Takeout Classics
- Assembling Your Toolkit: Essential Components for Success
- The Step-by-Step Journey to Ultimate Chicken Katsu
- Bringing the Elements Together: Final Assembly Sequence
- Elevating Your Plate: Tips and Customisations
- Recipe FAQs
- 📝 Recipe Card
Unveiling the Comfort of True Japanese Chicken Katsu Curry
There are certain dishes that transcend mere sustenance and become a warm embrace in food form. For millions worldwide, that culinary hug is Japanese Chicken Katsu Curry .
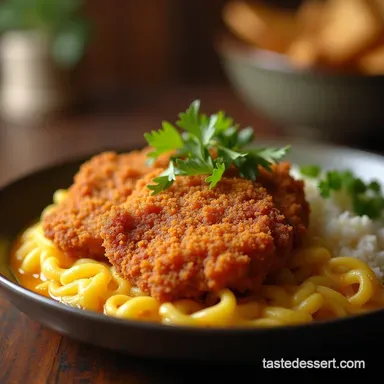
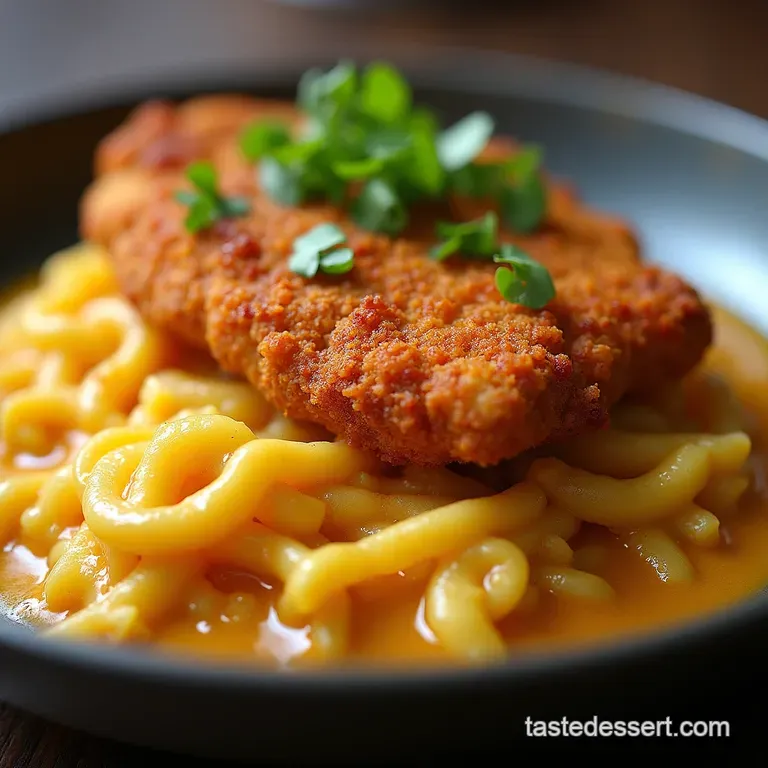
It’s a magnificent confluence of textures and tastes: the shatteringly crisp exterior of a perfectly fried chicken cutlet juxtaposed against a rich, deeply savoury, and subtly sweet Creamy Japanese Chicken Curry sauce, all served over tender, sticky rice.
This is not just food; it’s an event. While ready-made curry roux blocks offer a quick fix, mastering this dish from scratch elevates it to an entirely new plane. Today, we are diving deep into creating the Authentic Japanese Chicken Katsu Curry that stands head and shoulders above the rest.
Why This Homemade Katsu Outshines Takeout Classics
The secret to truly unforgettable Katsu lies in respecting the two main components the Katsu itself and the slow simmered sauce and treating them with distinct but complementary care.
When you cook this dish at home, you control the quality of the chicken, the crispiness of the coating, and the depth of the curry base, something often rushed in commercial kitchens.
The Allure of Crispy Meets Savoury Perfection
What makes the Katsu irresistible? It’s the panko . These Japanese breadcrumbs are flakier and absorb less oil than traditional Western breading, resulting in a lighter, airier crunch.
When this golden fried chicken is sliced and placed beneath the luscious sauce, the goal is for the top layer to remain exquisitely crispy while the lower edges just begin to soak up the gravy a textural masterpiece in every bite.
This delicate balance is key to a successful Katsu Curry Recipe .
Decoding the Deep Umami in Authentic Japanese Curry
The sauce, often mistakenly thought of as merely 'spicy,' is primarily umami driven . Building the Japanese Chicken Katsu Curry Sauce from scratch involves caramelising foundational aromatics like onions until sweet, blooming spices like curry powder in butter and flour to create a dark roux, and incorporating subtle background notes from ingredients like soy sauce and a touch of fruit sweetness (often grated apple).
This slow simmer transforms simple ingredients into a complex, velvety blanket, distinguishing it from simpler, flatter sauces.
Setting the Stage: What Makes This Dish a Culinary Hug
Ultimately, this dish earns its status as one of the Best Japanese Food staples because it hits all the major comfort notes simultaneously. It’s warm, satisfying, texturally engaging, and packs enough flavour complexity to keep you intrigued without overwhelming the palate.
Whether you are looking for a show stopping weekend meal or a richly rewarding weeknight experience, this iteration of Japanese Curry Rice delivers pure, unadulterated comfort.
Assembling Your Toolkit: Essential Components for Success

To achieve the glorious texture described above that perfect fried chicken alongside a rich, spoonable sauce preparation and the right tools are non-negotiable. We are aiming for a Japanese Chicken Katsu Curry Recipe that is memorable for all the right reasons.
Perfecting the Panko Crust: The Chicken Prep List
For four generous servings, you'll need four sizable boneless, skinless chicken breasts, ideally about 6 to 8 ounces each. The absolute star ingredient here is Panko breadcrumbs —you’ll need a full two cups of these airy flakes.
Alongside this, gather your usual dredging trio: all-purpose flour, two large eggs beaten lightly, salt, and freshly ground black pepper to season the meat itself. The quality of your Panko directly dictates the final crispness of your Katsu.
Crafting the Curry Base: Spices and Stock Requirements
The sauce requires a solid flavour foundation. Start with one large yellow onion, diced finely, alongside one large carrot and two medium Russet potatoes, chunked into roughly one-inch pieces. The spice blend needs about 3 tablespoons of a medium hot Japanese curry powder.
To build the rich, thick base (the roux), you will use 3 tablespoons of unsalted butter and 3 tablespoons of all-purpose flour. Finally, you need 4 cups of low-sodium chicken stock or water, plus flavour enhancers like 1 tablespoon of ketchup or tomato paste for tang, 1 tablespoon of soy sauce for deep umami, and a teaspoon of honey or brown sugar to balance the heat.
A classic addition that truly amplifies sweetness is a quarter of a medium apple, grated finely.
Essential Kitchen Gear for Katsu Mastery
Because we are deep frying, a few key items are necessary. You’ll need a heavy bottomed skillet or Dutch oven capable of holding about an inch of oil cast iron is excellent for maintaining stable temperatures.
A crucial piece of equipment, especially for beginners tackling this Easy Chicken Katsu Curry , is an instant read thermometer to monitor the oil temperature (aiming for 350° F or 175° C).
On top of that,, instead of draining Katsu on paper towels (which traps steam and softens the bottom), always drain the fried cutlets on a wire rack set over a baking sheet to allow air circulation.
Related Recipes Worth Trying
- Foolproof Japanese Curry on Rice Rich Homemade Kare Raisu — Ditch the blocks and learn to make a proper Japanese Curry Rice from scratch This recipe nails the rich savoury roux for authentic Asian curry with rice comfort
- The Ultimate Creamy Deli Chicken Salad Recipe Better Than Lunchbox — Tired of boring leftovers This classic Chicken Salad recipe delivers the perfect balance of creamy dressing satisfying crunch and sweet pops Your new goto...
- Elevated Chicken Salad Recipe with Grapes Tarragon — Forget bland deli fare This Classic Chicken Salad Recipe uses poached chicken grapes and tarragon for vibrant superior texture Your new favourite sandwich...
The step-by-step Journey to Ultimate Chicken Katsu
The process involves tackling the sauce first, as it needs time to simmer and meld its flavours, followed by the rapid frying of the Katsu just before serving.
Tenderizing the Chicken: Achieving Ideal Cutlet Thickness
Take each chicken breast and place it between two sheets of plastic wrap. Using a meat mallet or even the bottom of a heavy saucepan, gently but firmly pound the chicken until it reaches an even thickness of approximately half an inch.
This ensures the chicken cooks through evenly at the same rate the Panko crust crisps. Once flattened, season both sides generously with salt and pepper; this internal seasoning is vital since the breading will be relatively unseasoned.
The Three Step Dredging Method for Maximum Crisp Factor
Set up your breading station in three shallow dishes. The first dish contains the flour. The second holds the two lightly beaten eggs. The third and most important dish contains the 2 cups of Panko breadcrumbs. Pick up a seasoned cutlet and dredge it thoroughly in the flour, shaking off any major excess.
Next, dip it completely into the egg wash, allowing any excess to drip back. Finally, press the cutlet firmly into the Panko, ensuring every surface is coated thickly. Set the breaded cutlets aside briefly on a clean plate while you prepare the oil.
Simmering Secrets: Developing the Rich Curry Sauce Flavour
Begin the sauce by sautéing your diced onions, carrots, and potatoes in one tablespoon of neutral oil in a large pot until the onions are soft and starting to caramelise about ten minutes.
Next, create your roux base: push the vegetables to one side of the pot, add the 3 tablespoons of butter, let it melt, then whisk in the 3 tablespoons of flour and 3 tablespoons of curry powder.
Cook this paste for two full minutes, stirring constantly; this toasting step is what develops the deep, nutty notes characteristic of Authentic Japanese Chicken Katsu Curry . Slowly whisk in the 4 cups of stock, scraping up any browned bits from the bottom of the pot.
Add your ketchup, soy sauce, honey, and grated apple. Bring this mixture to a boil, then reduce the heat, cover, and let it simmer gently for 25 to 30 minutes until the potatoes are fork tender.
Frying Techniques: Attaining That Signature Golden Hue
Heat about an inch of neutral oil in your heavy skillet to 350° F ( 175° C). If you don't have a thermometer, test the oil by dropping a single Panko crumb in; it should sizzle vigorously immediately and float.
Carefully slide one or two breaded cutlets into the hot oil, ensuring you do not overcrowd the pan, which causes the oil temperature to plummet. Fry each side for approximately 3 to 4 minutes until they achieve a deep, even golden brown colour and the internal temperature reaches 165° F ( 74° C).
Remove immediately and place them on the waiting wire rack to drain and rest for five minutes before slicing them diagonally into thick, appealing strips.
Bringing the Elements Together: Final Assembly Sequence
With your crispy Katsu resting and your Creamy Japanese Chicken Curry sauce perfectly thickened (use an immersion blender partially to smooth the sauce while retaining some vegetable chunks for texture), it is time for the grand presentation.
Spoon a generous mound of freshly steamed Japanese short grain rice onto a large plate. Arrange the freshly sliced Katsu cutlets artfully over one side of the rice. Finally, ladle the hot, rich curry sauce generously over the chicken and around the rice, ensuring the crisp top layer of the Katsu peeks out enticingly.
Elevating Your Plate: Tips and Customisations
The beauty of making Japanese Chicken Katsu Curry at home lies in the ability to tweak it to your exact preference. These steps will ensure your dish is not just good, but truly your best version.
Advanced Hacks for Healthier or Quicker Preparation
If time is of the essence, use high-quality pre-made Japanese curry roux blocks, adding them during the final 10 minutes of the sauce simmering phase instead of making the roux from scratch.
For a healthier approach, you can use an air fryer to cook the Katsu after breading; spray the cutlets lightly with oil and air fry at 380° F ( 195° C) for 12- 15 minutes, flipping halfway.
While it won't match the depth of flavour from deep frying, it significantly reduces the fat content.
Spice Level Tweaks for the Perfect Japanese Chicken Katsu Curry Blend
The inherent sweetness of the classic sauce can be manipulated easily. To increase the heat in your Japanese Chicken Katsu Curry , mix a half teaspoon of cayenne pepper into the curry powder when blooming the roux.
Alternatively, for a complex heat, stir in a teaspoon of rayu (Japanese chilli oil) just before serving. For a richer flavour profile, consider substituting half the water in the sauce with brewed black tea.
Reheating Strategies to Preserve Katsu Crunch
The primary challenge with leftovers is the soggy Katsu. To counteract this, always store the sliced Katsu separately from the sauce. When reheating, place the Katsu strips on a baking sheet and warm them in a conventional oven or toaster oven at 350° F ( 175° C) for about 8 minutes until the Panko crisps up again.
Reheat the sauce separately on the stovetop, and then assemble just before eating.
Perfect Pairings: Recommended Side Dishes
To complete this wonderful Japanese Curry Rice experience, consider traditional accompaniments. Fukujinzuke , a mixed Japanese pickle made from daikon and lotus root, offers a bright, vinegary crunch that perfectly cleanses the palate after a rich bite of Katsu.
A simple side salad with a light sesame dressing also provides a refreshing contrast to the heavy, savoury curry.
Recipe FAQs
How can I make sure my Chicken Katsu stays super crispy and doesn't get soggy when I pour the Japanese Chicken Katsu Curry sauce over it?
Ah, the classic Katsu conundrum! The trick is threefold: use Panko breadcrumbs, ensure your frying oil is hot (around 350°F/175°C), and drain the cooked cutlets immediately on a wire rack, not paper towels. This allows air to circulate, keeping that golden crust light and breezy before it meets the sauce.
My homemade curry sauce seems a bit thin; what’s the best way to thicken it up without ruining the flavour?
If your sauce is running like a watery puddle, you likely need more roux! You can gently simmer it uncovered for another 10 minutes to reduce slightly, or you can whisk together a quick slurry of 1 tablespoon of flour or cornstarch mixed with 2 tablespoons of cold water.
Whisk this slurry into the simmering sauce until it thickens nicely; just make sure to let it simmer for a few minutes after adding it so you cook out any raw starch taste.
Can I prepare parts of the Japanese Chicken Katsu Curry ahead of time, perhaps for a midweek dinner rush?
Absolutely, this is a fantastic make-ahead meal! The curry sauce keeps brilliantly in the fridge for up to four days, and the flavour often deepens overnight it’s even better the next day!
You can also prep the chicken by breading it entirely and keeping it refrigerated on a tray for up to 12 hours; just fry it straight from the fridge just before serving.
I’m not keen on deep frying; is there a healthier alternative for cooking the Katsu?
If you want to avoid the deep fryer, an air fryer is a smashing substitute for the Katsu. Toss the breaded chicken lightly with a spray of neutral oil and cook at about 380°F (195°C) for 12-15 minutes, flipping halfway through, until golden brown.
While it won't be quite as rich as the traditional fried version, it still delivers excellent crispiness.
What can I use if I don't have the specific Japanese curry powder mentioned in the recipe?
If you can't get hold of Japanese curry powder, you can certainly improvise! Mix standard medium hot curry powder with a small pinch of ground turmeric for colour, and a tiny bit of cinnamon or ground cloves for that characteristic sweet warmth Japanese versions often have.
If you have pre-made roux blocks, just use those instead and skip the flour/spice roux step entirely.
Crispy Katsu Chicken Curry