Microwave Chocolate Chip Cookie: 1-Minute Treat
- Time: 4 min active + 1 min cook = Total 7 min
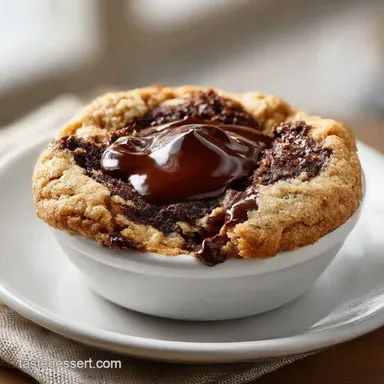
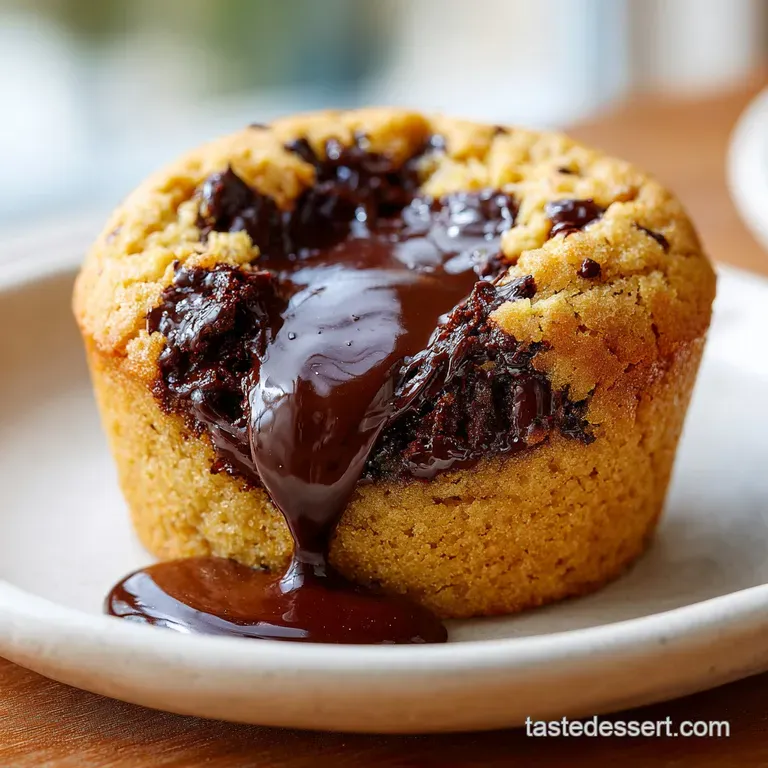
- Flavor/Texture Hook: Molten chocolate centers with a velvety, chewy crumb
- Perfect for: Late night cravings, single serving treats, or when you can't wait for the oven
- Microwave Chocolate Chip Cookie
- The Rubber Cookie Myth
- Quick Recipe Specs
- What You'll Need
- Tools For The Job
- The Step-By-Step Process
- Fixing Common Cookie Fails
- Troubleshooting Common Issues
- Fun Flavor Twists
- Adjusting the Batch Size
- Debunking Kitchen Myths
- Preservation Secrets
- Pairing Ideas
- Recipe FAQs
- 📝 Recipe Card
The scent of melted butter and warm vanilla hitting the air is enough to make anyone stop whatever they're doing. I remember the first time I tried a mug cookie, and it was a total disaster. It came out like a rubber eraser that tasted vaguely of sugar, and I almost gave up on the whole idea.
I thought the microwave just wasn't built for "real" baking.
But then I started playing with the fat to flour ratio. I realized the mistake was treating it like a tiny cake instead of a concentrated cookie. Once I dialed in the sugars and stopped overcooking the center, everything changed.
You're about to make a Microwave Chocolate Chip Cookie that actually feels like a treat, not a science experiment gone wrong. We're talking about that specific, gooey texture where the chocolate is still molten and the dough is soft, not spongy.
Microwave Chocolate Chip Cookie
Right then, let's get into why this version actually works. Most people make the mistake of adding an egg to a single serving cookie. In a microwave, an egg is too much moisture and protein, which is exactly what gives you that "rubbery" texture.
By using a splash of milk instead, we keep the richness but lose the bounce.
The secret is all in the carry over cooking. Because microwaves heat the water molecules in the food, the center keeps cooking long after the timer beeps. If you wait until it looks "done" in the microwave, you've already overcooked it. You want to pull it out when it still looks a bit shiny.
The Rubber Cookie Myth
Forget everything you've heard about microwave desserts being "fake" or tasteless. The biggest myth is that you need an oven to get a chewy result. While you won't get the same charred, caramelized bottom as a sheet pan, you can absolutely achieve a velvety, decadent crumb if you manage the heat.
The real issue is usually over mixing. When you stir the flour too vigorously, you develop gluten. In a standard oven, you have time for that to settle, but in a 60 second blast of heat, that gluten tightens up instantly, turning your cookie into a hockey puck.
Trust me, stir until the white streaks disappear, then stop immediately.
According to guidelines on The Kitchn, precision in measurement is the backbone of any successful bake, and that's even more critical when you're dealing with such small quantities. A single extra teaspoon of flour can shift the texture from chewy to dry.
Quick Recipe Specs
Before we dive in, here is the breakdown of how this treat compares to the traditional oven baked version. It's a trade off between time and that classic crisp edge.
| Feature | Oven Baked | Microwave Shortcut | Impact |
|---|---|---|---|
| Time | 30-60 mins | 7 mins | Massive time saving |
| Texture | Crispy edges, soft middle | Uniformly soft/gooey | Less contrast, more fudgy |
| Effort | High (Cleanup/Prep) | Low (One mug) | Much easier cleanup |
It's a brilliant solution for when you need a sugar fix right now but don't want to scrub three bowls and a baking sheet.
What You'll Need
For this recipe, you don't need a fancy pantry, just a few staples. Make sure your butter is unsalted so you can control the salt levels yourself.
- 1 tbsp unsalted butter, melted Why this? Provides the richness and fat for a velvety crumb
- 1 tbsp granulated white sugar Why this? Helps with the structure and sweetness
- 1 tbsp packed brown sugar Why this? Adds moisture and a deep molasses flavor
- 1 pinch salt Why this? Balances the sugar
- 1 pinch vanilla extract Why this? Essential for that "homemade" aroma
- 1 tbsp milk Why this? Replaces the egg to avoid rubberiness
- 3 tbsp all purpose flour Why this? The base structure of the cookie
- 1/4 tsp baking powder Why this? Gives it a slight lift so it's not a brick
- 1 tbsp semi sweet chocolate chips Why this? For those molten pockets of chocolate
- 1 pinch flaky sea salt Why this? A professional finish to cut the sweetness
Ingredient Swaps
If you're missing something, don't panic. You can usually find a workaround in your kitchen.
| Original Ingredient | Substitute | Why It Works |
|---|---|---|
| Brown Sugar | Coconut Sugar | Similar moisture. Note: Adds a slight caramel/nutty taste |
| Milk | Almond Milk | Same liquid ratio. Note: Works perfectly, slightly less creamy |
| Semi Sweet Chips | Dark Chocolate Chunks | Higher cocoa content. Note: More intense, less sweet result |
One thing to remember: don't bother with low-fat butter or margarine here. This is a small treat, and the butter is what makes it feel luxurious.
Tools For The Job
You don't need a stand mixer or any heavy gear. Just a few basics will do.
- A microwave safe mug or small ramekin (about 8-10 oz)
- A small fork or whisk for stirring
- Measuring spoons
- A small plate (for the cookie to rest on)
The step-by-step Process
Let's crack on. Follow these steps closely, and pay attention to the visual cues rather than just the timer.
- Melt your butter in the microwave safe vessel. Note: Don't let it boil over.
- Stir in the white sugar and brown sugar. Mix until the sugars are mostly dissolved and the mixture looks like a thick syrup.
- Add the vanilla and milk. Stir until the batter is smooth and glossy.
- Stir in the flour, baking powder, and salt. Stir gently until just combined to avoid overworking the dough.
- Fold in the chocolate chips. Make sure they're distributed evenly so every bite has some.
- Press the dough down slightly. Note: This prevents the center from peaking too high.
- Microwave on HIGH for 45 to 60 seconds. Stop when the edges look set and matte, but the center is still shiny.
- Remove from the microwave and let it stand for 60 to 90 seconds. This is critical for the center to set without overcooking.
- Sprinkle with a pinch of flaky sea salt.
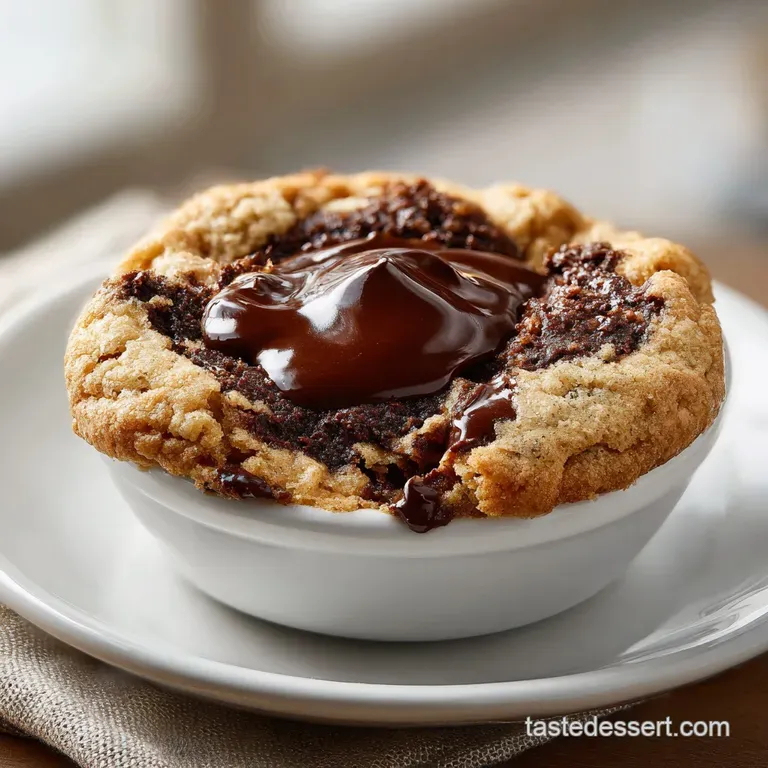
Chef's Note: If you want a more "professional" look, use a small ramekin instead of a mug. The wider surface area allows the heat to distribute more evenly, giving you a flatter, more traditional cookie shape.
Fixing Common Cookie Fails
Even with a simple recipe, things can go sideways. Usually, it comes down to the power of your microwave.
Troubleshooting Common Issues
| Issue | Solution |
|---|---|
| Cookie hard as a rock | This is the most common issue. It happens because you've overcooked the dough, evaporating all the moisture. Remember, it should look underdone when you take it out. |
| Why is the center still raw dough | You likely have a lower wattage microwave. Try adding 10-15 seconds next time, but check it in short bursts. |
| Why did the cookie overflow | Your vessel was too small. Use a mug with at least 2 inches of headspace above the dough. |
Common Mistakes Checklist
- ✓ Did you stop stirring the moment the flour vanished?
- ✓ Did you pull it out while the center was still shiny?
- ✓ Did you let it rest for at least 60 seconds before eating?
- ✓ Did you use a level tablespoon for the flour?
Fun Flavor Twists
Once you've mastered the basic Microwave Chocolate Chip Cookie, you can start experimenting. I love changing the mix ins to keep things interesting.
If you want something more complex, you could try adding a teaspoon of peanut butter to the melted butter stage. This makes it rich and salty. For those who love a double chocolate hit, swap out 1 tablespoon of flour for 1 tablespoon of cocoa powder.
If you're looking for something a bit different but still in the cookie family, you might love my cookie dough cheesecake cookies for when you actually have the time to use the oven.
Decision Shortcut:
- If you want it fudgier → add an extra 1/2 tsp of brown sugar.
- If you want it more "cakey" → add an extra pinch of baking powder.
- If you want a crunch → fold in 1 tbsp of crushed walnuts.
Adjusting the Batch Size
Since this is a single serve recipe, scaling it up requires a bit of care. You can't just put four mugs in the microwave at once, as they'll shield each other from the waves.
Scaling Down It's hard to go smaller than one serving, but if you do, use a tiny espresso cup. Reduce the cook time by about 20% and watch the edges closely.
Scaling Up If you're making this for two, I recommend making two separate mugs. If you must make a larger batch in one dish (like a square glass container), lower the microwave power to 70% and extend the time to 2-3 minutes.
This prevents the edges from burning while the center stays raw. For the salt and vanilla, only increase them to 1.5x rather than 2x to keep the flavors balanced.
Debunking Kitchen Myths
Let's clear up a few things about the microwave chocolate chip cookie recipe.
Myth: You must use a mug. Truth: Any microwave safe ceramic or glass dish works. A ramekin actually produces a better texture because it's shallower, allowing the heat to hit the dough more consistently.
Myth: Microwaves destroy the flavor of vanilla. Truth: High heat can evaporate alcohol, but a 60 second burst doesn't kill the flavor. In fact, the heat helps the vanilla aroma bloom, making the kitchen smell wonderful.
Preservation Secrets
Honestly, this is best eaten warm. But if you have leftovers (which is rare), here is how to handle them.
Storage Keep the cookie in an airtight container at room temperature for up to 2 days. In the fridge, it'll last 5 days, but it will get quite firm.
Reheating Pop it back in the microwave for 10-15 seconds. This brings back that molten chocolate feel.
Zero Waste Tip If you have a tiny bit of leftover dough stuck to the bowl, don't waste it! Add a splash of milk and a pinch of sugar to the bowl, stir it up, and eat it as a "cookie glaze" or use it as a dip for apple slices.
Pairing Ideas
A warm, gooey cookie needs a partner. I usually go for a cold glass of whole milk to contrast the heat. But if you want to go full decadent, serve this with a scoop of vanilla bean ice cream on top while the cookie is still steaming.
For something even more indulgent, try serving it alongside a piece of butterscotch fudge. The salty sweet combo of the fudge and the molten chocolate is just delightful.
Whether you're using a microwave chocolate chip cookie mug for a quick snack or making a few for a movie night, the key is that balance of texture. Keep it simple, don't overmix, and always, always let it rest. Trust me on that last part it's the difference between a rubbery mess and a homemade masterpiece.
Recipe FAQs
Why is my microwave cookie hard as a rock?
You overcooked the dough. This evaporates all the moisture, leaving the cookie tough. Stop the microwave when the center still looks slightly wet and shiny.
Why is the center still raw dough?
Your microwave likely has a lower wattage. Try adding 10-15 seconds in short bursts next time to reach the proper doneness.
Why did the cookie overflow the mug?
Your vessel was too small. Use a mug with at least 2 inches of headspace above the dough to allow it to rise without spilling.
How to tell when the cookie is done in the microwave?
Stop the timer when the edges look set and matte. The center must still appear slightly wet to prevent the cookie from becoming hard.
Is it true that microwave cookies always taste like cake?
No, this is a common misconception. Using the correct ratio of butter and sugars ensures a dense, cookie like consistency rather than a spongy cake texture.
How to achieve a better texture?
Press the dough down slightly to flatten the top. If you enjoyed mastering this texture control here, see how the same principle works in these decadent cookies.
Why do I need to let the cookie stand after cooking?
Allow the carryover heat to finish the cooking process. Letting it stand undisturbed for 60 to 90 seconds ensures the center sets perfectly without overcooking the edges.
Microwave Chocolate Chip Cookie