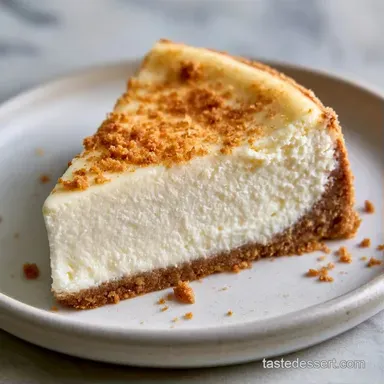
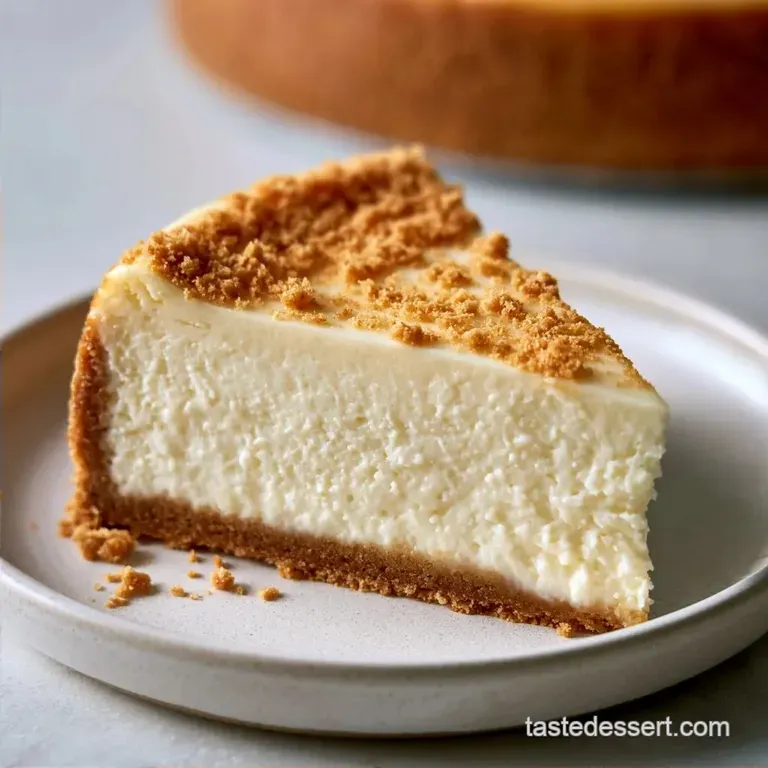
Simple No Bake Cheesecake with Graham Cracker Crust
- Time: 20 min active + 6 hours 20 mins chilling
- Flavor/Texture Hook: Buttery, crisp base with a light, airy filling
- Perfect for: Last minute party hosting or summer treats
- Quick Look at the Specs
- The Logic Behind the Method
- What Every Ingredient Does
- Everything You Need to Grab
- The Gear for the Job
- Putting the Cake Together
- Avoid These Common Mistakes
- Troubleshooting Common Issues
- Mix Up the Flavors
- Adjusting the Batch Size
- Dessert Truths
- Saving the Leftovers
- The Best Pairings
- Pro Tips for Success
- Recipe FAQs
- 📝 Recipe Card
The smell of browned butter and graham crackers always takes me back to the first time I tried to make a dessert for a crowd. I had attempted a baked version, but I pulled it out of the oven only to find a giant crack running right down the middle. It looked like a canyon.
I was gutted, but that failure led me to this method.
You don't need a water bath or a thermometer to get a professional result. The payoff here is huge because the effort is minimal. You spend about twenty minutes mixing and pressing, and then you just let the fridge do the hard work.
This Simple No Bake Cheesecake is all about the contrast. You get that salty, crunchable crust paired with a filling that feels like a cloud but tastes decadent. It's the kind of dessert that makes people ask for the recipe before they've even finished their first slice.
Quick Look at the Specs
When you're planning your day, remember that the waiting is the hardest part. While the prep is fast, the set time is non negotiable. If you cut into this too early, you'll have a delicious puddle instead of a cake.
For a standard 9 inch pan, you'll get about 8 generous servings. I usually find that this is the sweet spot for a dinner party. If you're serving a larger crowd, you can double the batch and use two pans, but don't try to make one giant, deep cake as the center might not set properly.
The Logic Behind the Method
I used to think you needed gelatin to make a no bake cake hold its shape. Turns out, the right ratio of fats and air is enough.
- Cold Whipped Cream: Beating the cream to stiff peaks creates a structural web of air bubbles that holds the heavier cream cheese up.
- Lemon Juice: The acidity helps tighten the proteins in the cream cheese, which makes the filling feel more stable.
Since this doesn't use heat, the texture is completely different from a traditional bake. If you want something denser and more traditional, you might prefer a Classic New York Cheesecake, but for ease, this is the winner.
| Method | Active Time | Texture | Best For |
|---|---|---|---|
| No Bake | 20 mins | Light and Airy | Hot weather / Beginners |
| Oven Baked | 60 mins | Dense and Creamy | Formal dinners / Traditionalists |
What Every Ingredient Does
I've found that using the right temperature for your ingredients is more important than the brand you buy. Here is why these specific items are in the bowl.
| Ingredient | What It Does | Best Swap |
|---|---|---|
| Cream Cheese | Provides the body and tang | Mascarpone (richer, less tang) |
| Heavy Cream | Adds air and lift | Full fat coconut cream |
| Graham Crumbs | Creates the salty, crisp base | Digestive biscuits |
| Lemon Juice | Cuts the richness / aids setting | Lime juice |
Everything You Need to Grab
Make sure your cream cheese is truly softened. If it's still cold, you'll end up with tiny lumps that no amount of mixing will fix.
For the Base 1 1/2 cups (180g) graham cracker crumbs Why this? Classic honey wheat flavor that pairs with tang. 1/4 cup (50g) granulated sugar Why this? Adds a slight crunch to the crust. 6 tbsp (85g) unsalted butter, melted
Why this? Binds the crumbs into a solid disk.
For the Filling 16 oz (450g) full fat cream cheese, softened to room temperature Why this? Essential for a smooth, lump free texture. 1/2 cup (60g) powdered sugar, sifted Why this? Dissolves faster than granulated sugar. 1 tsp (5ml) pure
Vanilla extract Why this? Adds depth to the sweetness. 1 tbsp (15ml) fresh lemon juice Why this? Brightens the flavor profile. 1 cup (240ml) heavy whipping cream, cold Why this? Creates the airy, stable structure.
The Gear for the Job
You don't need a fancy kitchen to pull this off. A basic hand mixer works, but a stand mixer makes the whipping process a bit easier on your arms.
The most important tool is a 9 inch springform pan. If you use a regular cake pan, getting the cheesecake out without destroying it is a nightmare. I also recommend a rubber spatula for the folding process, as a whisk will deflate all the air you just worked so hard to put in.
Putting the Cake Together
Follow these steps closely. The folding part is where most people go wrong, so take your time.
- Combine the graham cracker crumbs and sugar in a bowl.
- Pour in the melted butter and stir until the mixture looks like wet sand.
- Press the mixture firmly into the bottom of a 9 inch springform pan using the base of a measuring cup. Note: A compact crust prevents crumbling.
- Place the pan in the freezer for 10 minutes to set.
- In a large bowl, beat the softened cream cheese and powdered sugar on medium high speed until the mixture is completely smooth and pale.
- Stir in the vanilla extract and lemon juice, then beat for another 2 minutes to incorporate air.
- In a separate chilled bowl, whip the cold heavy cream on high speed until stiff peaks form. Note: Stop as soon as the peaks hold their shape to avoid over beating.
- Using a rubber spatula, gently fold the whipped cream into the cream cheese mixture in three batches using a slow, over and under motion until no white streaks remain.
- Pour the filling over the chilled crust and smooth the top with a spatula.
- Cover tightly with plastic wrap and refrigerate for at least 6 hours, or overnight for maximum stability. until the edges feel firm to the touch.
Avoid These Common Mistakes

Even a Simple No Bake Cheesecake can go wrong if you rush the process. Most issues come down to temperature or over mixing.
Troubleshooting Common Issues
| Issue | Solution |
|---|---|
| Why Your Filling Is Runny | If the cake doesn't set, it's usually because the heavy cream wasn't whipped enough or the fridge wasn't cold enough. You need those stiff peaks to act as the "skeleton" of the cake. |
| How to Stop Lumps | Lumps happen when cold cream cheese meets sugar. Let your cheese sit on the counter for two hours. If you're in a rush, you can microwave it for 10 seconds, but be careful not to melt it. |
| My crust is crumbling | This happens if you didn't press the crumbs hard enough or didn't use enough butter. Use a flat bottomed glass to really pack that base down. |
Mix Up the Flavors
Once you have the basic method down, you can change the profile easily. This Simple No Bake Cheesecake is a blank canvas.
The Fruit Route You can swirl in some homemade jam or fresh berry puree. If you love fruit, you might also enjoy my Strawberry Cheesecake recipe for a more intense berry flavor. Just fold the puree in at the very end so you don't deflate the cream.
The Chocolate Twist Fold in 1/2 cup of mini chocolate chips or a swirl of melted (and cooled) dark chocolate. For a more cookie centric vibe, replace the graham crackers with crushed Oreo cookies.
The Zesty Version Add the zest of one whole lemon to the cream cheese mixture. This makes the dessert feel much lighter and more refreshing, which is great for brunch.
Adjusting the Batch Size
You can scale this recipe, but you have to be careful with the ratios.
Cutting it in half Use a 6 inch pan instead of a 9 inch one. Reduce the chilling time slightly to 4 hours, but check the center with a finger to ensure it's set. For the egg free filling, simply halve all measurements.
Doubling the recipe I recommend making two separate cakes rather than one giant one. If you must use a larger, deeper pan, increase the chilling time to 12 hours. Don't double the vanilla or lemon juice exactly; use about 1.5x the amount so the flavors don't become overpowering.
Dessert Truths
There are a few things people say about no bake desserts that just aren't true. Let's clear those up.
"You must use gelatin for a firm slice." Not true. As long as you use full fat cream cheese and whip your heavy cream to stiff peaks, the fat and air provide plenty of structure.
"low-fat cream cheese works just as well." Definitely not. low-fat versions have more water and less stability. Your cake will likely turn out mushy. Stick to the full fat blocks.
Saving the Leftovers
Since this is a dairy heavy dish, you have to be smart about how you store it.
Fridge and Freezer Keep the cake in the fridge, covered tightly with plastic wrap, for up to 5 days. It actually tastes better on day two because the flavors have time to meld. You can freeze it for up to one month. Wrap it in foil and then plastic wrap to prevent freezer burn.
To thaw, leave it in the fridge overnight.
Zero Waste Tips If you have leftover graham cracker crumbs, don't toss them. Mix them with a bit of honey and oats for a quick granola topper for yogurt. If you have a bit of the cream cheese filling left in the bowl, stir it into your morning coffee for a decadent treat.
The Best Pairings
A Simple No Bake Cheesecake is rich, so you want something to cut through that heaviness.
Fresh Berries A heap of fresh raspberries or blueberries adds a bright acidity that balances the sugar. I like to add a tiny pinch of flaky sea salt over the berries to make the flavors pop.
The Coffee Match A bitter espresso or a strong black coffee is the ideal partner. The bitterness of the bean cleanses your palate between bites of the creamy cake.
A Minty Contrast Serving this with a side of fresh mint leaves or a mint infused syrup adds a cool, herbal note that makes the whole experience feel more like a high end bistro dessert.
Pro Tips for Success
To get that perfectly smooth, silky finish, there are a few small tricks I've picked up.
Chef's Note: Freeze your mixing bowl and whisk attachment for 15 minutes before whipping the heavy cream. This keeps the fat cold and helps you reach stiff peaks much faster.
Also, when folding, don't just stir in circles. Use a "cut and fold" motion. Cut through the center of the mixture with your spatula, scrape the bottom, and flip the batter over the top. This preserves the air bubbles.
Finally, when it's time to serve, dip your knife in hot water and wipe it dry between every single slice. This gives you those clean, sharp edges that make the cake look like it came from a bakery.
Recipe FAQs
How to make an easy no-bake cheesecake?
Combine graham cracker crumbs, sugar, and melted butter for the crust, then fold whipped cream into a cream cheese and powdered sugar mixture. Press the crust into a springform pan and refrigerate the filled cake until firm.
Why is my cheesecake filling runny?
Whip the heavy cream until stiff peaks form. These peaks act as the skeleton of the cake; if the cream is under whipped, the filling won't set properly.
How to stop lumps from forming in the filling?
Soften the cream cheese to room temperature for two hours. If you are in a rush, microwave it for 10 seconds, but be careful not to melt it.
Is it true that this cheesecake can be served immediately after assembling?
No, this is a common misconception. The cake must refrigerate for at least 6 hours, or overnight, to achieve the necessary stability for slicing.
Why is my crust crumbling when I slice the cake?
Press the crumbs firmly into the pan using the base of a measuring cup. A compact crust ensures the base stays together when the springform latch is released.
Is this recipe suitable for beginners?
Yes, because it requires no oven time or complex baking skills. If you enjoyed the simple assembly here, see how the same easy layering works in our peach dump cake.
How long should I refrigerate the cheesecake for maximum stability?
Chill for at least 6 hours or overnight. Longer refrigeration allows the fats to solidify completely, resulting in a cleaner slice.
Simple No Bake Cheesecake