Light and Airy Homemade Whipped Cream Dessert
- Time: 5 min active + 15 min chilling
- Flavor/Texture Hook: Silky, airy, and sweet
- Perfect for: Quick desserts, cake toppings, or berry bowls
Homemade Whipped Cream Dessert Basics
The cold clink of a chilled metal bowl is the first sign things are going right. Then comes that hit of pure vanilla, a scent that instantly makes the kitchen feel like a bakery. I remember the first time I tried this without chilling my bowl, and the cream just sat there, stubbornly liquid, while I whirred the mixer into oblivion.
You don't need a professional kitchen to get those towering, stiff peaks. It's all about temperature and timing. Whether you're topping a slice of pie or making a standalone treat, this approach keeps the cream stable so it doesn't melt into a puddle on your plate.
Making a Homemade Whipped Cream Dessert is less about the ingredients and more about the physics of cold. When the fat is cold, it creates a structure that holds onto air. Once you get the hang of the visual cues, you'll never go back to the pressurized cans.
Quick Recipe Specs
The timing here is tight, but the prep matters. You can't rush the chill time if you want the volume to really pop.
Timing and Yield
- Prep time: 5 minutes
- Cook time: 0 minutes
- Total time: 20 minutes
- Yield: 2 cups
What You'll Need
The list is short, but the quality of the cream makes the difference. Don't use half and half; you need the high fat content to hold the air.
- 1 cup heavy whipping cream Why this? High fat is required for stability
- 2 tbsp powdered sugar Why this? Dissolves faster than granulated
- 1 tsp pure vanilla extract Why this? Adds a classic, floral aroma
- 1 pinch fine sea salt Why this? Cuts through the heavy sweetness
| Original Ingredient | Substitute | Why It Works |
|---|---|---|
| Heavy Cream (1 cup) | Coconut Cream (chilled, 1 cup) | Similar fat content. Note: Adds a distinct coconut flavor |
| Powdered Sugar (2 tbsp) | Maple Syrup (2 tbsp) | Natural sweetener. Note: Thinner consistency, less stable peaks |
Right then, make sure your cream is straight from the back of the fridge. If it's room temperature, you're just making a sweet soup.
Required Kitchen Tools
You can use a hand mixer or a stand mixer, but the bowl choice is where most people trip up.
- Chilled mixing bowl (metal is best)
- Electric hand mixer or stand mixer
- Measuring cups and spoons
- Silicone spatula
| Method | Time | Texture | Best For |
|---|---|---|---|
| Electric Mixer | 3-5 mins | Consistent, airy | Large batches |
| Hand Whisk | 10-15 mins | Denser, rich | Small amounts |
A heavy metal bowl holds the cold much better than plastic. It's a simple shift that saves you minutes of beating.
Steps to Get Peaks

Follow these steps closely. The difference between a cloud and a clump of butter is usually just thirty seconds of over mixing.
- Place the mixing bowl and beaters in the freezer for 10-15 minutes. Note: This keeps the fat stable
- Pour the cold heavy cream into the chilled bowl.
- Add the powdered sugar.
- Stir in the vanilla extract.
- Add a pinch of fine sea salt.
- Start the mixer on low speed until the liquid blends to avoid splashing.
- Increase to medium high speed.
- Beat 3 minutes until the cream thickens and forms stiff peaks that stand straight up.
- Stop the mixer immediately when peaks hold their shape.
- Gently fold the cream with a spatula to smooth the top.
Why Most Recipes Fail
Most people skip the equipment chill. If the bowl is warm, the fat in the cream melts, and the air bubbles collapse. You end up with a liquid mess despite your best efforts.
Why the Bowl Stays Cold Cold fat stays stable, which traps air bubbles more effectively. This prevents the cream from turning into butter too quickly.
Decision Shortcut
- If it's too liquid: Beat for 1 more minute on high.
- If it looks grainy: Stop immediately; it's nearly butter.
- If it's splashing: Drop the speed to low for 30 seconds.
Fixing Texture Issues
If your Homemade Whipped Cream Dessert looks a bit off, don't panic. You can usually save it unless you've gone full on butter mode.
Why Your Cream Is Liquid
This usually happens because the cream wasn't cold enough or you stopped too early. If it's still liquid, check your temperature and keep beating.
Why Your Cream Is Grainy
Graininess means you've over beaten the fat. The fat globules are clumping together, which is the first step of making butter.
| Problem | Root Cause | Solution |
|---|---|---|
| Liquid consistency | Undershot beating time | Beat on high for 60 more seconds |
| Grainy texture | Over beaten fat | Fold in 1 tbsp of liquid cream by hand |
| Flat peaks | Bowl was too warm | Chill bowl and restart with fresh cream |
Keeping Cream Fresh
Store your cream in an airtight container in the fridge for up to 2 days. It will lose some volume over time, but it's still great for dipping.
Zero Waste Tip If you have a bit of leftover cream that's gone flat, don't toss it. Stir it into your morning coffee or use it as a base for a honey butter spread to add some lightness to your toast.
Freezing Guidelines Don't freeze whipped cream. The air bubbles pop during the freezing process, and you'll end up with a separated, watery mess when it thaws.
Customizing the Flavor
You can turn this Homemade Whipped Cream Dessert into a variety of toppings. Just add your flavorings during step 4.
- Chocolate: Fold in 1 tbsp of cocoa powder.
- Coffee: Add 1 tsp of instant espresso powder.
- Zesty: Grate in some fresh lemon or lime zest.
For a more substantial treat, dollop this cream onto a peach dump cake. The cold cream cuts through the warm, sugary fruit perfectly.
Plating and Serving
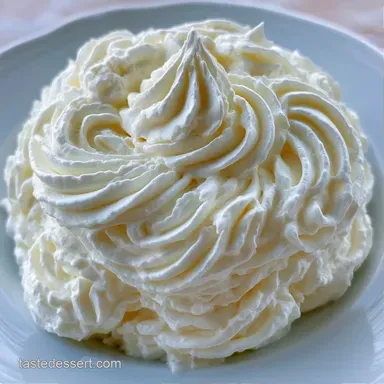
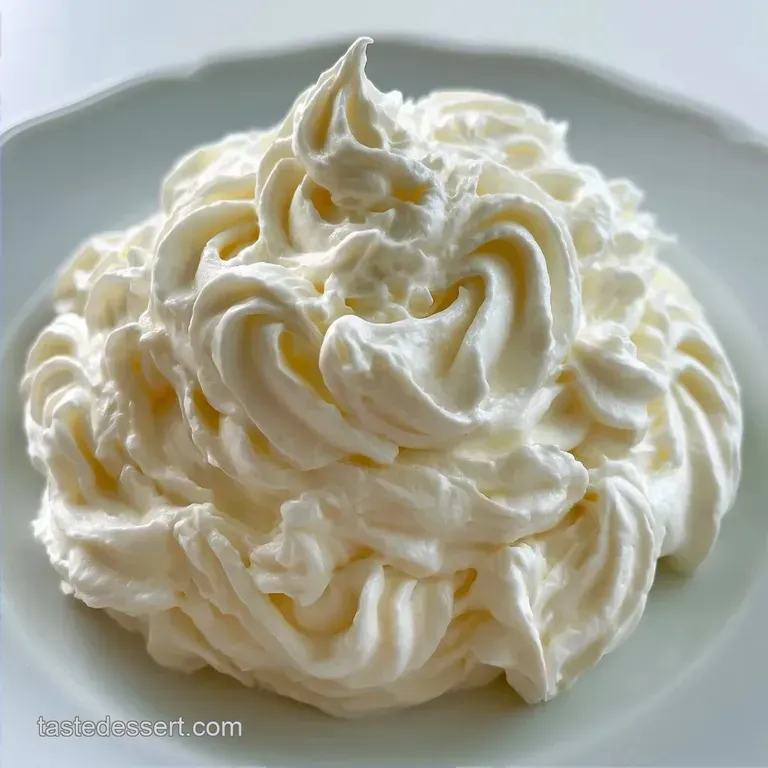
When serving the Homemade Whipped Cream Dessert, focus on the height. Use a piping bag with a star tip for a professional look, or just use two spoons to create a rustic "quenelle" shape.
If you're using it as a cake filling, make sure the cake is completely cold. If the cake is even slightly warm, the cream will slide right out the sides. For the best result, pipe a ring of cream around the edge of the layer and fill the center with jam or fresh berries.
Once you've mastered your first Homemade Whipped Cream Dessert, you'll realize that the simple act of chilling your tools is the real trick. It's a small habit that leads to a much more decadent result.
Recipe FAQs
How to make homemade whipped cream for dessert?
Pour cold heavy cream, powdered sugar, vanilla, and salt into a chilled bowl. Start the mixer on low speed to avoid splashing, then increase to medium high until stiff peaks form.
What kind of dessert can I make with whipped cream?
Use it as a topping for cakes or pies. It also adds a light, airy contrast to a decadent trifle.
How to make 3 ingredient whipped cream?
Omit the salt and combine heavy cream, powdered sugar, and vanilla. Follow the same chilling and beating process to achieve the desired texture.
What should I eat with vanilla ice-cream?
Top it with a dollop of fresh whipped cream. This creates a rich, layered texture that enhances the vanilla flavor.
Why did my whipped cream turn into butter?
You overbeat the cream. Once the fat separates from the liquid, it becomes butter, so stop mixing the moment you see stiff peaks.
Is it true I can skip chilling the bowl and beaters?
No, this is a common misconception. Chilling the equipment for 10 15 minutes keeps the fat stable, ensuring the cream whips up faster and holds its shape.
How long does homemade whipped cream last in the fridge?
Store it in an airtight container for up to 24 hours. It may lose some volume over time, so gently whisk it before serving.
Homemade Whipped Cream Dessert